Chapter 1Welcome to MondoWrite
MondoWrite is a writing workshop for novelists and screenwriters who like to build their story before they write it. You start by dropping your ideas anywhere, you connect them, you sort them out little by little, then you write. Hence its motto: from chaos to an ordered world.
One content, four views
Your project is a single set of cards and texts. The four views in the top bar are four ways of reading it: nothing is ever copied from one to another.
| View | What it is for |
|---|---|
| Canvas | The free board where ideas are born: cards you drop, connect with threads and gather in frames. |
| Bible | The entries of your world (characters, places, plots, themes…), sorted by type on their own, with the project cover at the top. |
| Outline | The order of the story: templates (three acts, Save the Cat…) to place scenes in, chapters and a timeline. |
| Manuscript | The text, scene by scene, laid out like a book. In a screenplay project this view becomes Screenplay, and the Outline lists the scenes in screenplay order. |
A scene created in the Outline immediately has its card on the canvas; a character written in the screenplay has its entry in the Bible; the text written in a Scene card is the text of the Manuscript.
The app’s principles
- Structure emerges, you don’t set it up. No required field, no form to fill in: a card is born an “Idea” and becomes a Character, a Place or a Scene when you decide.
- Three gestures are enough: type (to create and write), drag a thread (to connect), drop (an image, a link, a file).
- Your texts belong to you: everything is saved in a folder of Markdown files, readable with any text editor. No account, no server.
- AI is optional and only asks questions and makes suggestions. It never writes for you.
- Mouse, finger or keyboard: every action has a path for each. The app comes in English and French, in light and dark.
How to read this guide
The screenshots show the example project that comes with the app, Little Red Riding Hood by Charles Perrault (1697), illustrated with Gustave Doré’s engravings. Button names are written like this. Shortcuts are given for Windows and Linux with Ctrl; on a Mac, use ⌘ (Cmd) instead.
Chapter 2Install and update
Download the app
MondoWrite is a desktop application for macOS, Windows and Linux. The installers are published on the project’s releases page: github.com/sebastienpiconnier/MondoWrite/releases. Take the latest version, then the file for your system:
| System | File |
|---|---|
| Mac with Apple silicon (M1 and later) | MondoWrite_x.y.z_aarch64.dmg |
| Mac with an Intel processor | MondoWrite_x.y.z_x64.dmg |
| Windows | MondoWrite_x.y.z_x64-setup.exe (or the .msi) |
| Linux | .AppImage (any distribution), .deb (Debian, Ubuntu) or .rpm (Fedora) |
On a Mac, open the .dmg and drag MondoWrite into the Applications folder. On Windows, run the installer. On Linux, make the AppImage executable or install your distribution’s package.
If macOS refuses to open an app downloaded outside the App Store, right-click MondoWrite in Applications, choose Open and confirm. Windows may show a SmartScreen warning: More info, then Run anyway.
Updates
At launch, the app checks (at most once a day) whether a new version has been published. If so, a banner says so: Update downloads and installs the new version, after saving your project; MondoWrite restarts on its own. What’s new opens the version’s page, Later closes the banner.
You can also check yourself: Settings, Updates section, Check for updates (also in About MondoWrite). The Check for updates at launch box turns off the automatic check. Nothing is ever installed without your consent.
The browser version
MondoWrite also works in a web browser, to discover the app. Projects are then kept in the browser’s storage, not in a folder: for real work, use the desktop app.
Chapter 3First steps
The projects page
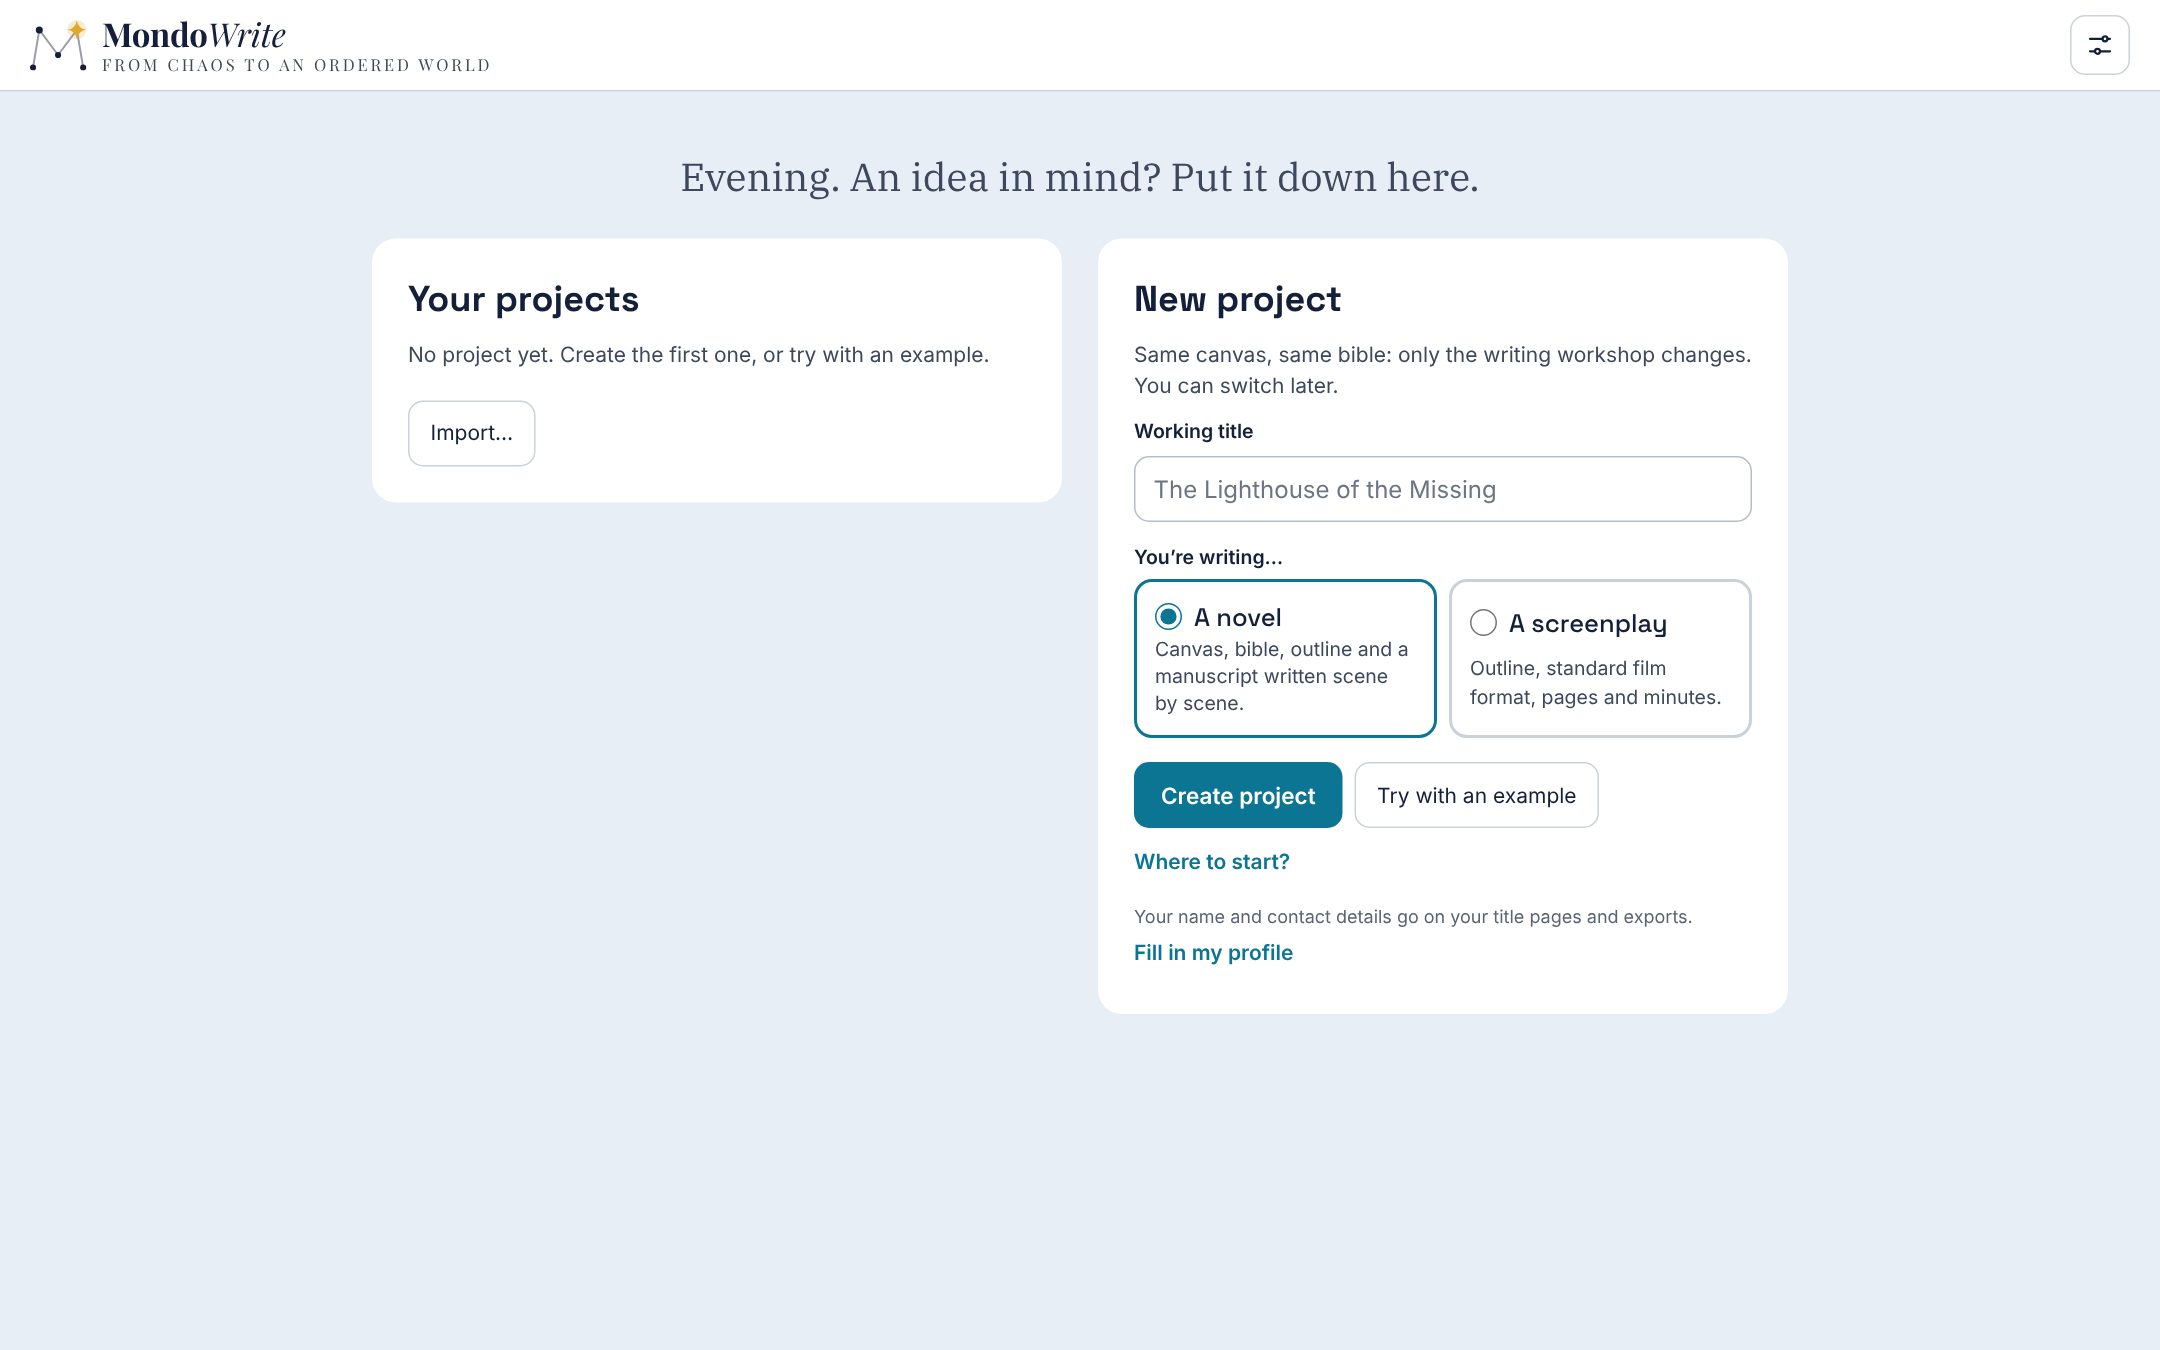
MondoWrite always opens on the projects page. A greeting waits for you there: it says hello according to the time of day, with your first name if it is in your profile, and suggests picking up the last project you opened (or says how many days it has been). Below, two columns: Your projects (the ones you have opened on this device) on one side, New project and Full examples on the other.
Your writer profile
Fill in the You, the writer window once and for all, opened with Edit my profile… in Settings (and, while your profile is empty, with Fill in my profile under New project): first name, last name, pen name (optional: the name you sign your work with, if it isn’t your own), email, phone, address, and, if you like, your Background and your Credits or publications (one work per line). This information stays on your device, never in a project. It is used to:
- sign your exports (the pen name if there is one, otherwise first and last name);
- fill in the cover page of the exported manuscript with your contact details;
- fill in the title page of every new screenplay;
- write the “About the author” page of the documents you send (Bible), with your background and your works.
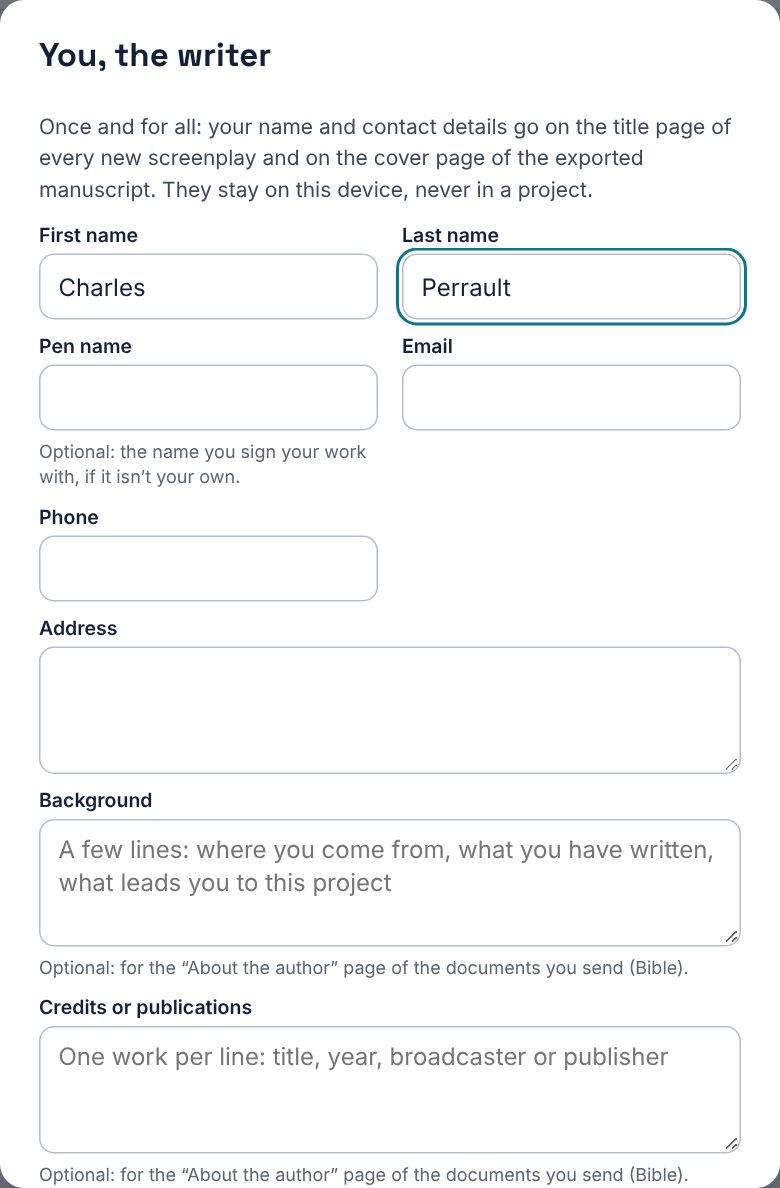
Settings then show your author name; Edit my profile… opens the window again, from the projects page as from an open project. The Bible export window leads there too, to complete the “About the author” page of a document.
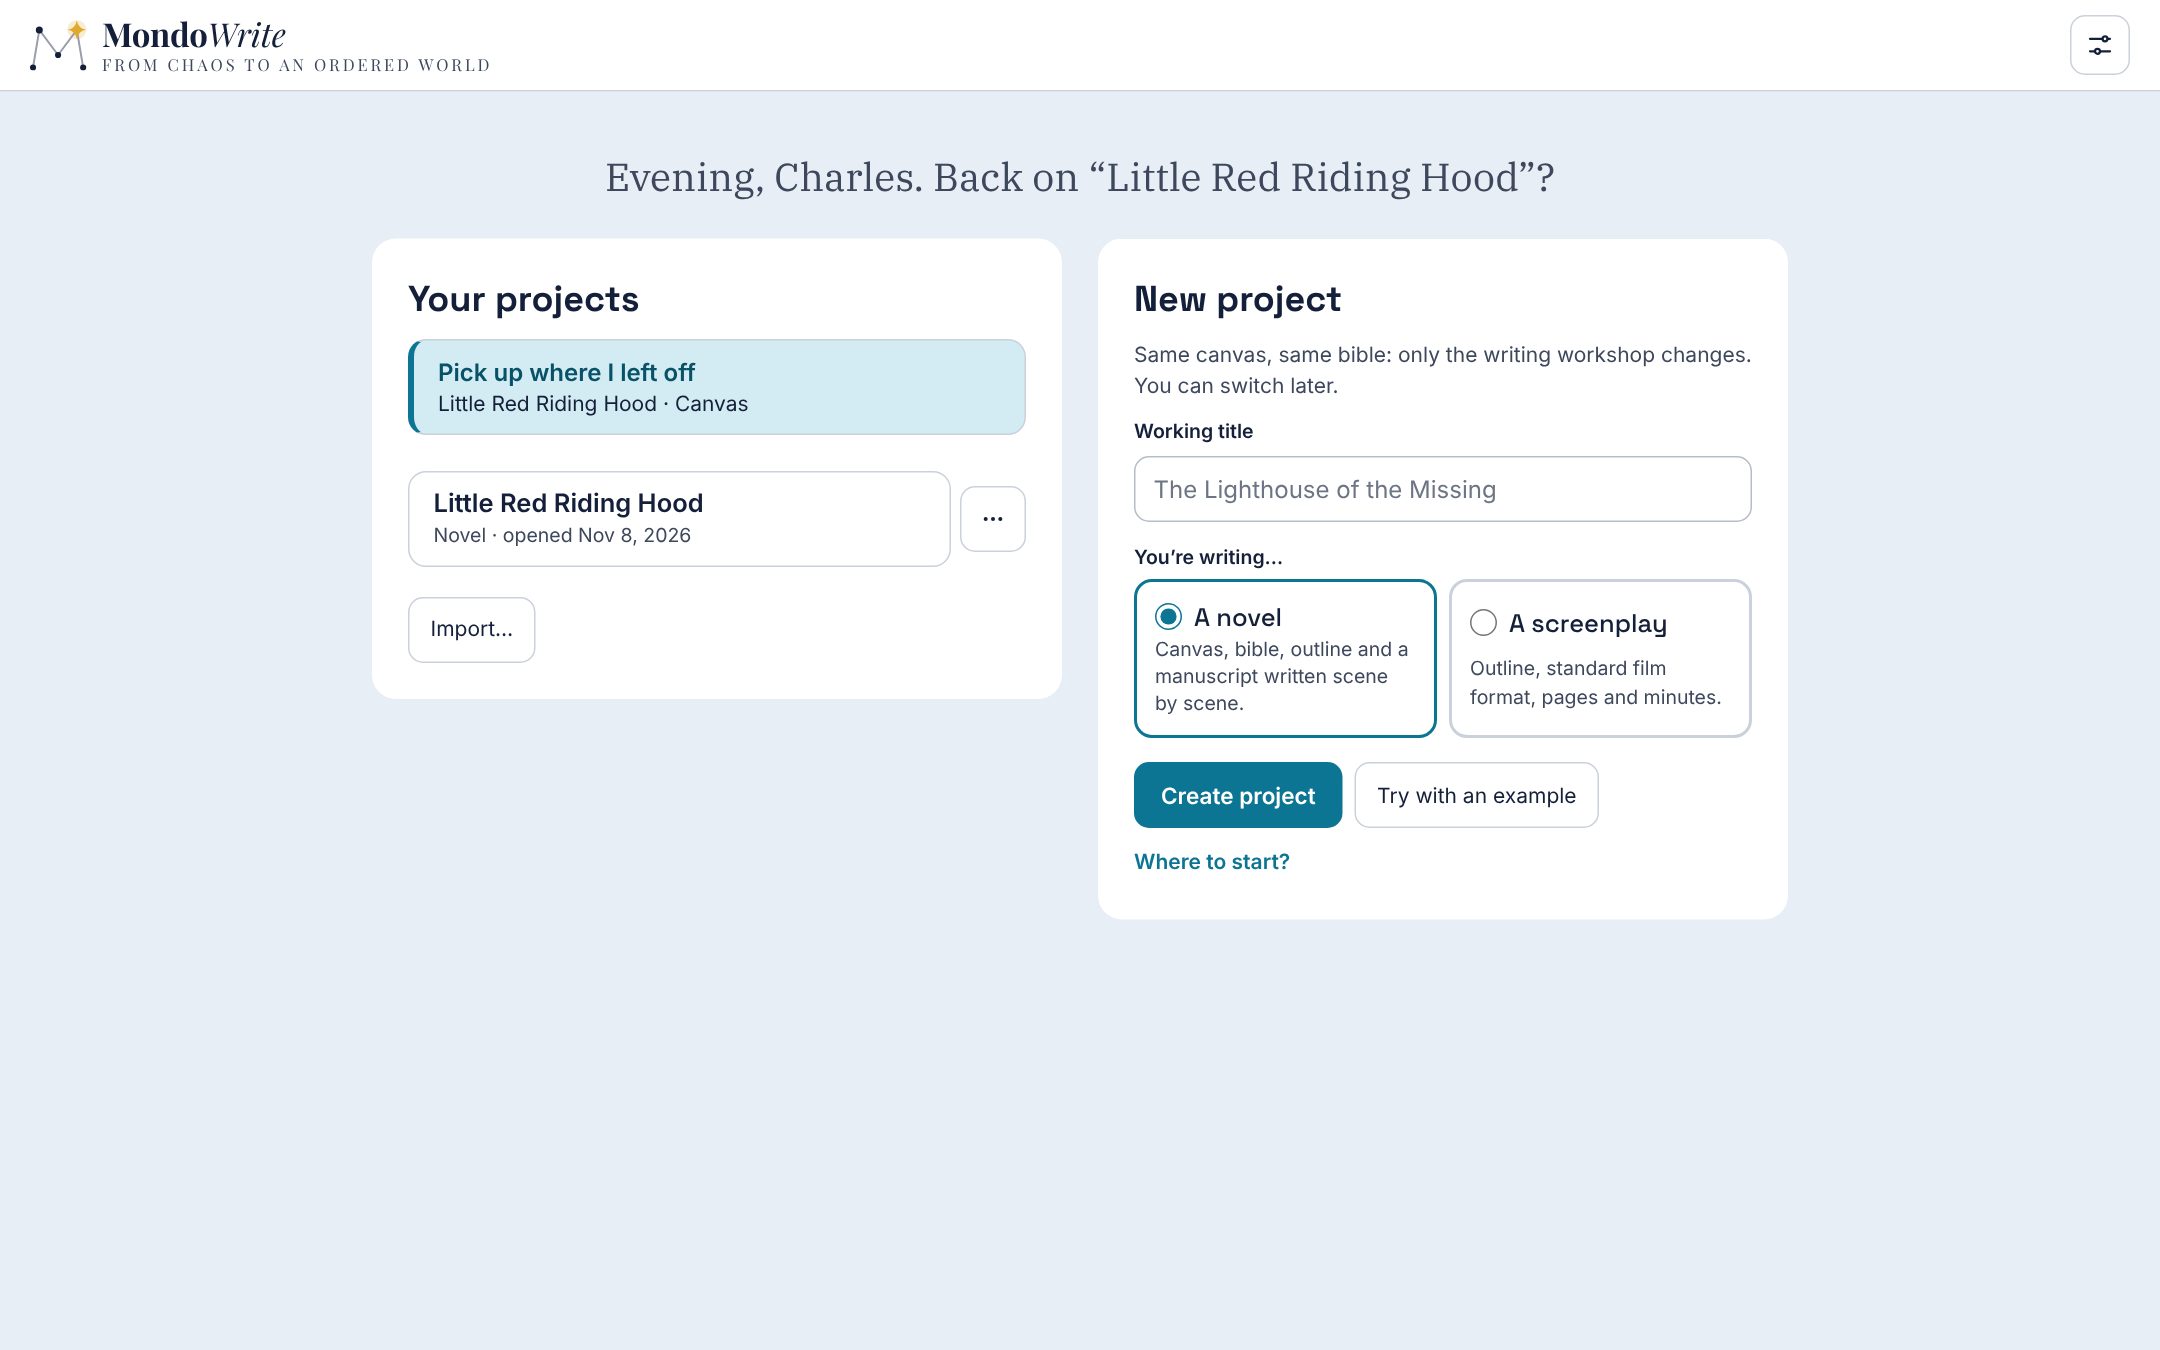
The last project you opened has, at the top of the list, a Pick up where I left off button: it reopens the project in the view where you left it and, in the Manuscript or the Screenplay, at the same scene, with the cursor in place. That position stays on your device (it is not written in the project): on another device, the project has its own. As soon as you have six projects or more, the list gains a search field (title or folder name), a sort (Last opened, Name, Type) and, if you have both novels and screenplays, a Show filter: Novels or Screenplays. Sort and filter are kept for next time.
Create a project
- In New project, type a Working title (you can change it).
- Choose A novel or A screenplay. The canvas and the Bible are the same, only the writing workshop and the vocabulary change. You can switch later.
- Click Create project, then choose the folder to save it in (with iCloud or a cloud folder, it is created there directly, in a folder named after it). A project is a folder: put it wherever you like, including iCloud Drive, Dropbox or OneDrive.
If the chosen folder already contains a MondoWrite project, the app opens it instead of overwriting it. Creating never overwrites anything.
Open or remove a project
Click a project in the list to open it. If opening takes a while (an iCloud project opened for the first time on the device, whose files are still arriving), a window shows how far along it is. Open folder… opens a project that isn’t in the list yet (copied from another computer, for example). The ⋯ button next to a project offers Hide from the list (no file is touched; Hidden projects brings it back) and, in red, Delete project…, which asks you to confirm: its files are erased, from all your devices if it is in iCloud. Export it as a .zip first if you want to keep a copy.
Try with an example
Try with an example creates the Little Red Riding Hood project without asking anything (in iCloud or your cloud folder if you have one, otherwise in Documents › MondoWrite on a computer): characters, places, connected scenes, an outline in two chapters, the complete text of the tale and three engravings by Doré. It is the best way to discover the app. A six-step Guided tour opens; it stays available in Settings.
Full examples, on the projects page, offers fuller public-domain works, illustrated, with their bible, outline and text: The Count of Monte Cristo (novel and series) and The Hound of the Baskervilles (novel and feature film), in English and French. They download from mondowrite.app (you need a connection): Download fetches the project, checks it is the one announced, then opens it like an imported project (on a computer, you choose the folder to keep it in). Examples in another language are folded under In other languages.
Import
Import…, on the projects page, creates a project from an existing file:
- Word (
.docx), Markdown (.md) or text (.txt): a novel project. Chapters are recognised (Word headings, “Chapter 3”, bare numbers, page breaks), separators such as* * *split scenes, and a title and “by So-and-so” at the top become the project title. A prologue or epilogue of a single scene becomes a book page. - Fountain (
.fountain) or Final Draft (.fdx): a screenplay project, with its Scene, Character and Location cards. A text file with at least two scene headings (INT., EXT.) is also read as a screenplay. - PDF (
.pdf): a screenplay if it holds scene headings, otherwise a novel. For a screenplay, each element is recognised by its indent (scene heading, action, character, parenthetical, dialogue, transition); page numbers, and the (MORE) and (CONT’D) added by the original software, are removed, and a speech split by a page break is joined again. For a novel, paragraphs are found by their first-line indents, headings by their larger size, and running heads, page numbers and drop caps are set aside. A scanned PDF (images, no text) cannot be imported. Read the result through: a PDF keeps the layout, not the original structure. - MondoWrite project (
.zip): a project exported with Export › Full project (.zip) reopens as it was, images and PDFs included. - Scrivener project (
.scriv, or compressed as a.zip): a novel, or a screenplay if it is written in script mode. On Mac, choose the.scriv; on Windows and Linux, the.scrivxfile inside it. If the project can’t be read, compress it (right-click, Compress) and choose the.zip. A window then lists the binder’s folders: the Draft is always imported, untick the ones you don’t want.- Draft: chapters and scenes in binder order; each document keeps its title (without “Chapter 1 -”), its synopsis and its status (“To Do” becomes To write, “First Draft” Draft, “Revised Draft” Revised, “Final Draft” and “Done” Done); a document split by
* * *becomes several scenes. Comments and footnotes (from the inspector or written inline) stay in place; images in the text become Image cards linked to the scene. - Characters and Places: one Bible sheet per document; a filled-in template sheet (“Character Sketch”, “Setting Sketch”) fills the sheet’s fields, one never filled in is left out. A list of characters in a single document (a “NAME - tagline” heading per character, followed by lines such as “Age: …”, “Occupation: …”) gives one sheet per character, with its tagline; those in a “Main characters” part are marked as main.
- Research and other folders: one frame per folder on the canvas; a PDF becomes a Document card, an image an Image card, a web page a Link card, a text an Idea card.
- Keywords: one card each (Character, Place or Theme when the keyword sits under “Characters”, “Locations” or “Themes”), wired to each scene that carries it. A keyword that names a character in the Bible (“Ethan” for “Ethan Moreau”) is wired to that sheet directly. A label renamed “POV” gives each scene its point of view; renamed anything else (“Plot”…), it gives Plot cards wired to their scenes.
- Document notes: one line goes into the synopsis if it is empty, a longer note becomes an Idea card wired to the scene. Bookmarks and internal links become wires.
- Snapshots: each one becomes a version of its scene (Scene versions…), with its title and date; you can read it, compare it or go back to it.
- Book pages: a document titled Dedication, Epigraph, Acknowledgments, Copyright or About the author becomes the matching book page, wherever it is stored.
- Writing history: the words written each day go into the statistics, and your writing streak carries on.
- Screenplay (Scrivener’s script mode): each element is recognized from its layout (scene heading, action, character, parenthetical, dialogue, transition) and the script is written in standard format, scene numbers included; characters and locations get their cards, and a sheet from the Characters folder fills in the character of the same name. Scrivener’s title page is only a template: MondoWrite makes its own.
- A Scrivener 2 (Mac) or 1 (Windows) project isn’t imported: open it in Scrivener 3 first, which updates it.
- Draft: chapters and scenes in binder order; each document keeps its title (without “Chapter 1 -”), its synopsis and its status (“To Do” becomes To write, “First Draft” Draft, “Revised Draft” Revised, “Final Draft” and “Done” Done); a document split by
An import always goes into an empty folder: it never replaces an existing project.
The top bar
Once a project is open, the top bar gathers everything you use everywhere:
- on the left, ‹ Projects, which saves and goes back to the list;
- the project title, editable with a click;
- the four views (Ctrl 1 to 4);
- the save status (Saved, Not saved, Saving…): a click saves right away, like Ctrl S;
- Export; To do (the tick, with the number of things waiting); the search magnifier (Ctrl F); Settings; and the AI button if you have plugged one in.
You never need to save: the app does it on its own, less than a second after your last change. A click on the save status, or Ctrl S, forces an immediate save.
When space runs short (an iPad in landscape), the bar stays on a single line to leave the height for your work: Projects keeps only its arrow, Export becomes an icon, and the save status becomes a dot while it isn’t saved. The views only move under the logo if that isn’t enough, in portrait for instance. A screenplay’s running time and pages are in the Screenplay view.
Chapter 4Your path
There is no right order: take MondoWrite by the end that suits you. Here are seven paths, from the most planned to the freest. Pick yours, and leave the rest aside until you need it.
For each path, the table shows the views that matter right away (●) and those that will help later (○).
| Path | Canvas | Bible | Outline | Manuscript or Screenplay |
|---|---|---|---|---|
| The architect | ● | ● | ● | ○ |
| The gardener | ○ | ○ | ○ | ● |
| The project in development | ○ | ● | ||
| The series writer | ● | ● | ○ | ● |
| The rewrite | ○ | ○ | ● | ● |
| The research-heavy novel | ● | ● | ○ | ○ |
| The writer on the move | ● | ○ | ● |
The architect: plan everything before writing
For those who want to know the ending before the first line.
- On the canvas, empty your head: one idea per card, unsorted. Then turn them into Characters, Places, Plots, Scenes with /.
- In the Bible, give your main characters their engine (Wants, Needs, Wound, inner conflict) and each plot its dramatic question.
- In the Outline, choose a template (three acts, Save the Cat, hero’s journey) and file each scene in its slot.
- Organize, on the canvas, then shows the whole structure at a glance.
- Write in the Manuscript, scene after scene, in the Outline’s order.
- Proofread with Check, then export.
At first: exporting the Bible.
The gardener: write first, structure later
For those who discover their story by writing it.
- Open the Manuscript right away and write. Enter twice on an empty line splits the scene, three times opens a new chapter.
- Type @ to mention a character or a place: its card is created if it does not exist. Names that keep coming back without a card show up in Check, with Create the card.
- The Bible fills itself: under each entry, the scenes where they appear.
- Later, the Outline without a template shows the order of your scenes; a template then helps you check the pace.
- What you cut goes to the Graveyard, so nothing is lost.
The sheets to fill in and the character assistant: they will help with the rewrite.
The project in development: the Bible and the pitch document
For those who must convince before writing: a publisher, a producer, a funding committee.
- Fill in the cover, the first page of the Bible: logline, tagline, chips, statement of intent. Ask me asks a question for each empty field.
- Mark your main characters with the star, give them a hook, an engine and an arc.
- Build the world and the structure: places, groups, rules, plots, and for a series the episodes and Writing the series.
- Look at the questions about the story in Check.
- Export › Bible… for someone else: choose the look, keep an eye on the page count, add the “About the author” page and, if you wish, the first pages as an appendix.
The Outline and the Manuscript, until the contract is signed.
The series writer
- Create a Screenplay project, choose the format on the cover, then fill in Writing the series (arena, before the pilot, engine, the season’s question) or Writing the film (director’s note, feasibility).
- In the outline, + New episode turns your screenplay into a series: name the season and each episode in place, and give each one its synopsis.
- The thread grid, in the Bible export, shows which plots live in which episodes.
- Write each episode in the Screenplay view (Write the episode, in the episode’s ⋯ menu in the outline).
- Check tells you if the pilot is too short or too long for its format.
- Export the series bible for a producer, with the first pages of the pilot as an appendix.
The rewrite: start from an existing text
For those who already have a manuscript or a screenplay written elsewhere.
- On the projects page, Import… (Word, Markdown, text, Fountain, Final Draft, Scrivener): chapters, scenes, characters and locations become cards.
- Organize the canvas to see chapters and scenes at a glance.
- Check spots names spelled two ways and characters without a card; the Statistics window shows who is present, and who meets whom.
- Give each scene a status (draft, to revise, done) and highlight the passages “to rework”.
- Find and replace, or Rename everywhere… from a card’s menu.
The research-heavy novel: research first
For a historical novel, an investigation, a world to invent.
- Paste links, images and PDFs on the canvas: each becomes a card, with its source sheet (author, date, what I take from it, reliability).
- Lay down the world cards: Event for the timeline, Rule for its laws, Group for families and institutions, Object, Secret.
- Set each sheet’s Certainty: settled, tentative, to explore.
- Your sources stay in “For you”: never in a document you send.
The writer on the move: iPhone, iPad, computer
- Sync your projects through iCloud Drive (see Your files).
- On the iPhone, the canvas + captures an idea on the go: the card opens full screen, you write, you close it; the Manuscript lets you write a few lines.
- On the iPad or the computer, you find these cards on the canvas and arrange them at leisure.
- Focus mode quiets everything around the page while you write.
Chapter 5The canvas
The canvas is a large board with no edges. You drop cards on it, connect them with threads, gather them in frames. It is the place of fertile chaos.
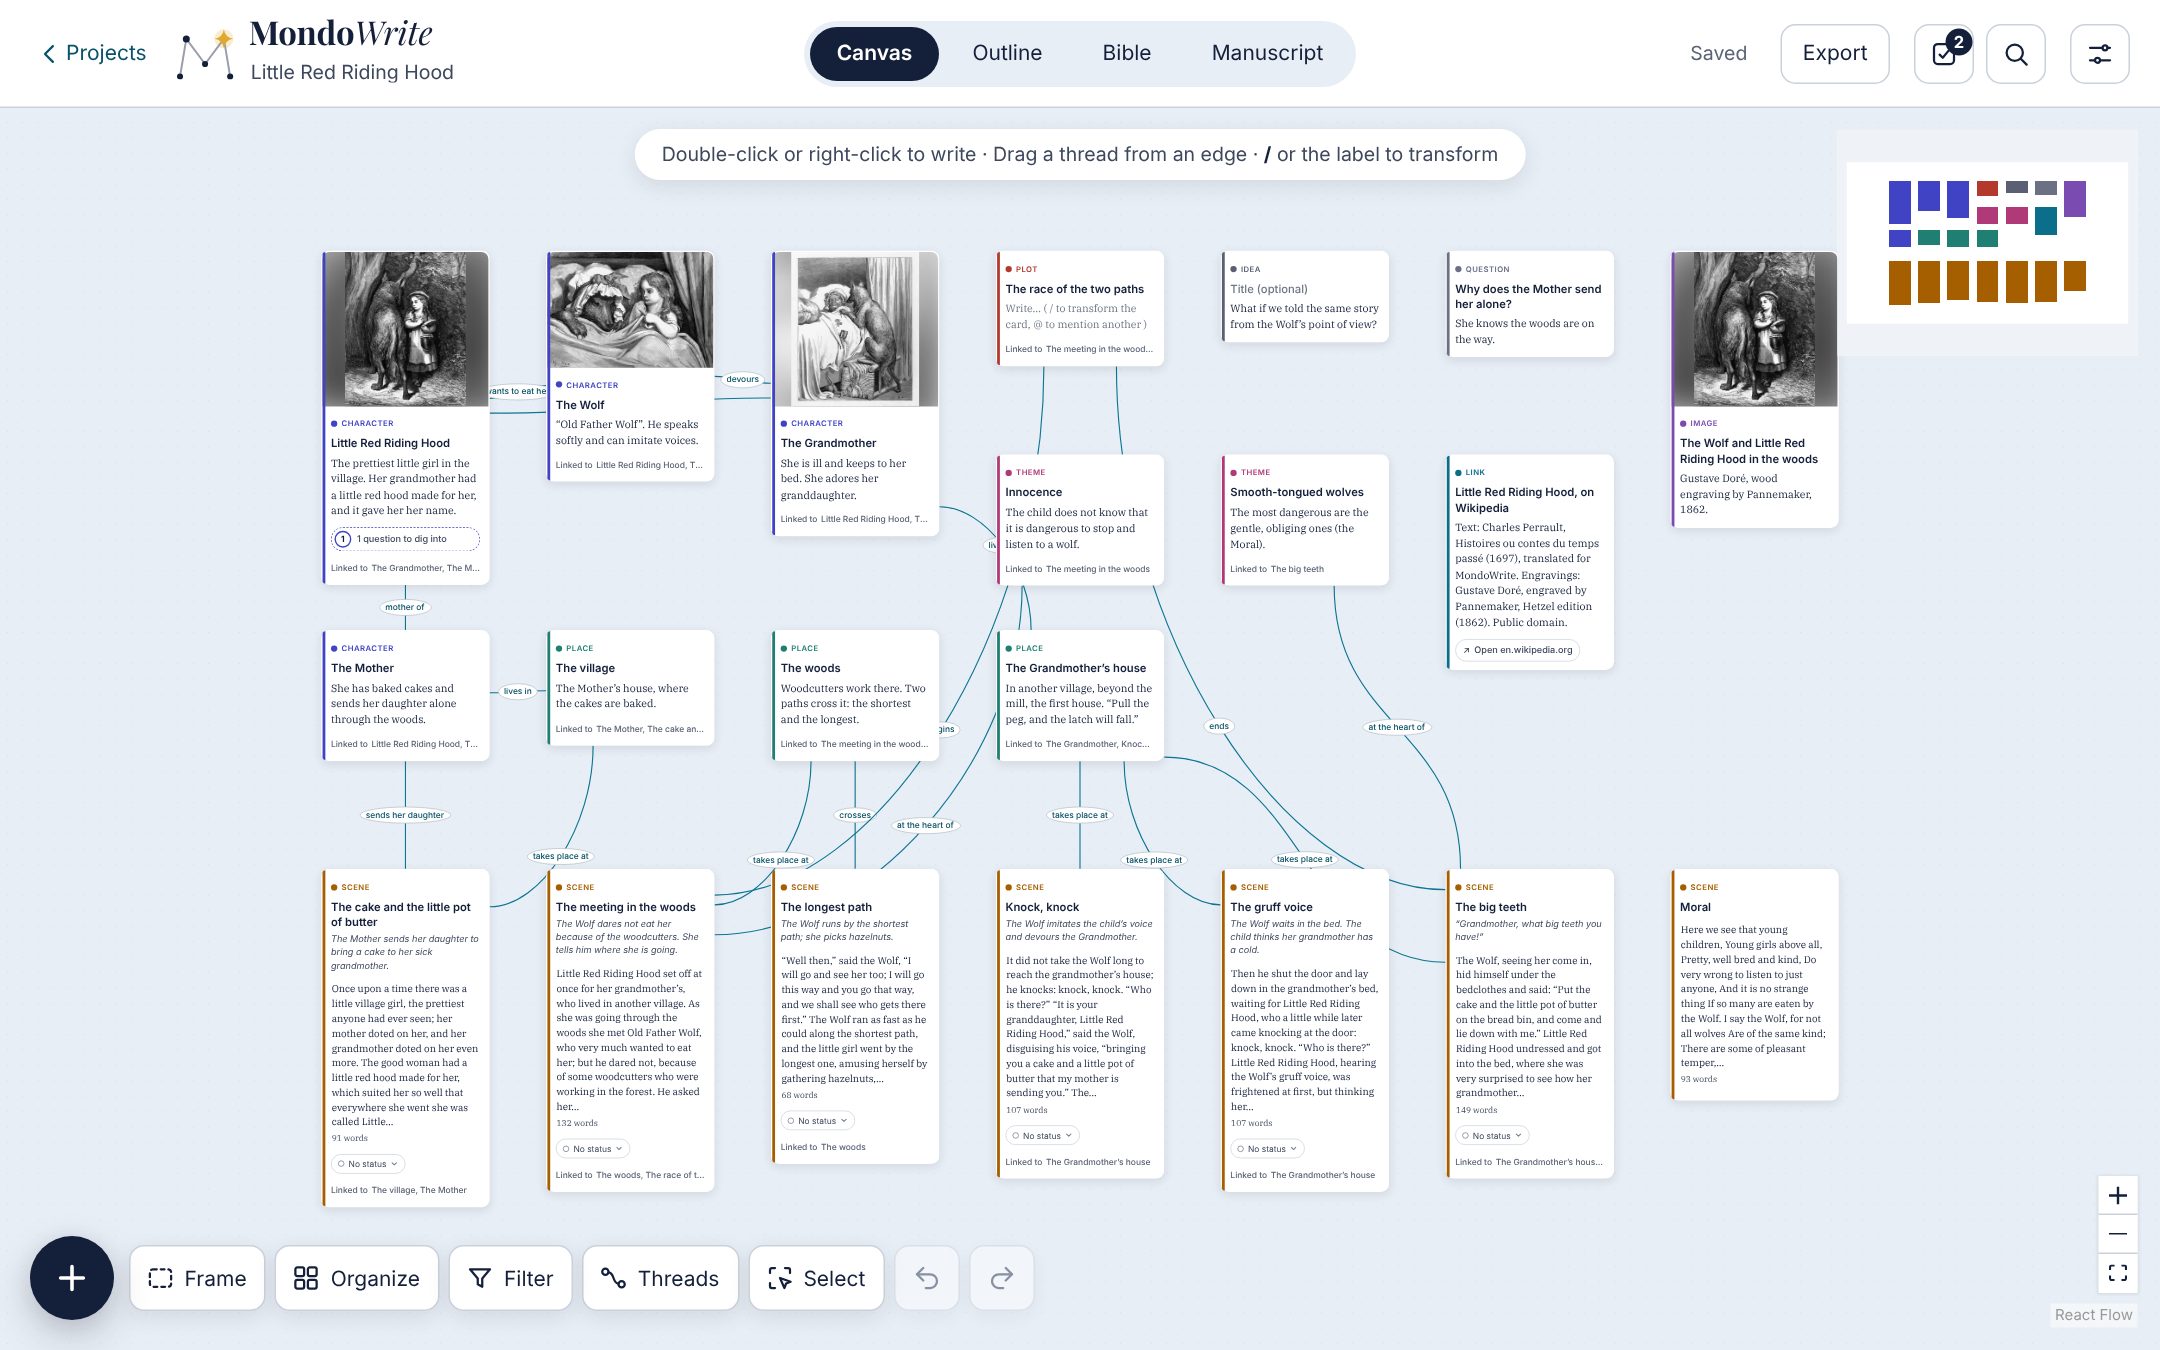
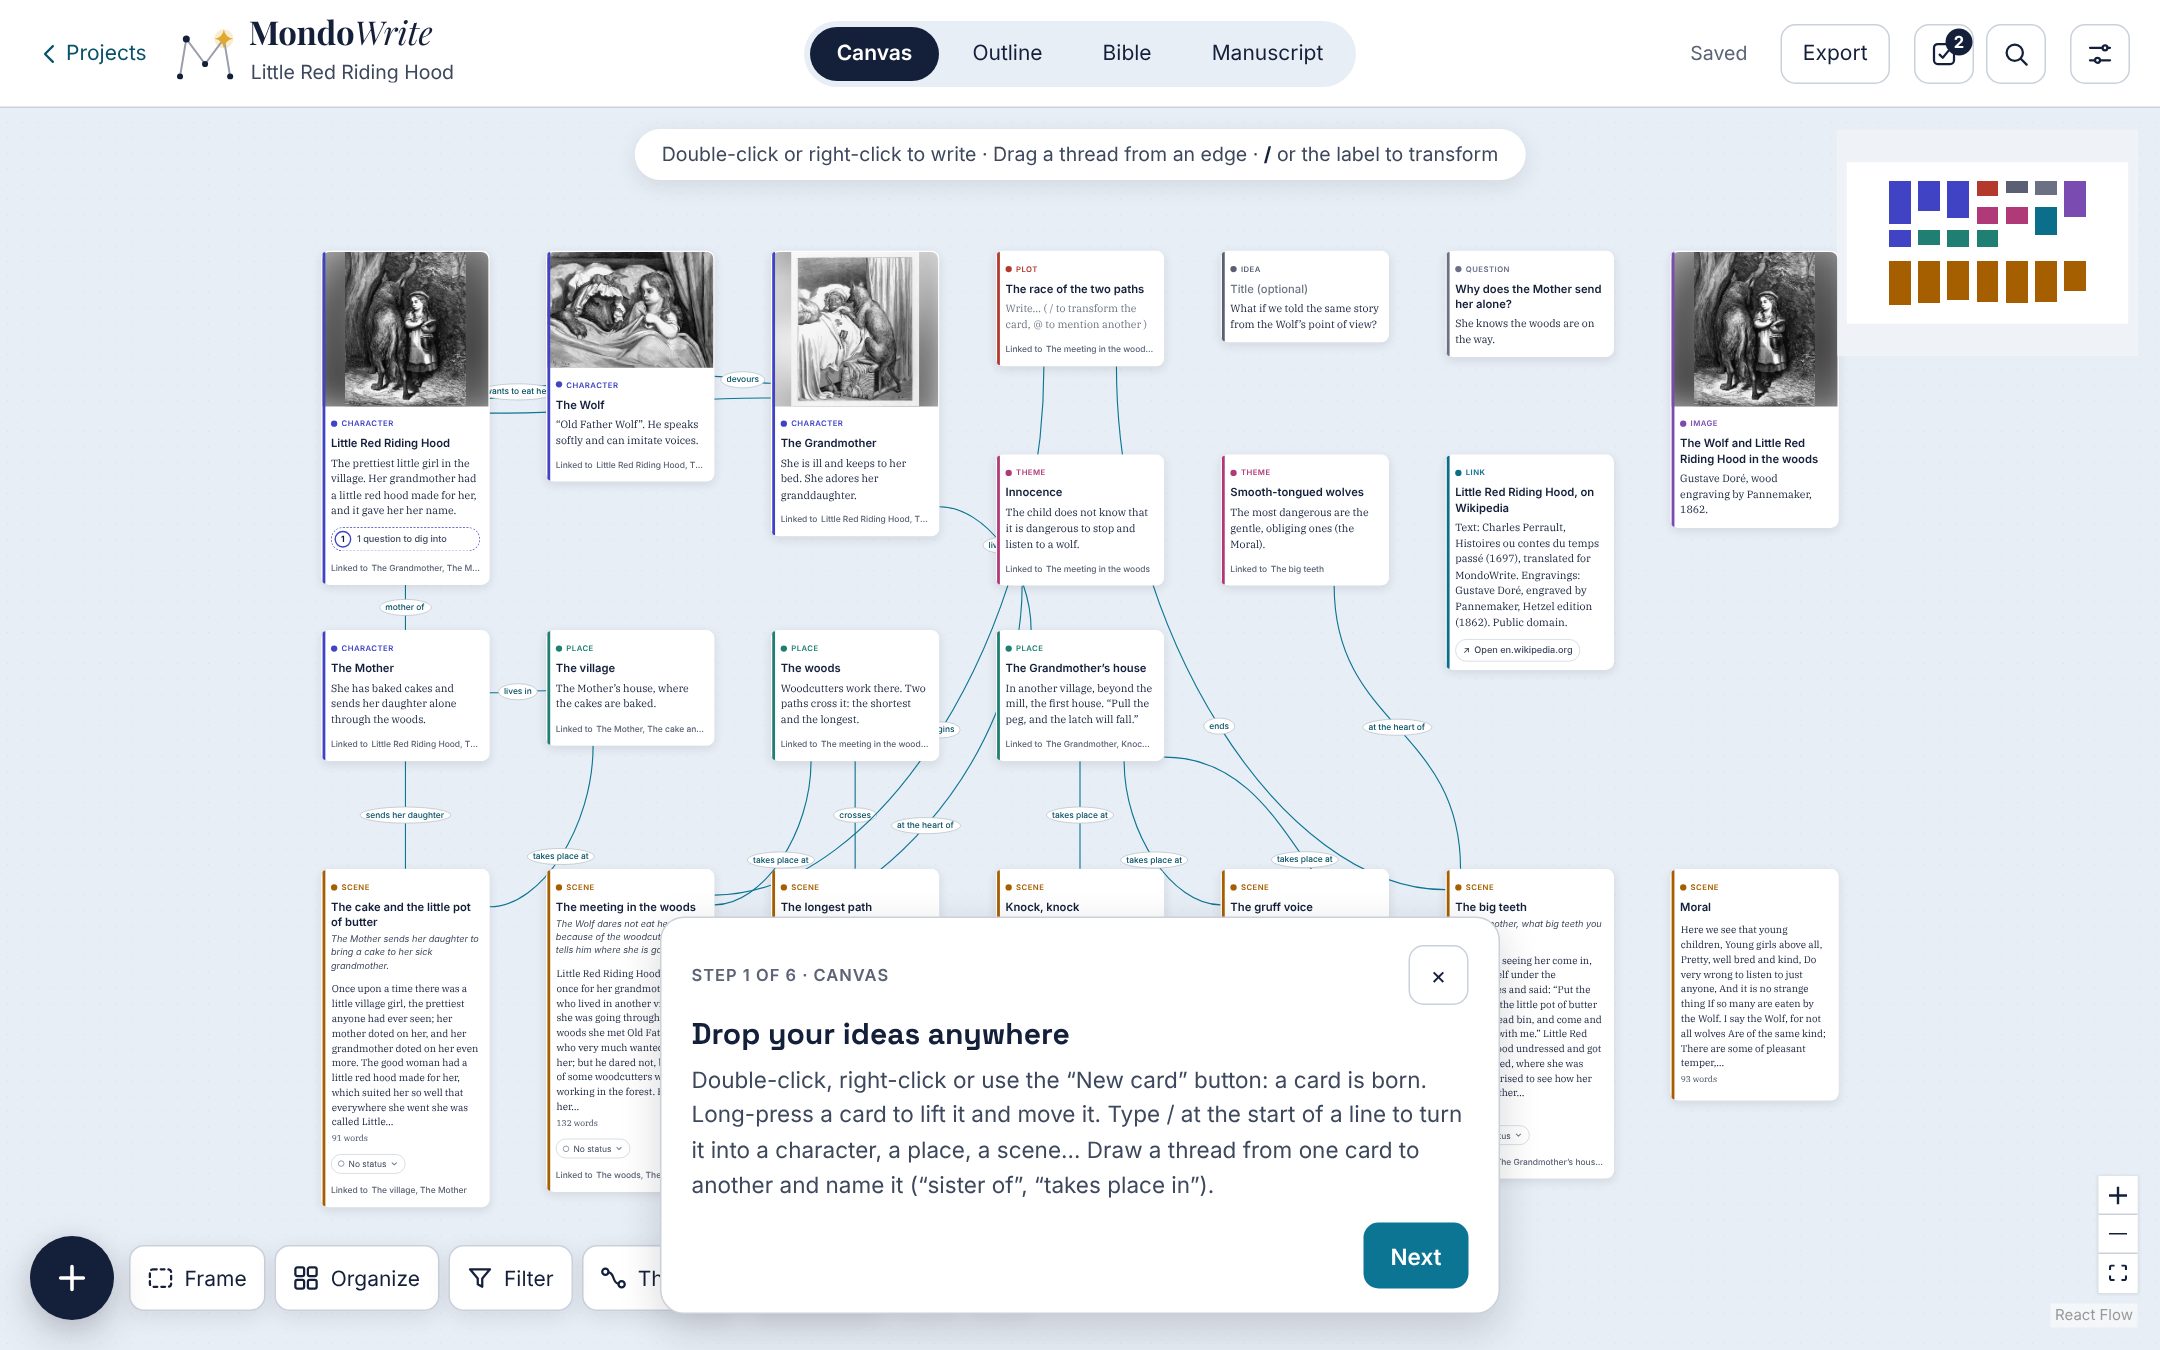
To move around, drag the background, or slide two fingers on a trackpad (a mouse wheel works too, with Shift to go sideways). To zoom, pinch the trackpad or the screen, or hold Ctrl while turning the wheel: zooming also works over a card, even with both fingers on it. A card whose text scrolls keeps the gesture as long as there is text left to scroll. With a mouse, you can get wheel zoom back: in Settings, under Wheel and trackpad (canvas), choose Zoom (as before). The +, − and frame buttons at the bottom right zoom and show the whole board. The minimap at the top right shows where you are; each card type has its colour there.
Create a card
There are four ways to create a card, for mouse, finger and keyboard:
- a double-click on the background, or a right-click;
- the New card button, at the bottom left;
- the N key, when you are not typing in a card.
The card is born where you clicked, never on top of another one. The cursor is in its title; Enter moves to the card’s text.
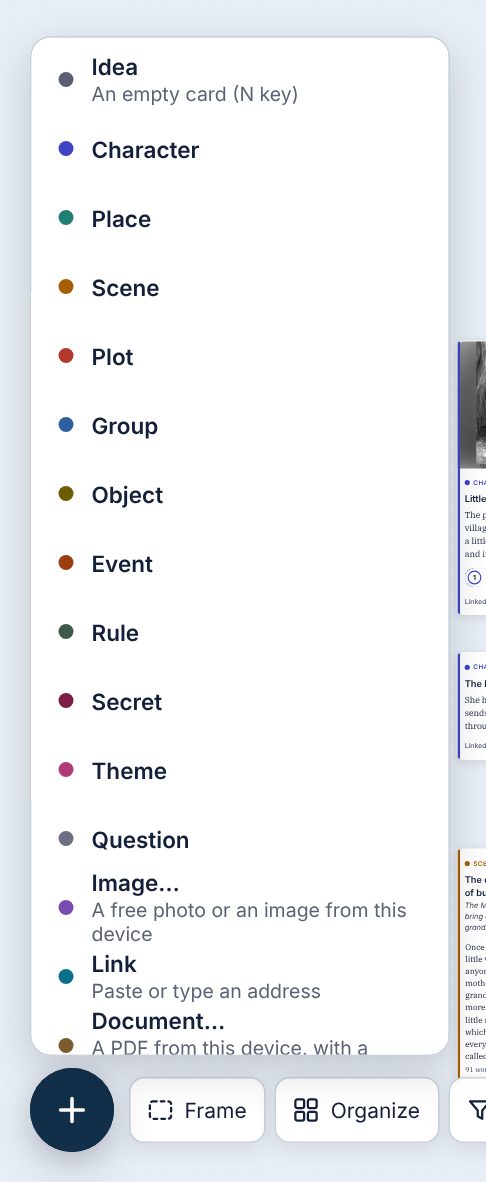
The arrow to the right of New card opens the list of all types: an empty card, a character, a place, a scene, a plot, a group, an object, an event, a rule, a secret, a theme, a question, an image (free photo or image from your device), a link or a PDF document.
Card types
| Type | What it stands for |
|---|---|
| Idea | The starting type: a loose note, which will become something else or stay an idea. |
| Character | A person in the story, with their character sheet, motor and arc in the Bible. |
| Place (Location in a screenplay) | A setting, with its period, atmosphere, what happens there. |
| Scene | A scene of the story. Its text is the Manuscript’s or the Screenplay’s. |
| Plot | A storyline (main, secondary, romantic…) with its dramatic question. |
| Group | A family, a clan, a company, a crew: what it wants, how it works, its means. Its members are the characters linked to it by a thread. |
| Object | A thing that matters in the story: where it comes from, what it does, what it stands for, where it is. |
| Event | Something that happened, often before the story: when, what it changed, what people say about it. |
| Rule | A rule of the world (a magic, a law, a custom): what it applies to, its exceptions, what it costs, what happens to whoever breaks it. |
| Secret | What some people hide: the truth, the stakes, the clues planted, when and how it comes out. Those who know are the characters linked to it by a thread. |
| Theme | An idea that runs through the story. |
| Question | Something to dig into later. Questions are gathered in “To dig into”. |
| Image, Link, Document | Your sources: an image, a web page, a PDF, with author and date. |
Change the type: the slash
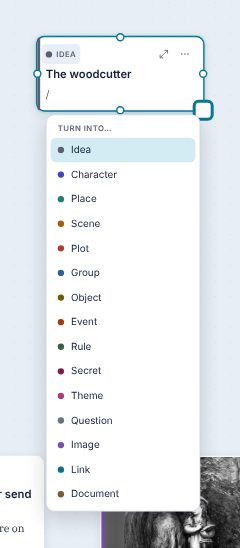
Type / at the start of a line of the card’s text (or in an empty title): the Turn into… menu opens. Choose with the arrows and Enter, or with the mouse. With a finger or the mouse, you can also tap the type label at the top left of the card. Changing the type loses nothing: the text and the threads stay.
Write in a card
A card’s text is formatted like a light word processor. Select a passage: a small bar offers bold, italic, strikethrough, heading, list, checkbox and quote, then what you can do with the passage (create an entry, note, synonyms, Comment, Graveyard, depending on the text). On iPad, it keeps only these actions on the passage; on iPhone, there is no bar, and the iOS menu stays on its own. You can also write Markdown, which turns into formatting as you type: **bold**, *italic*, # Heading, - list, [ ] for a checkbox. Pasted Markdown text is formatted the same way. In a scene’s text (the Manuscript, the enlarged Scene card), a dash at the start of a line stays a dialogue dash: start a list there with * .
A card whose text is taller than a certain height folds, with More details to unfold it; it stays open while you write.
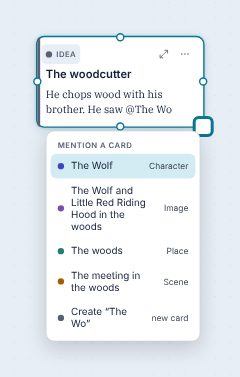
Mention another card: @
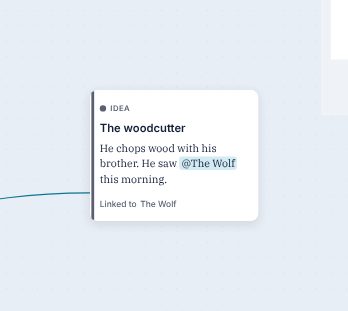
Type @ (or [[, as in Obsidian) followed by the start of a name: the list of the project’s cards appears. Pick one: its name is inserted as a mention, and a thread is drawn on its own between the two cards. If the card doesn’t exist yet, Create “…” creates it on the spot. It also works in the text of a Bible entry and in an enlarged card.
A mention follows its card: if you rename the card, the name changes wherever it is mentioned; if you delete it, the mention becomes plain text again.
Connect with threads
Hover over a card: a small dot appears in the middle of each edge. Drag from one of them to another card (anywhere on the card): a thread connects them. Click the thread to give it a label, the kind of link: “mother of”, “takes place in”, “suspects”… These labels show up again in the Bible (Linked to) and on the relationship map. To remove a thread, click it, then Unlink.
A thread has its own sheet too. In the Bible, touch a card under Linked to: three boxes open below the list, Their history, What is at stake between them and How it changes. A dot marks the threads that have a sheet. What is at stake between two characters follows their relationship in the pitch document. To remove the thread, use Unlink from “…” at the foot of that sheet.
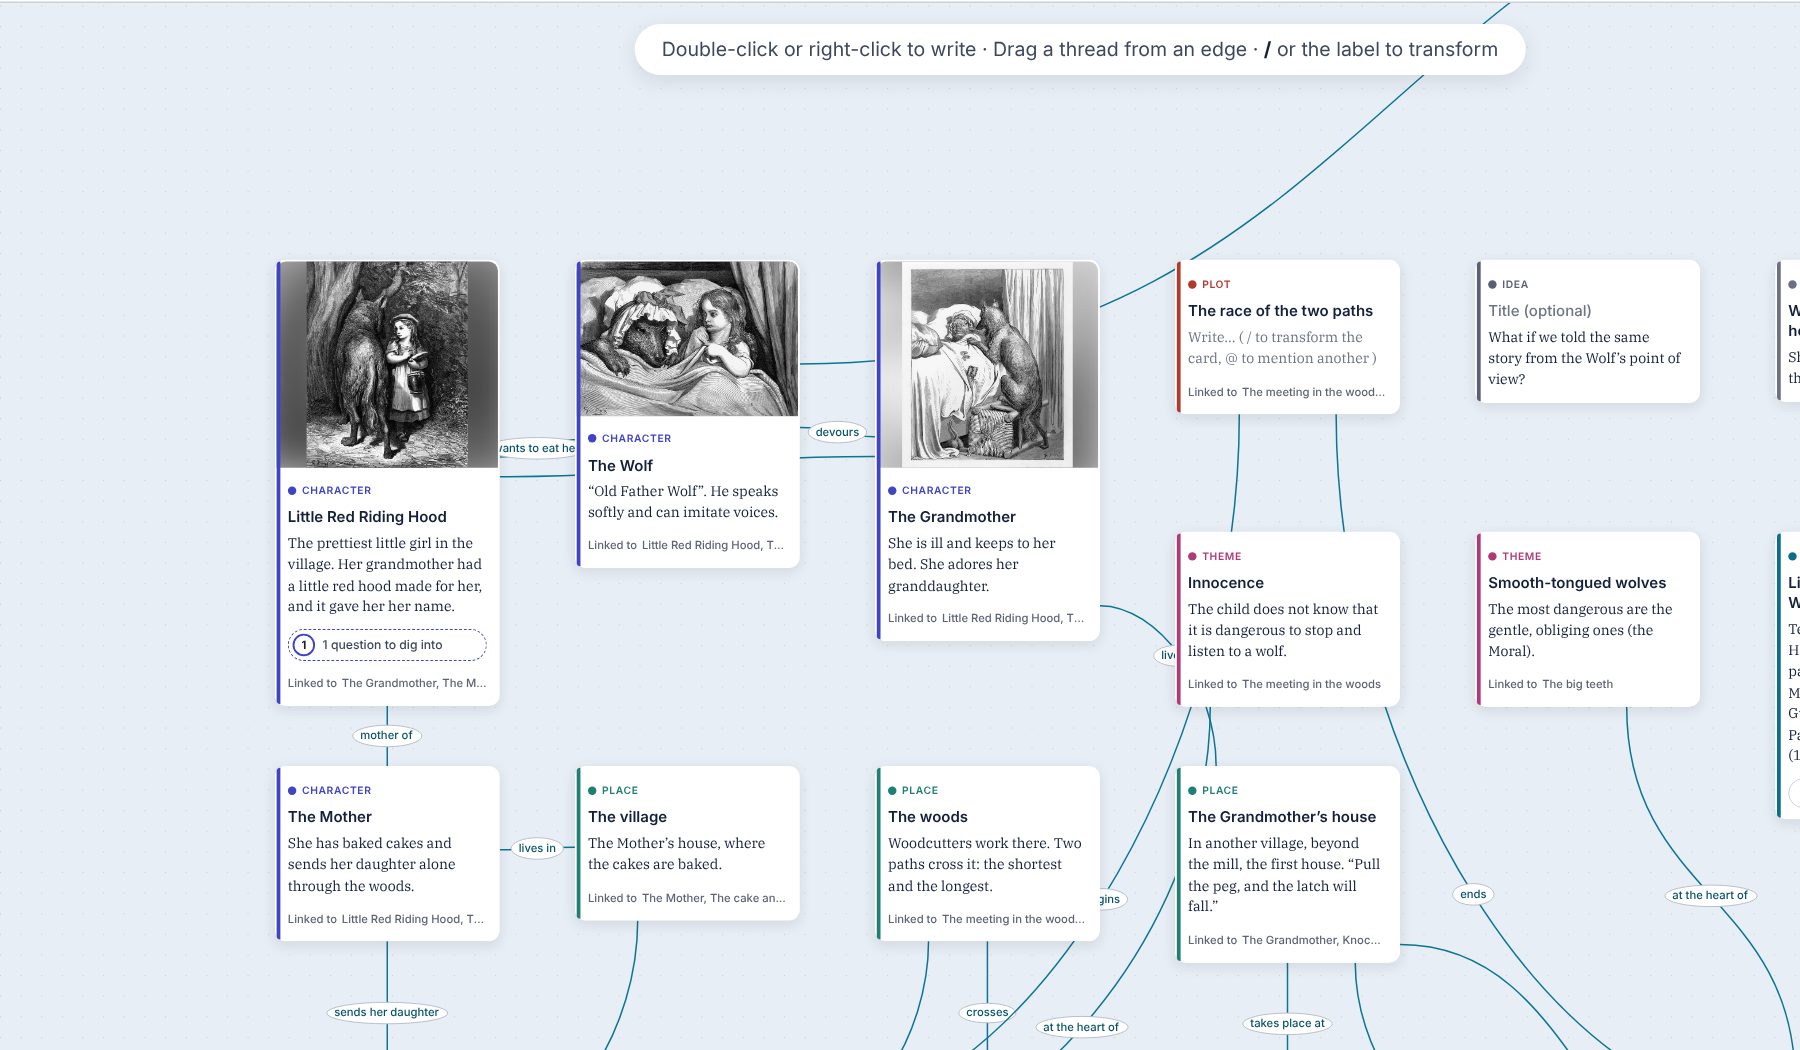
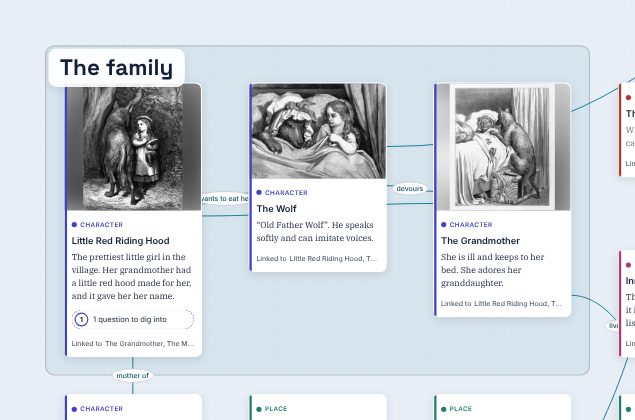
At the foot of each linked card, a discreet line says what it is linked to: Linked to The Wolf, The Grandmother… Touch that line to unfold it, then a name: the canvas centers on that card and spotlights it.
When threads cross too much, the Threads button (at the bottom, next to Filter) hides them all. Nothing is deleted, and the choice is kept with the project. Cards then spell out what they are linked to; touch Linked to on a card to show only its threads, touch it again to hide them. Threads again brings them all back.
Move, widen, expand
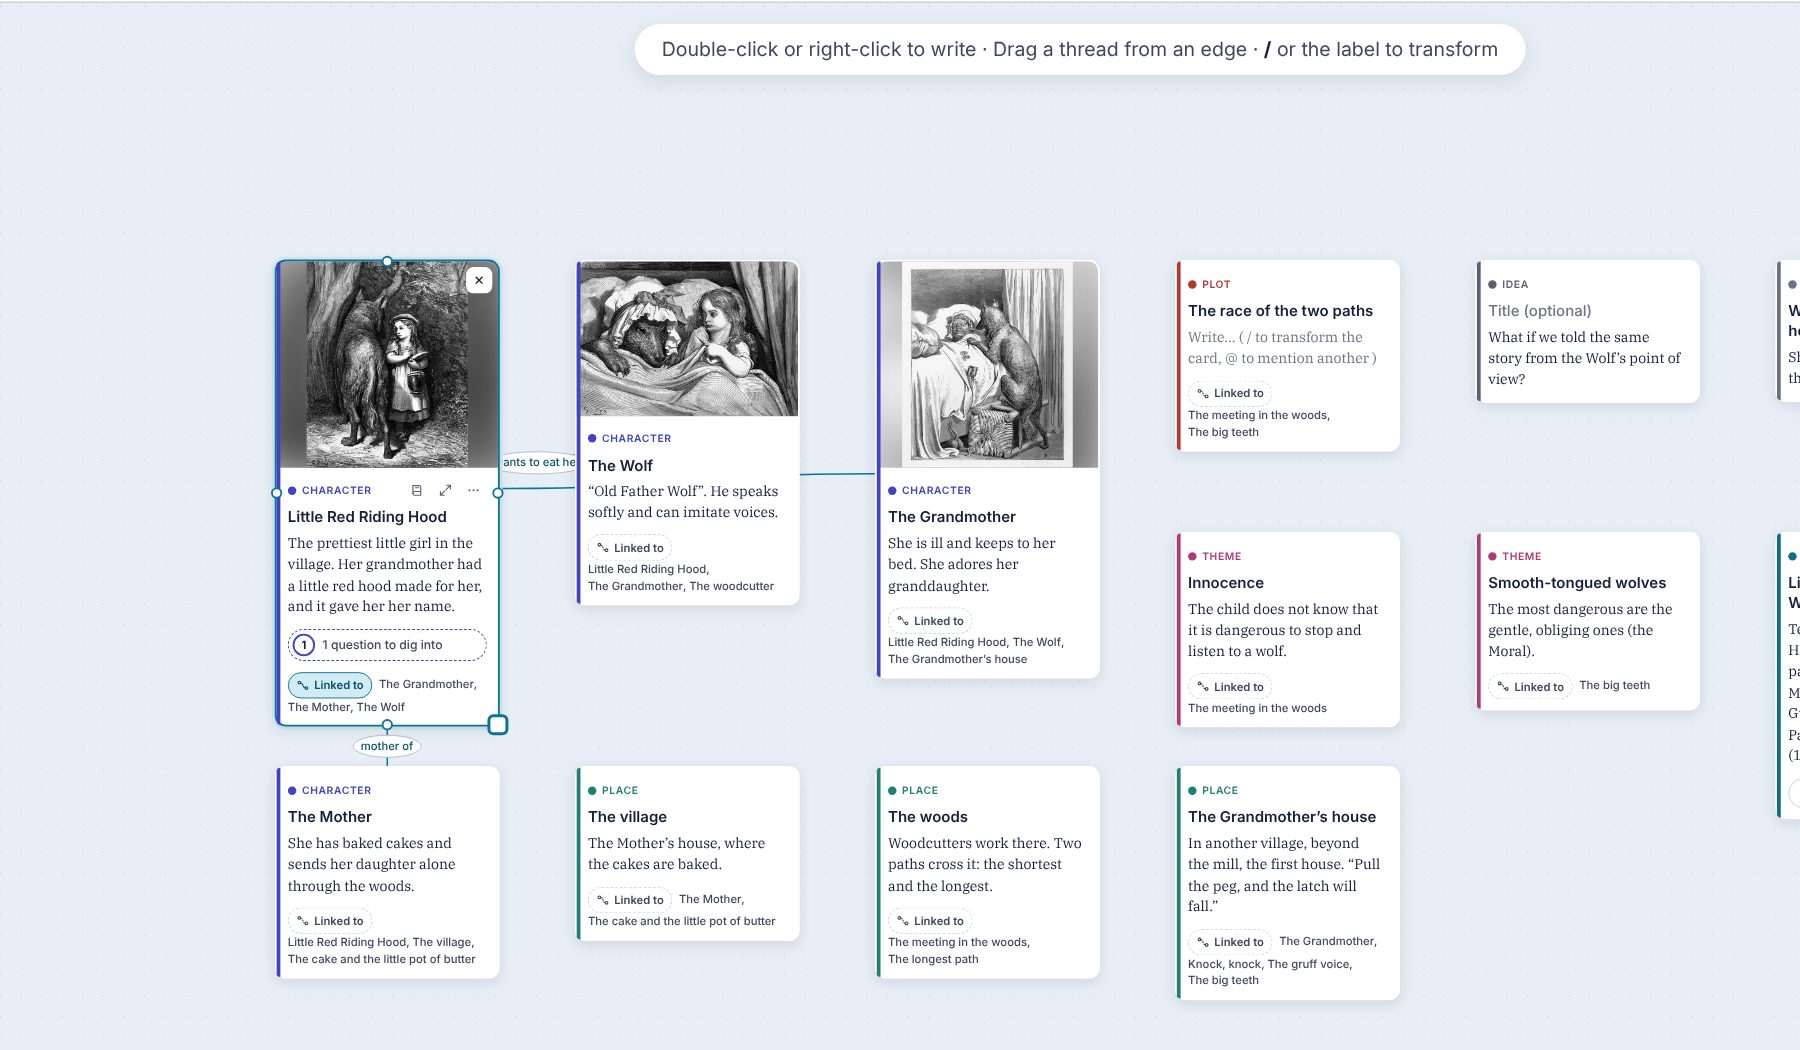
- Move: grab the card by its header (or its image) and drag it.
- Widen: drag the handle at the card’s bottom right corner, or Alt ← →. The height always follows the text.
- Expand: the two-arrow button (or Ctrl Enter on the selected card) opens the card in large, with its full sheet. A click beside it closes it.
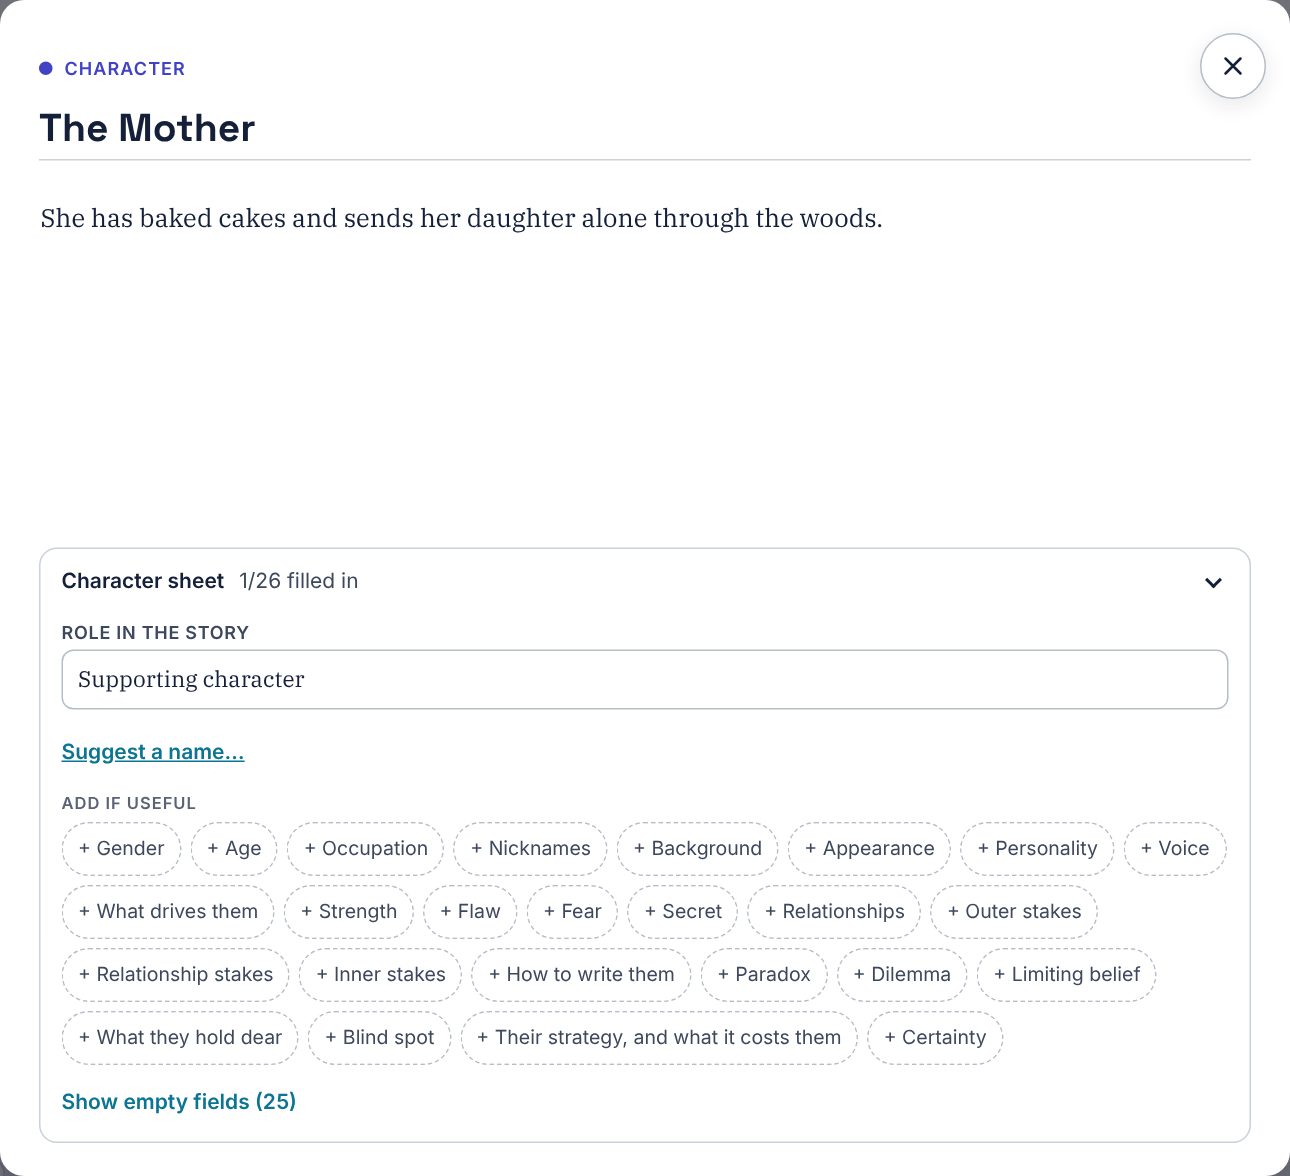
A card’s ⋯ menu
The ⋯ button (or a right-click outside the card’s text) offers:
- Add an image or Change the image;
- Filter on this card: show only this card and its neighbours (connected by a thread or a mention);
- Copy card and Duplicate card;
- Rename everywhere…: change the card’s name and replace it throughout the text too (see the Manuscript, “Find and replace”).
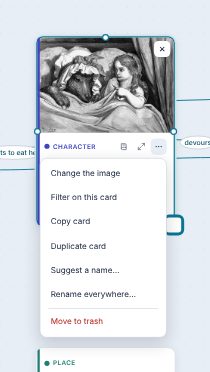
The sheet button (the small page) of a typed card opens its entry in the Bible.
Images, links and documents
The canvas also keeps your sources at hand:
- An image: drop an image file on the canvas, paste it (Ctrl V), or choose Image… in the New card menu. An image dropped on a card becomes its image. Images are copied into the project folder and keep their proportions.
- A link: paste a web address on the canvas. A Link card is born, with the page’s title, author, date and image. An address pasted into an empty card turns that card itself into a Link.
- A PDF: drop it or choose Document…. The Document card shows a preview of the first page, the page count and the author; Read the document opens it in the app’s reader.
- Pasted text becomes an Idea; a dropped
.mdor.txtfile becomes a card (an Obsidian note keeps its title and type).
Pasted onto a card (click its edge, then Ctrl V), the text goes into that card, at the end: into its notes, or into the scene’s text for a Scene card. No card is created.
Copying, pasting and duplicating cards
Select one or more cards, then Ctrl C and Ctrl V: the copies arrive where the pointer is, with their sheet, their images, the scenes’ text and the threads between them. Ctrl D, or Duplicate card in the ⋯ menu, puts a copy right next to it. In another app, pasting gives the cards’ title and text.
A card that changes type loses nothing: a Scene turned into an Idea keeps its synopsis and its text in its notes, and a long text in a card that becomes a Scene becomes the scene’s text (a short line becomes its synopsis).
Free photos
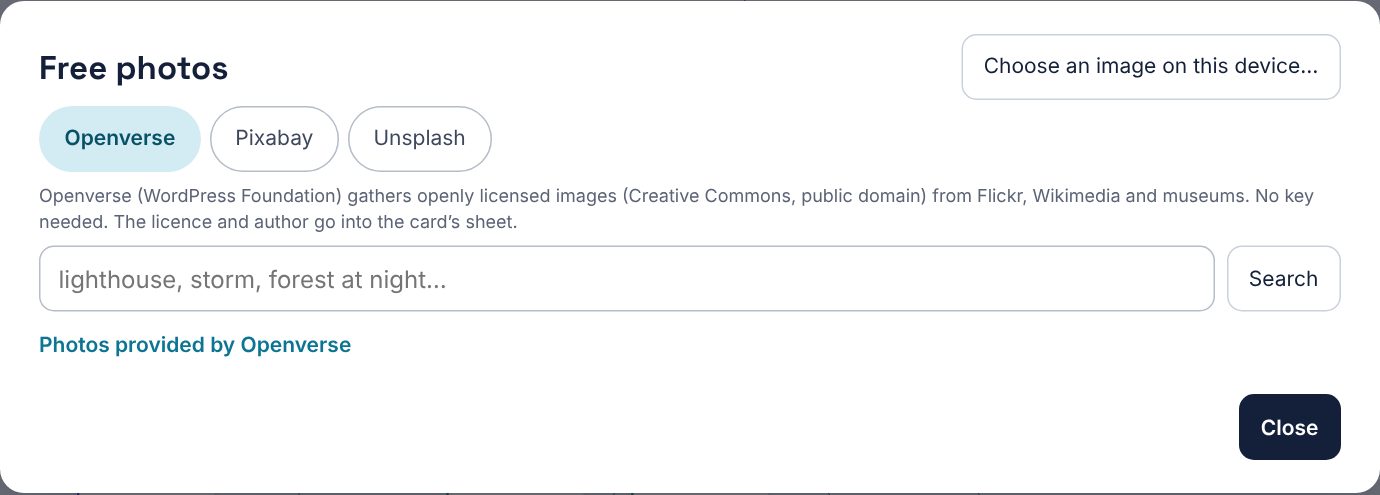
Image… opens the Free photos window: search for a word (“lighthouse, storm, forest at night…”) and pick a photo. Three sources: Openverse, with no key, which gathers openly licensed images (Flickr, Wikimedia, museums); Pixabay and Unsplash, which need a free key, kept on your device. The photo’s author, page and licence are noted in the card’s sheet. Choose an image on this device… takes a file from your computer.
Frames
A frame gathers cards without imposing anything on them: “The family”, “Act I”, “Research”. Select cards and press C (or the Frame button): the frame surrounds them. Name it in its header. Moving the frame (by its header, or with a long press on an empty spot inside it, with a finger or the mouse) moves the cards inside; drag its edges to resize it. Deleting a frame doesn’t delete its cards.
With no cards selected, C puts an empty frame in a free space near the center of the view. A new card never lands across a frame: created in a frame (double-click, right-click), it stays there, next to its cards; created elsewhere, it goes into an empty space.
The padlock in the header locks the frame: neither it nor its cards move any more, even with Organize. The cards stay editable, connectable and deletable.
Frames have a hierarchy: a frame placed inside another has a smaller title and a dotted outline. A frame inside a top-level frame (a chapter in a beat, a beat in an “Act I” frame you drew) drops one level, with nothing to set. The beats of a structure template get the largest title, a coloured outline and their rank next to the name (“Beat 3 of 15”). When you zoom out, titles grow and move above the cards: from afar, the canvas reads like a table of contents. A chapter’s title then sits below its beat’s title instead of covering it. Close up or far away, frame titles stay in front: threads and their labels pass beneath them.
Select several cards
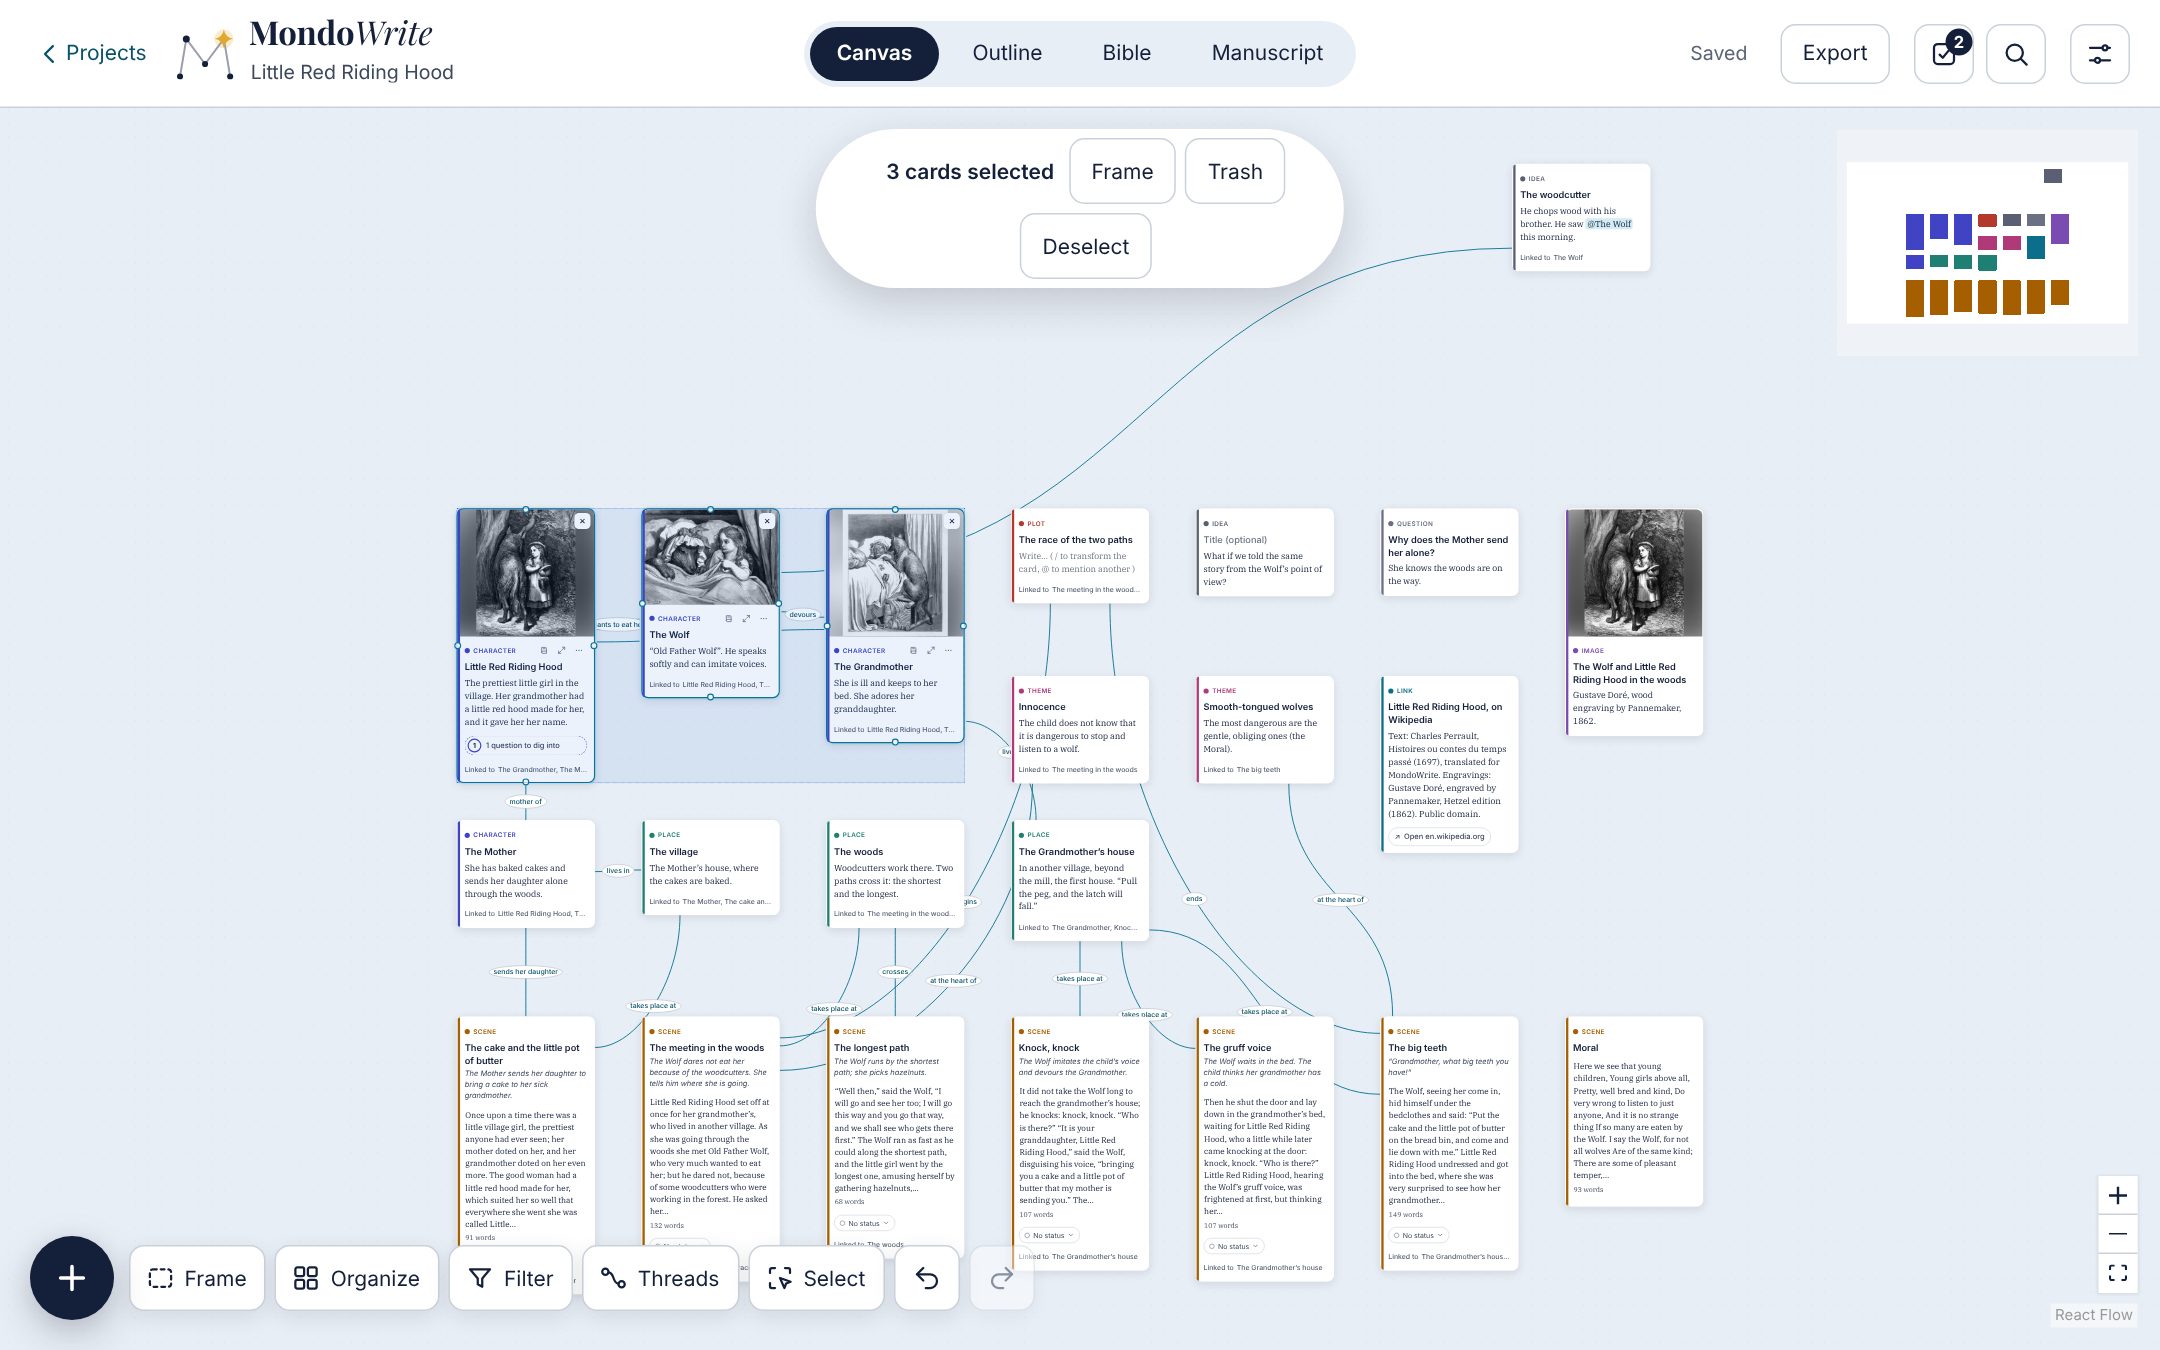
With a mouse: Shift + drag draws around cards; Ctrl + click adds a card to the selection; Ctrl A selects everything, Esc deselects. With a finger: the Select button makes dragging draw around cards instead of moving the view. A bar at the top then offers Frame, Trash and Deselect; the chosen cards move together.
Organize the canvas
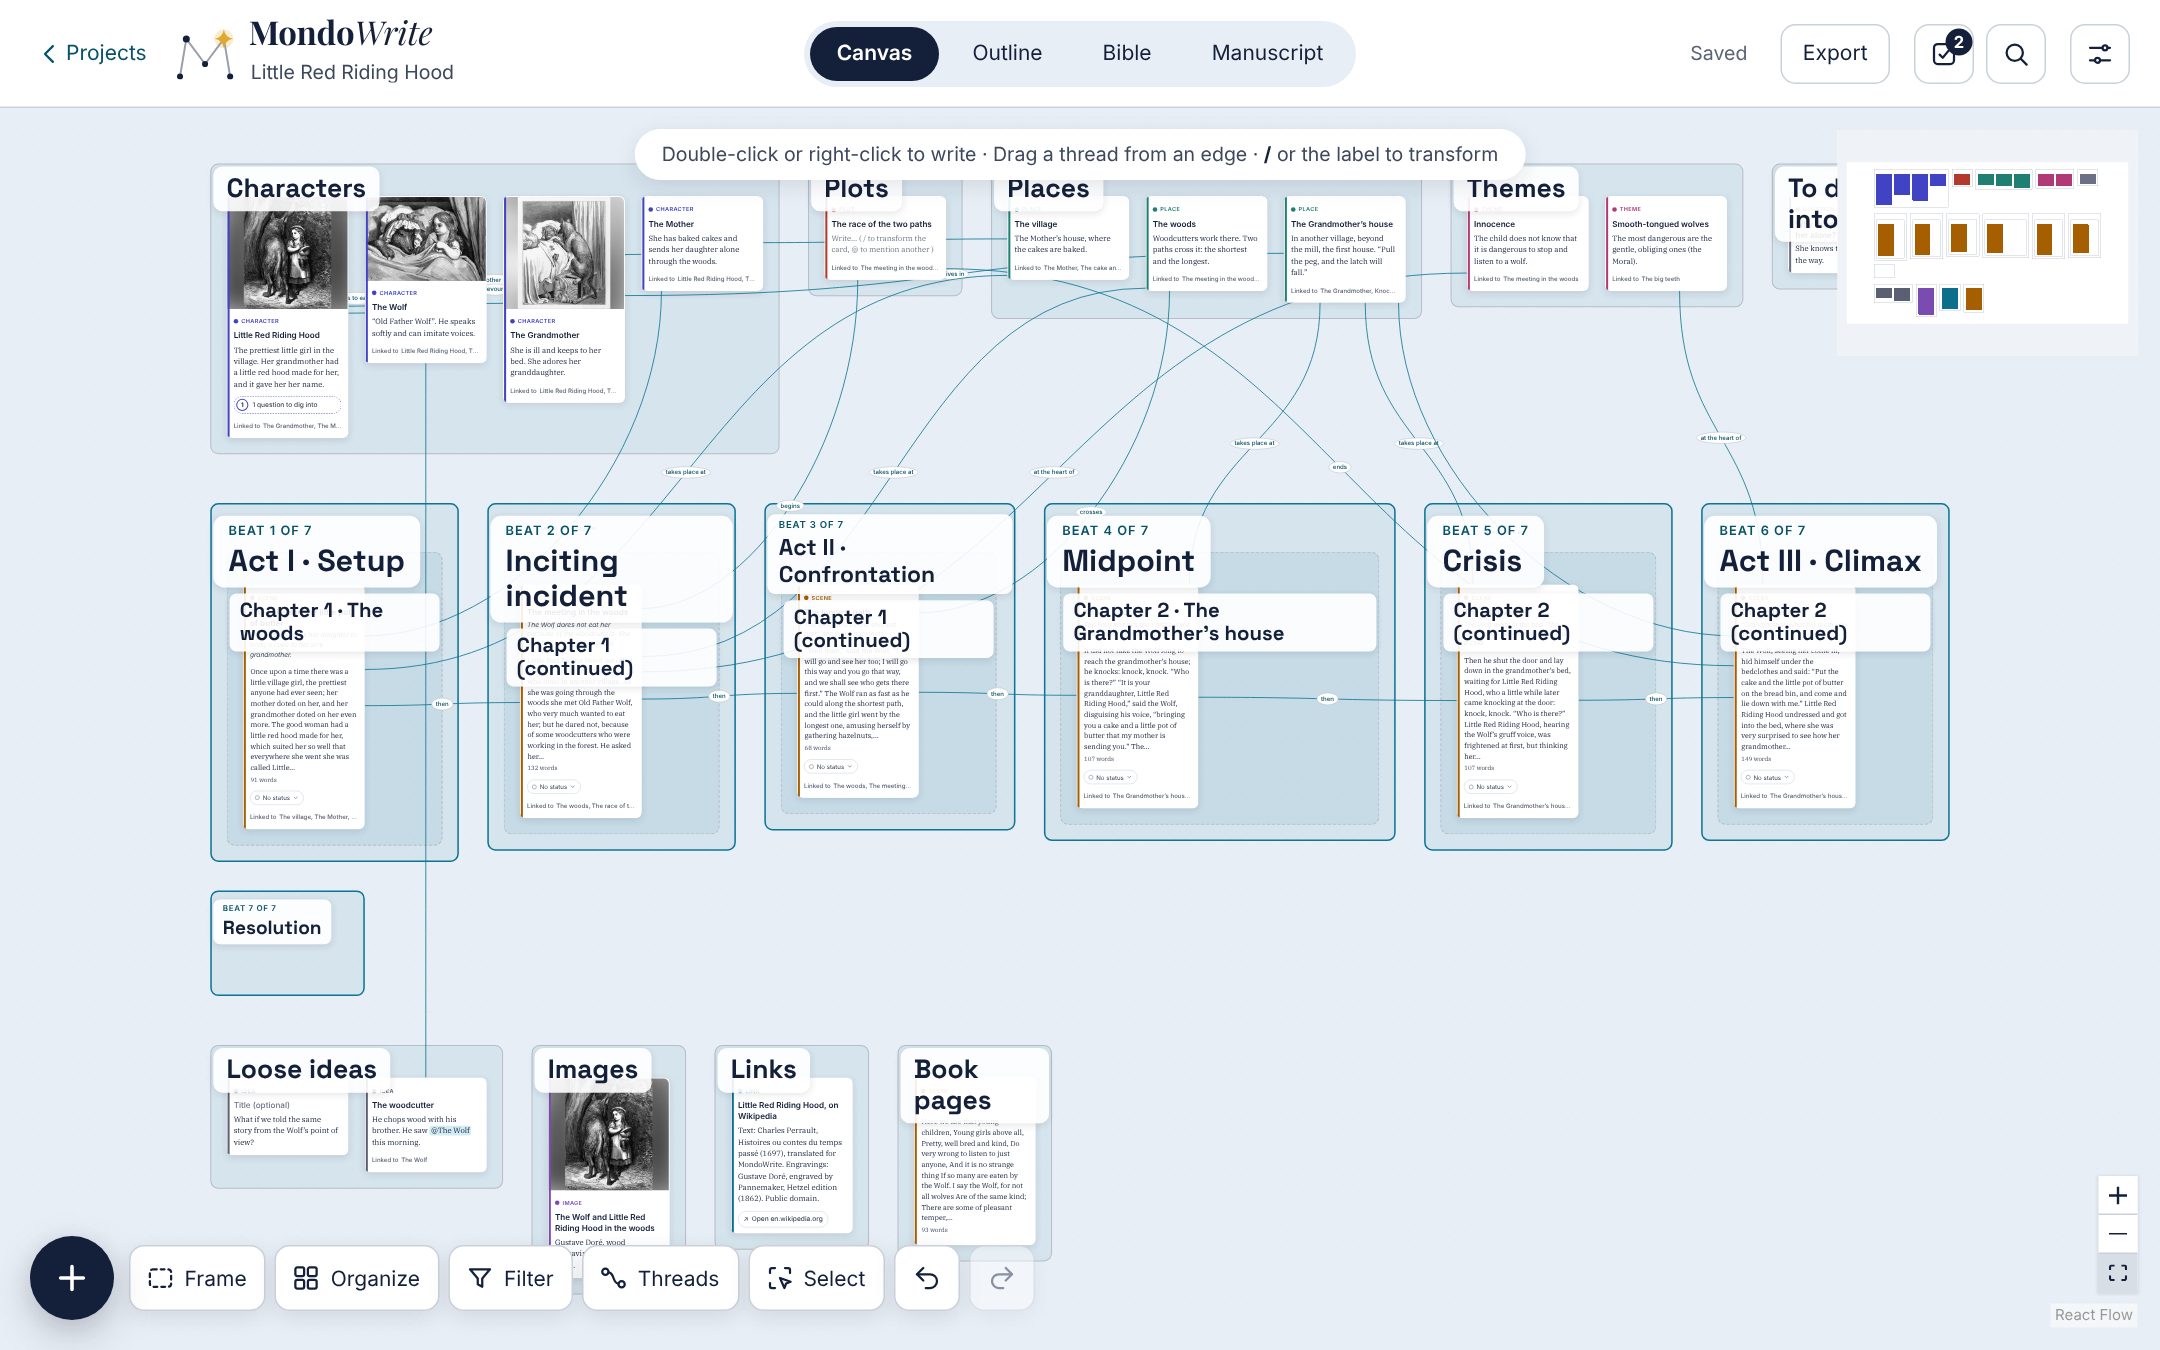
When everything overflows, Organize puts every card in a frame: characters, places, plots, themes, questions, images, links, loose ideas, and scenes by template beat and by chapter, linked in story order by “then” threads. The whole forms a compact block, shaped like the screen: the more cards there are, the longer the rows of scenes, and the frames line up on that width instead of stretching into a long strip. A chapter spread over several beats carries its title in the first one and “(continued)” in the others. Locked frames stay in place. A single undo (Ctrl Z) puts everything back.
In a series, scenes are arranged by season and by episode: a large frame per season, a frame per episode inside it (“Ep. 3 · Storm”), its scenes within. These frames appear on their own as soon as you create seasons and episodes in the outline, even before the first scene (if the canvas has no frame of yours yet), then follow every change. Scenes written before the first episode go to Outside any episode, Scene cards not yet written in the screenplay to To place. Drop a scene in another episode’s frame: it moves there with all its text, where you put it, and the canvas arranges itself again. Without dragging, Move to in the outline does the same.
Every beat of the template gets its frame, even an empty one (“Nothing here yet”): the gaps in the structure show at a glance. Drop a scene in a beat’s frame to put it in that beat, at the spot where you let go (hold the card by its header); the Outline, the sequencer and the Manuscript follow at once. In a screenplay, the beats are those of the template chosen in the sequencer.
After that, the canvas follows the story on its own: moving a scene or a chapter in the Outline, the Manuscript or the Screenplay’s scene list moves it on the canvas too, without going back to Organize. An organized canvas is organized again; otherwise the scenes just swap places and nothing else moves.
Filter and search
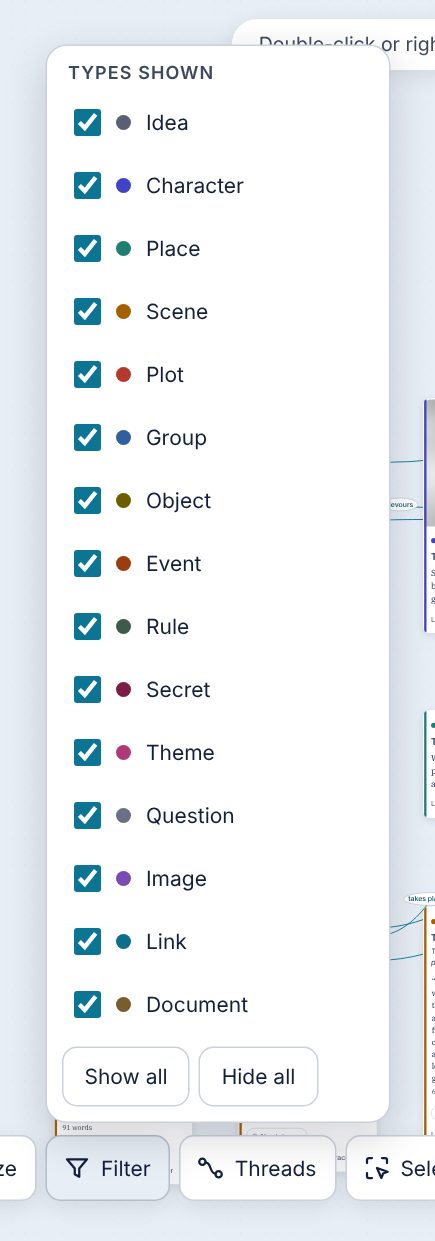
Filter hides card types (nothing is deleted): untick the types you no longer want to see. A “Filter on” banner reminds you at the top (on a phone, the button’s funnel turns solid instead); Show all brings everything back, and Hide all unticks every type at once (handy to keep just one or two).
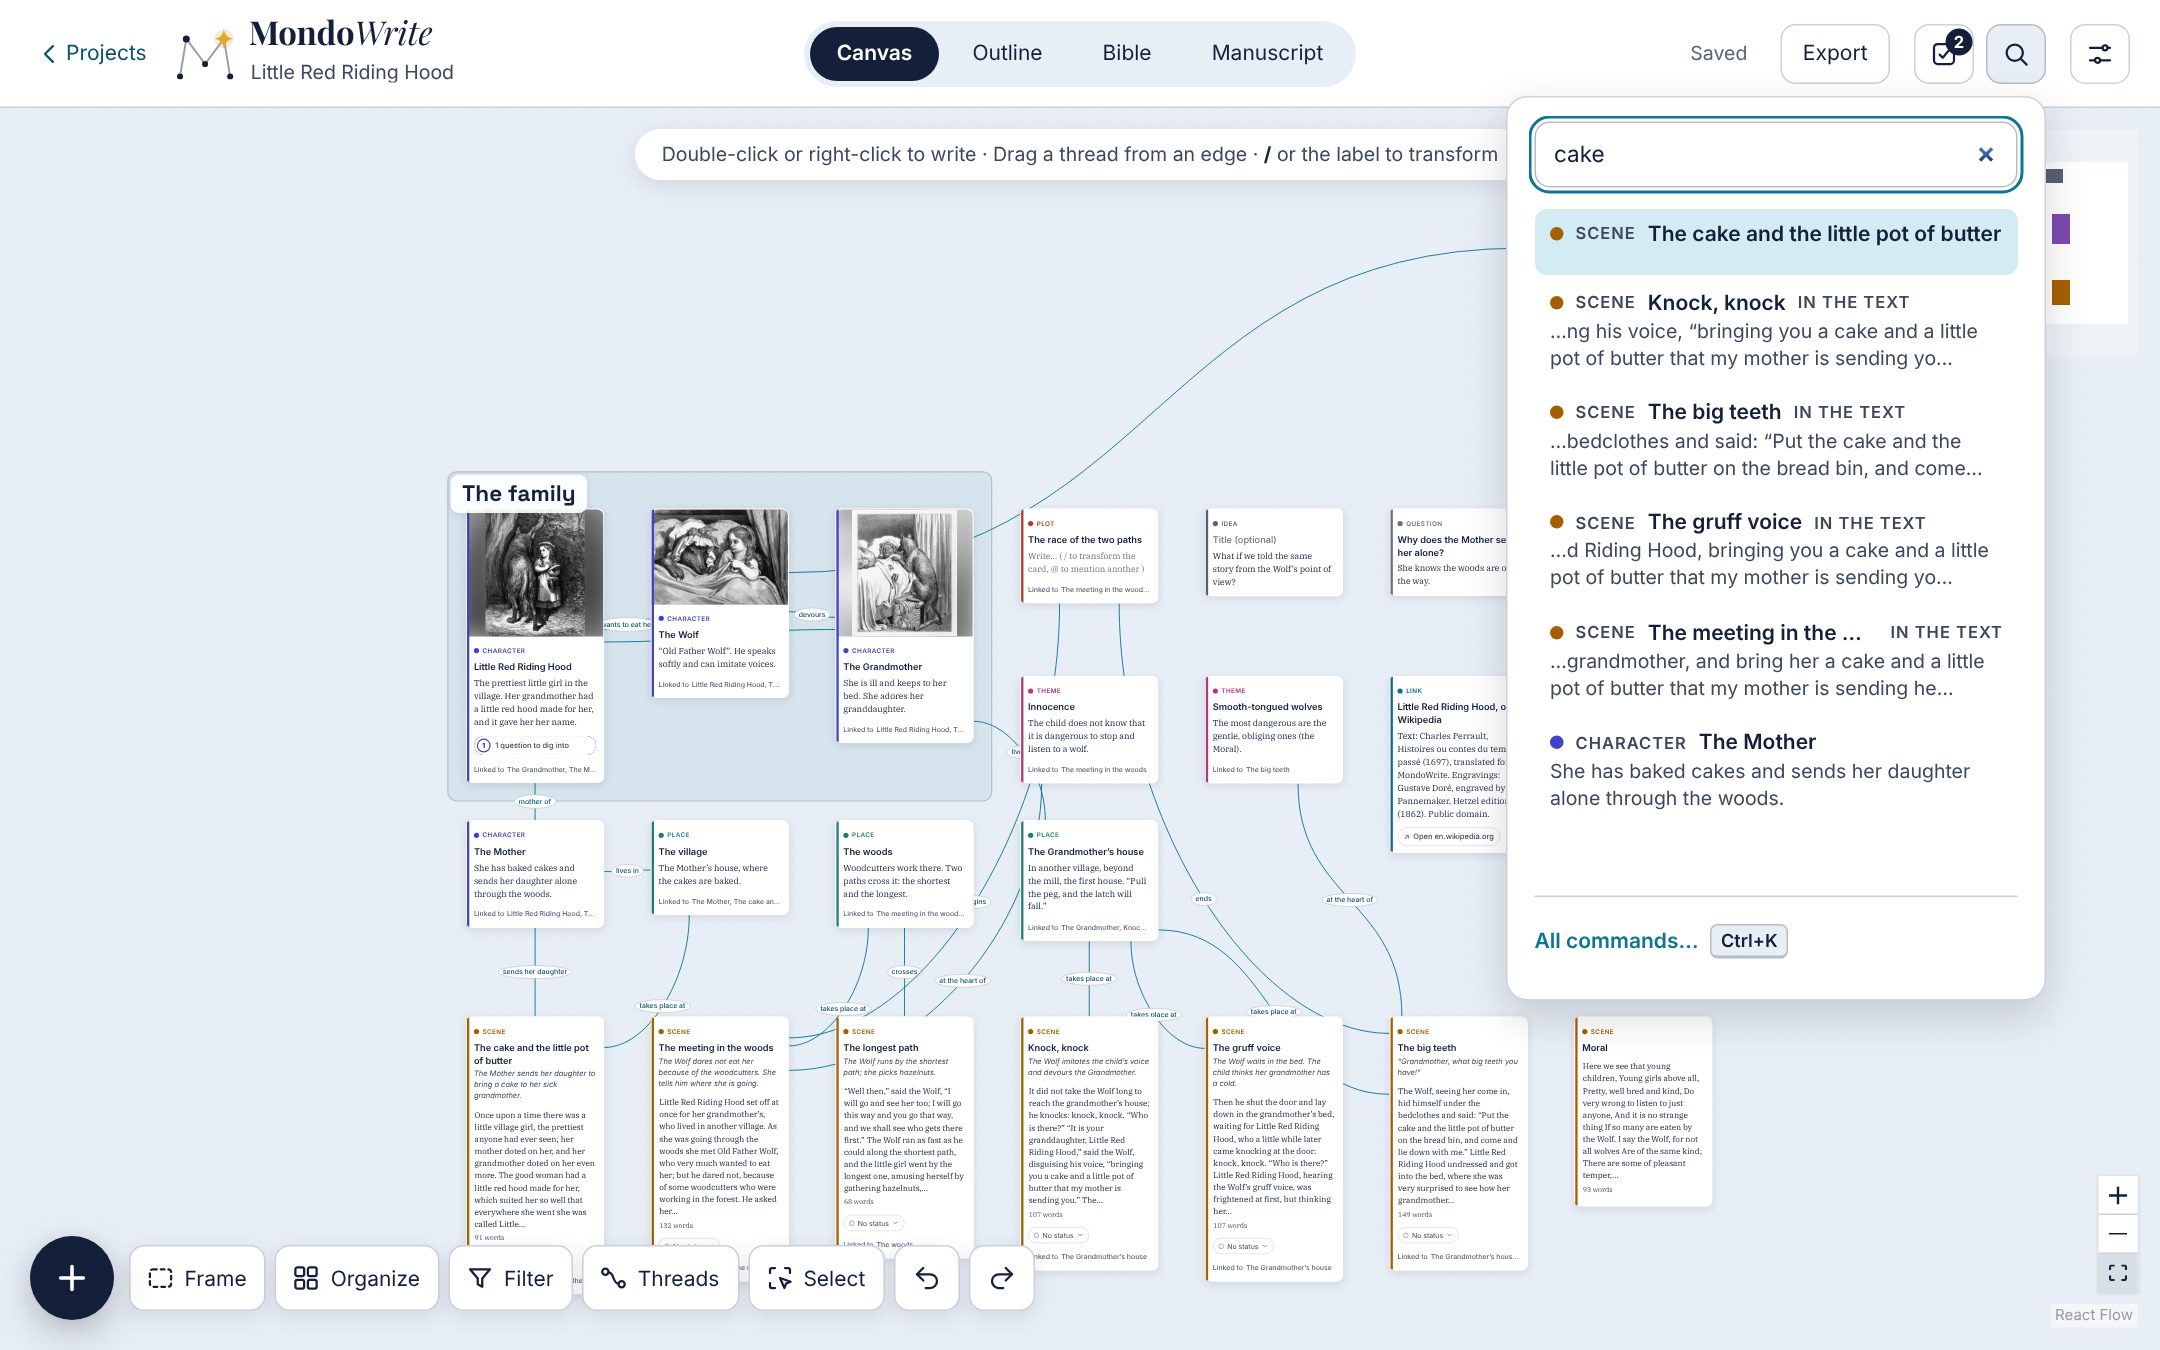
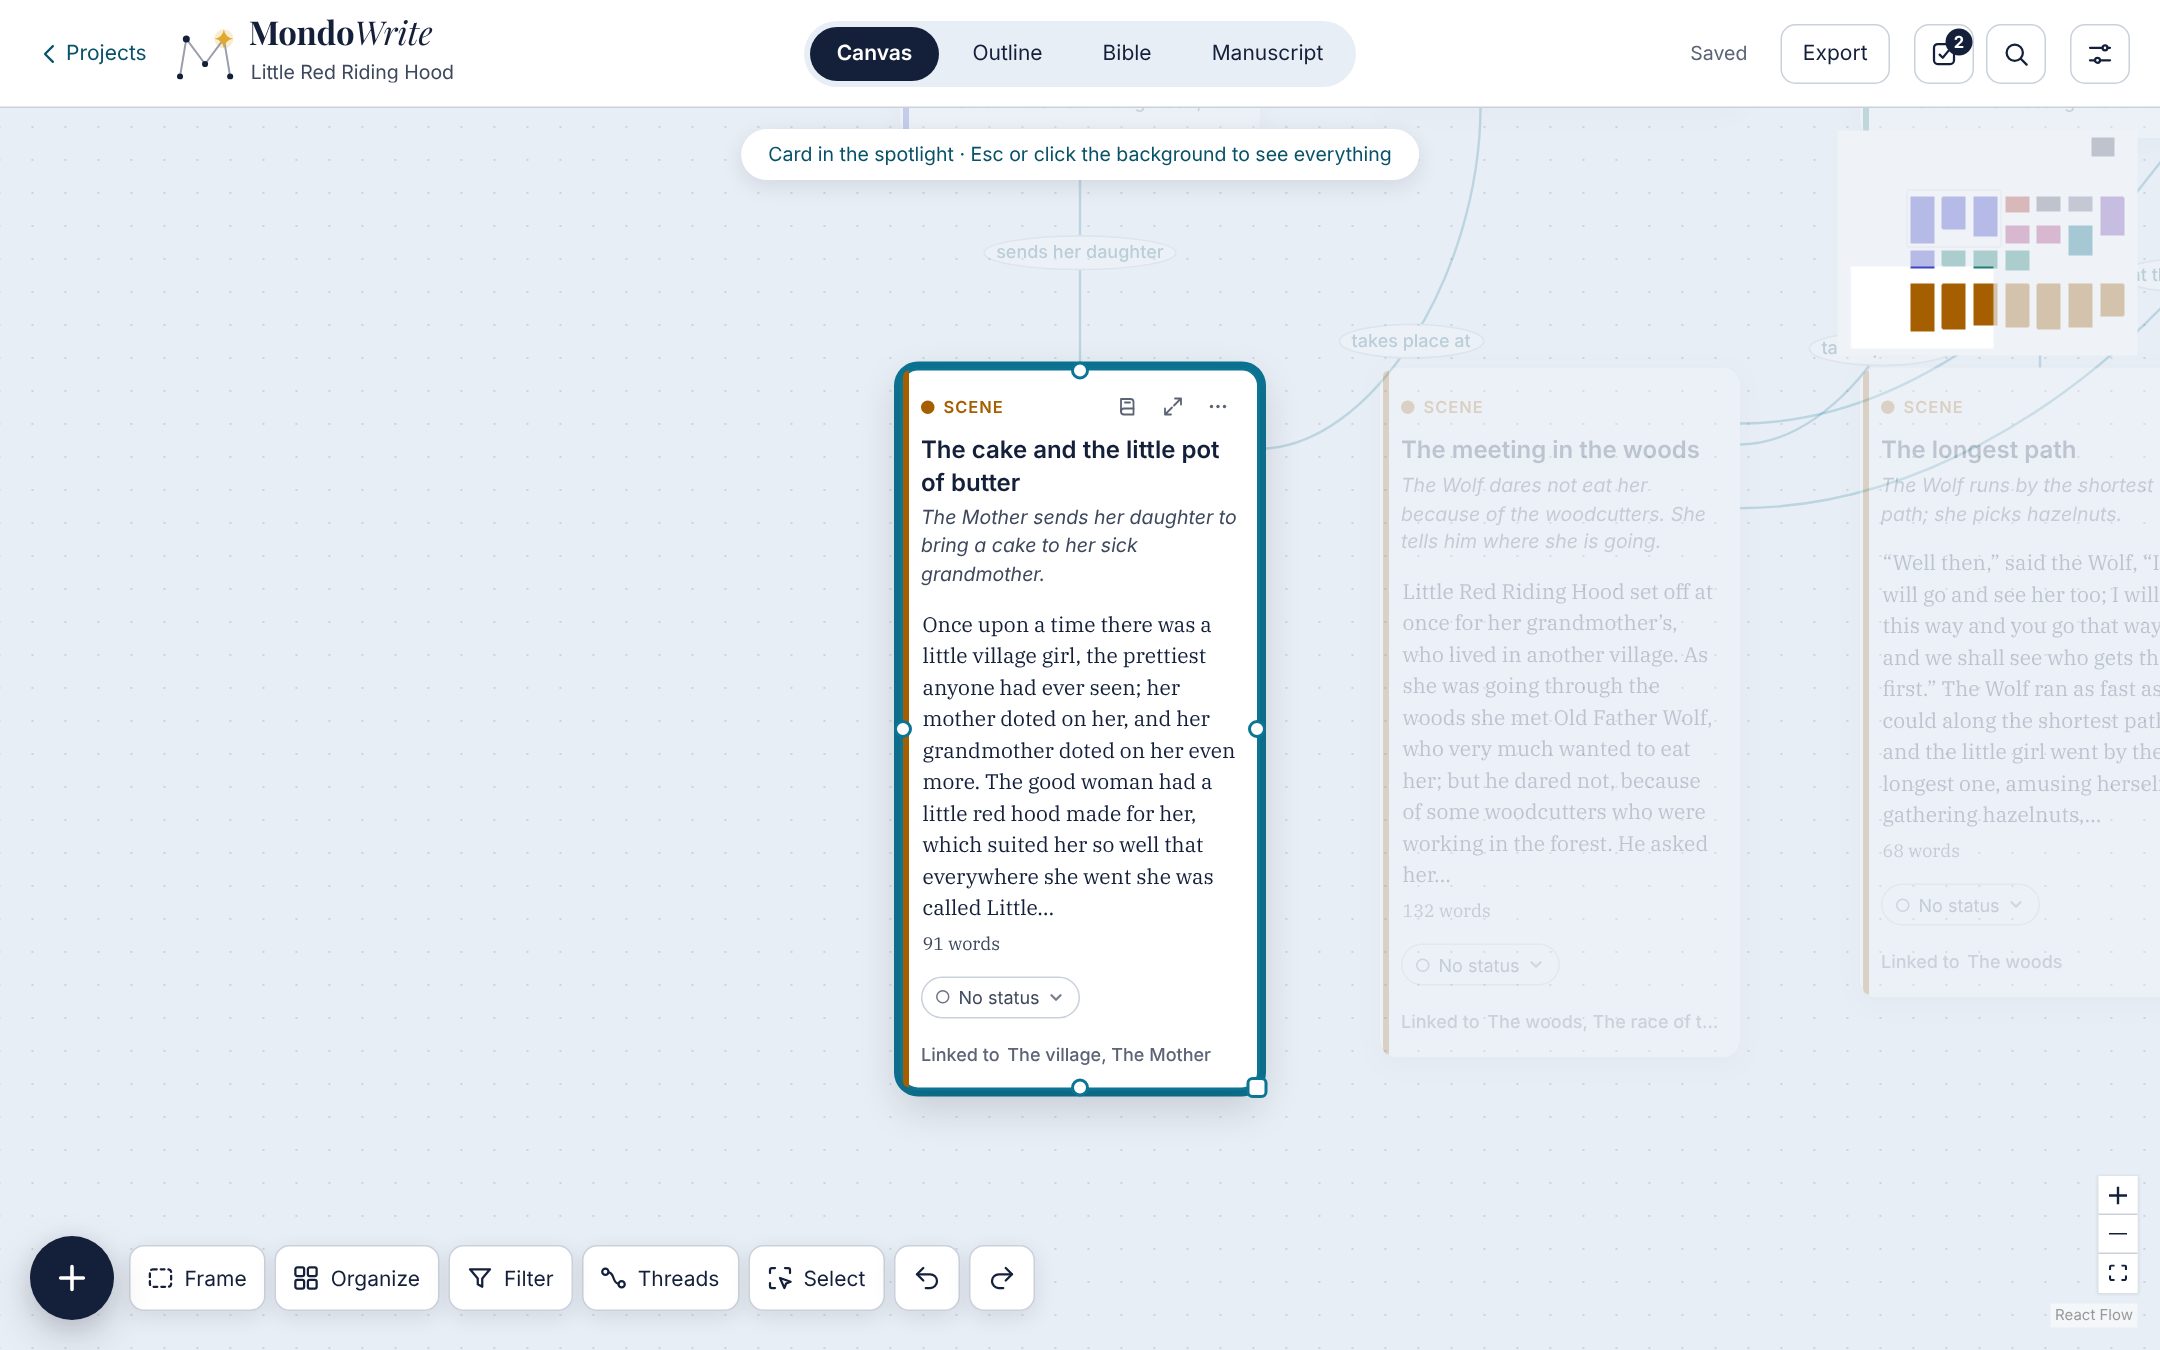
The magnifier (Ctrl F) searches card titles and text, ignoring case and accents, and also the text of scenes (“in the text”). Pick a result: the canvas centers on the card and moves in closer (100%, never further away), and puts it in the spotlight (the others fade; Esc or a click on the background brings everything back), or the scene opens in the Manuscript.
Undo, delete, the trash
Undo and Redo (at the bottom, or Ctrl Z and Ctrl Shift Z) undo and redo changes to the canvas, the outline and the trash. Inside a text, these shortcuts undo typing.
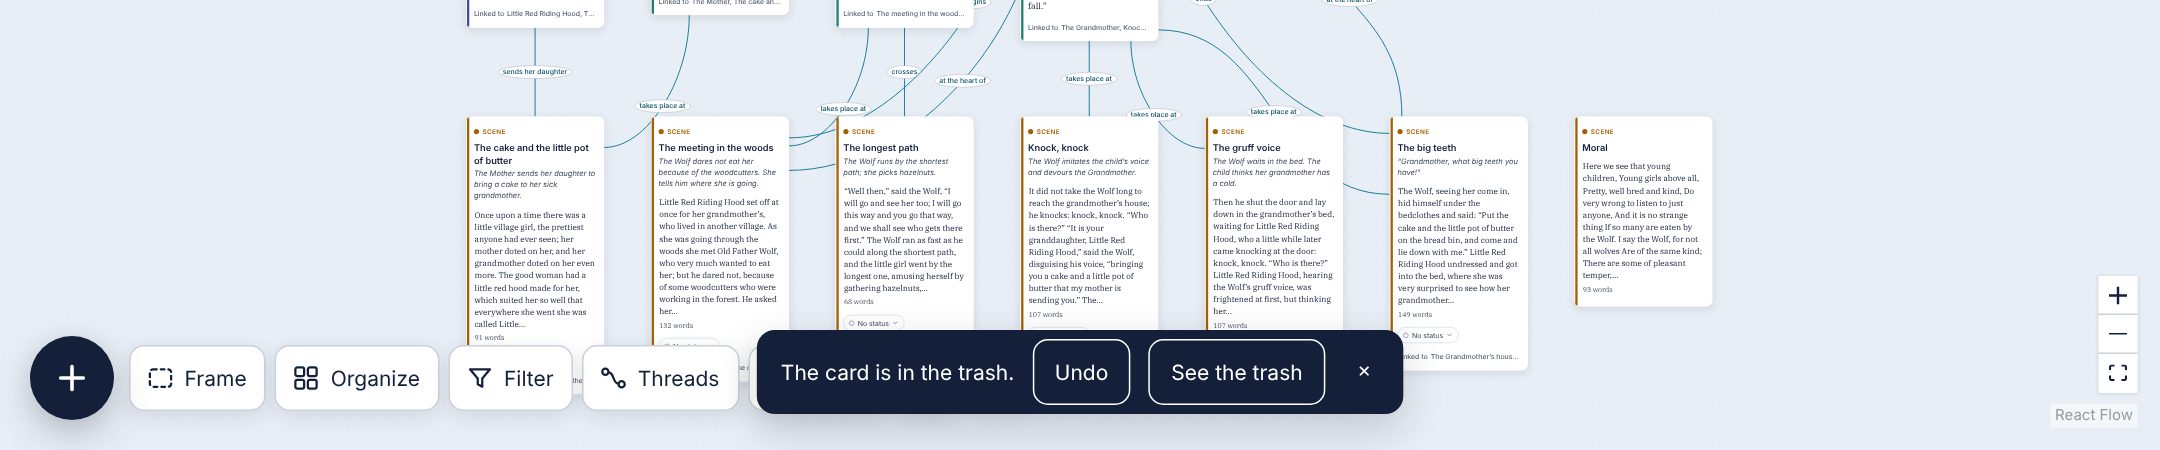
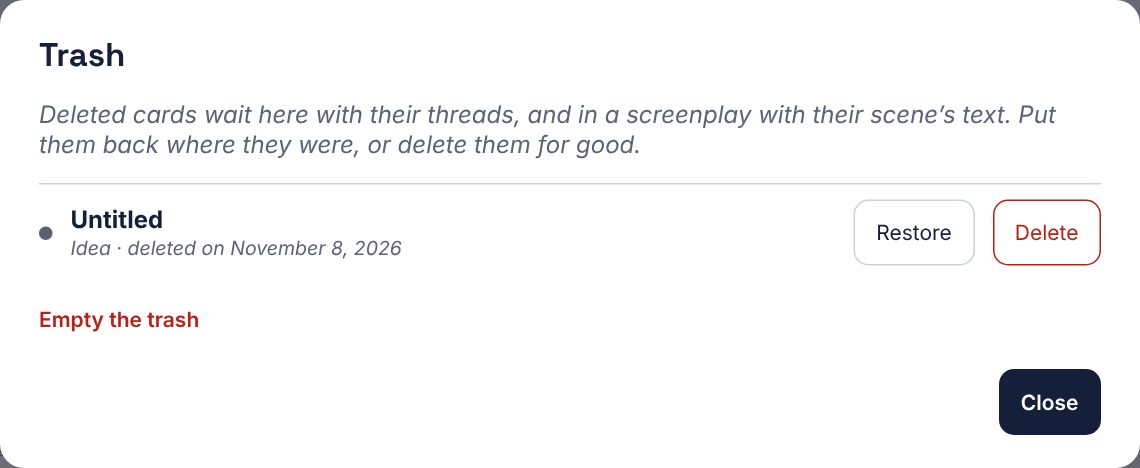
Deleting a card (Move to trash, in red at the bottom of its ⋯ menu, or Delete) moves it to the trash, with its place and threads. A message immediately offers Undo. The trash opens from the Settings button’s menu (Trash (n)), or on a Mac from File › Trash…: Restore puts the card back, Delete erases it for good. A scene’s text is never lost with its card.
To do
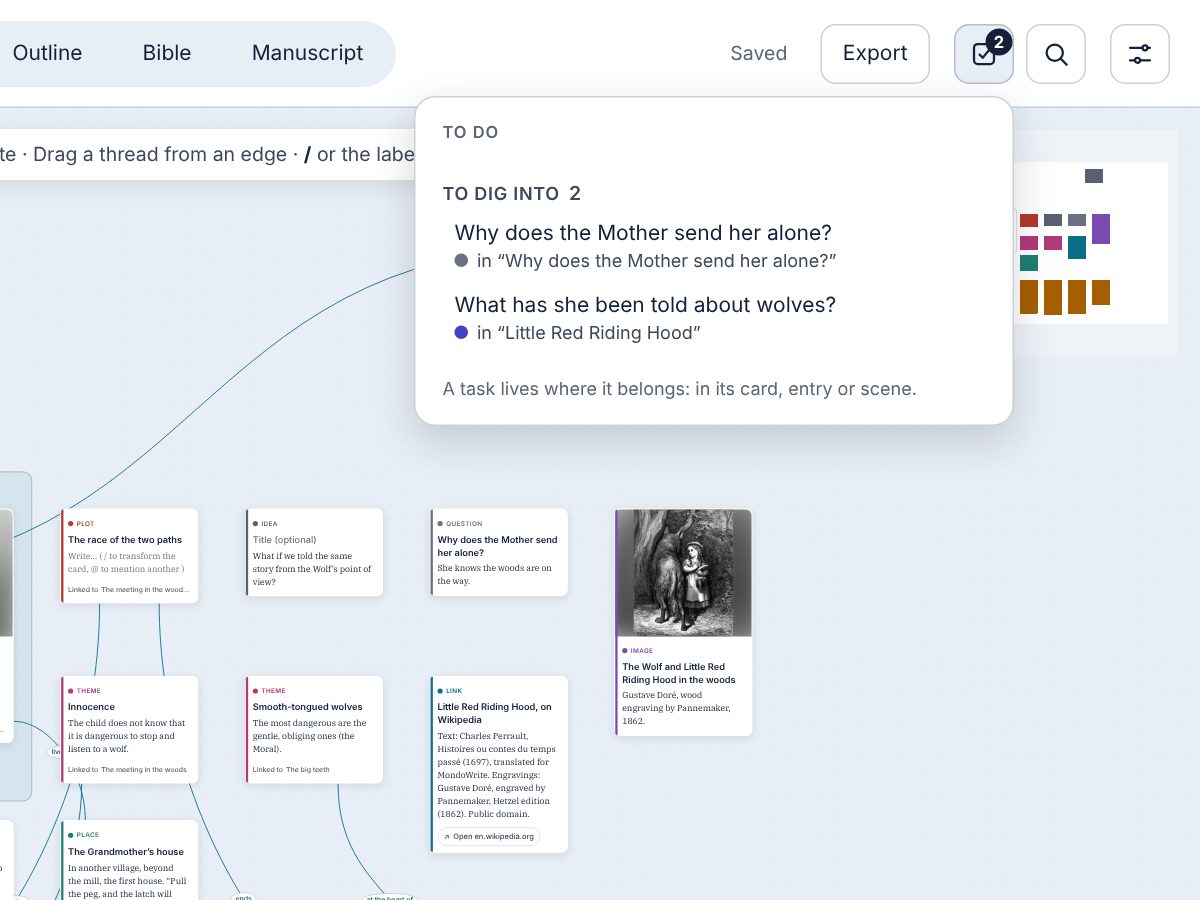
The To do button (Ctrl Shift L) gathers everything that is waiting: unticked boxes in your cards, passages marked To revisit in the manuscript, and the questions To dig into (questions kept in a character’s entry and Question cards). A task stays where you put it: ticking it in the panel ticks it in its card.
Chapter 6The Bible
The Bible gathers the entries of your world. It builds itself: each typed card on the canvas has its entry there, sorted by type. Nothing is copied: editing an entry edits the card.
The contents
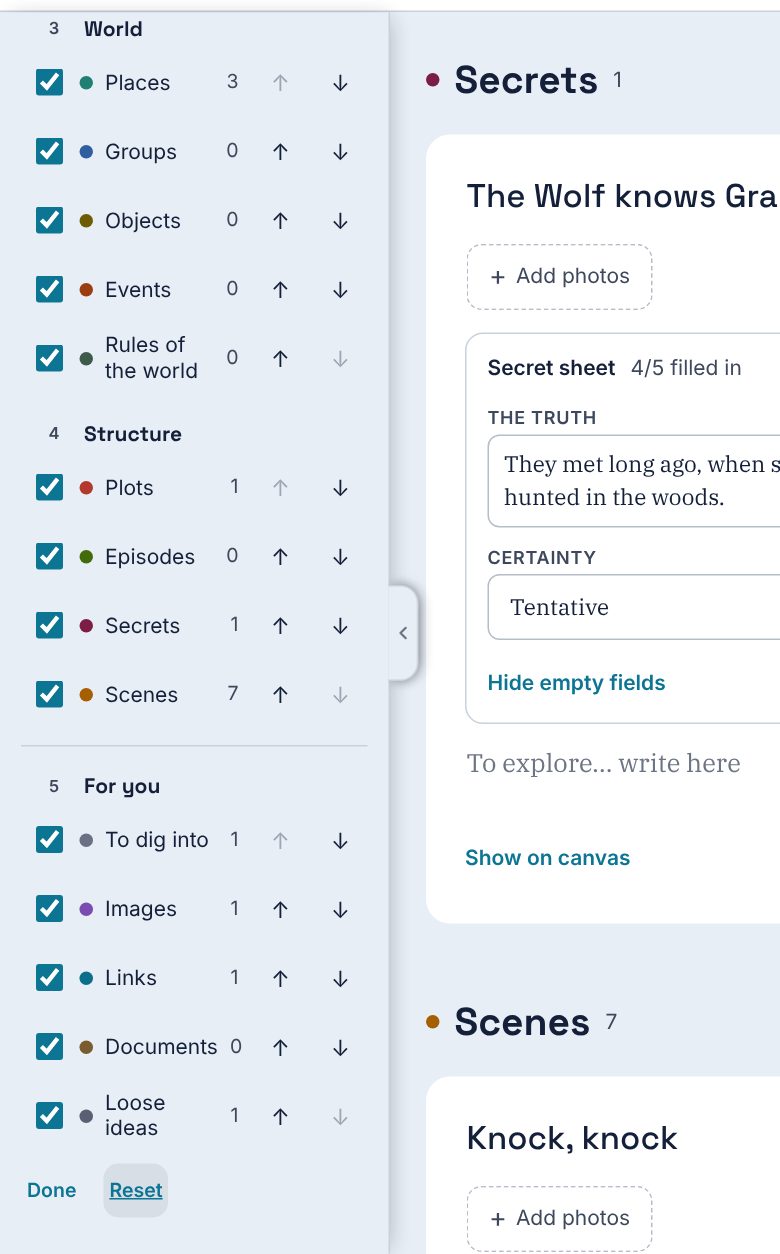
On the left, the contents arrange the sections in five numbered parts, in the order of a pitch pack: 1 · Presentation (the project, the themes), 2 · Characters, 3 · World (the places), 4 · Structure (storylines and scenes) and, set apart, 5 · For you (questions to dig into, images, links, documents, loose ideas): what is just for you, never printed in a pack you send out. Each section shows its number of entries; a click takes you there. Each section’s + button creates an entry there (and so a card on the canvas). Each entry collapses with its arrow, top right, to show only its title; Collapse all and Expand all do the same for the whole section. The device remembers it from one session to the next, and an entry opened from the canvas expands by itself. Choose and order sections lets you hide sections and change their order within their part, with the arrows; this setting also applies to the Word and Markdown export of the Bible.
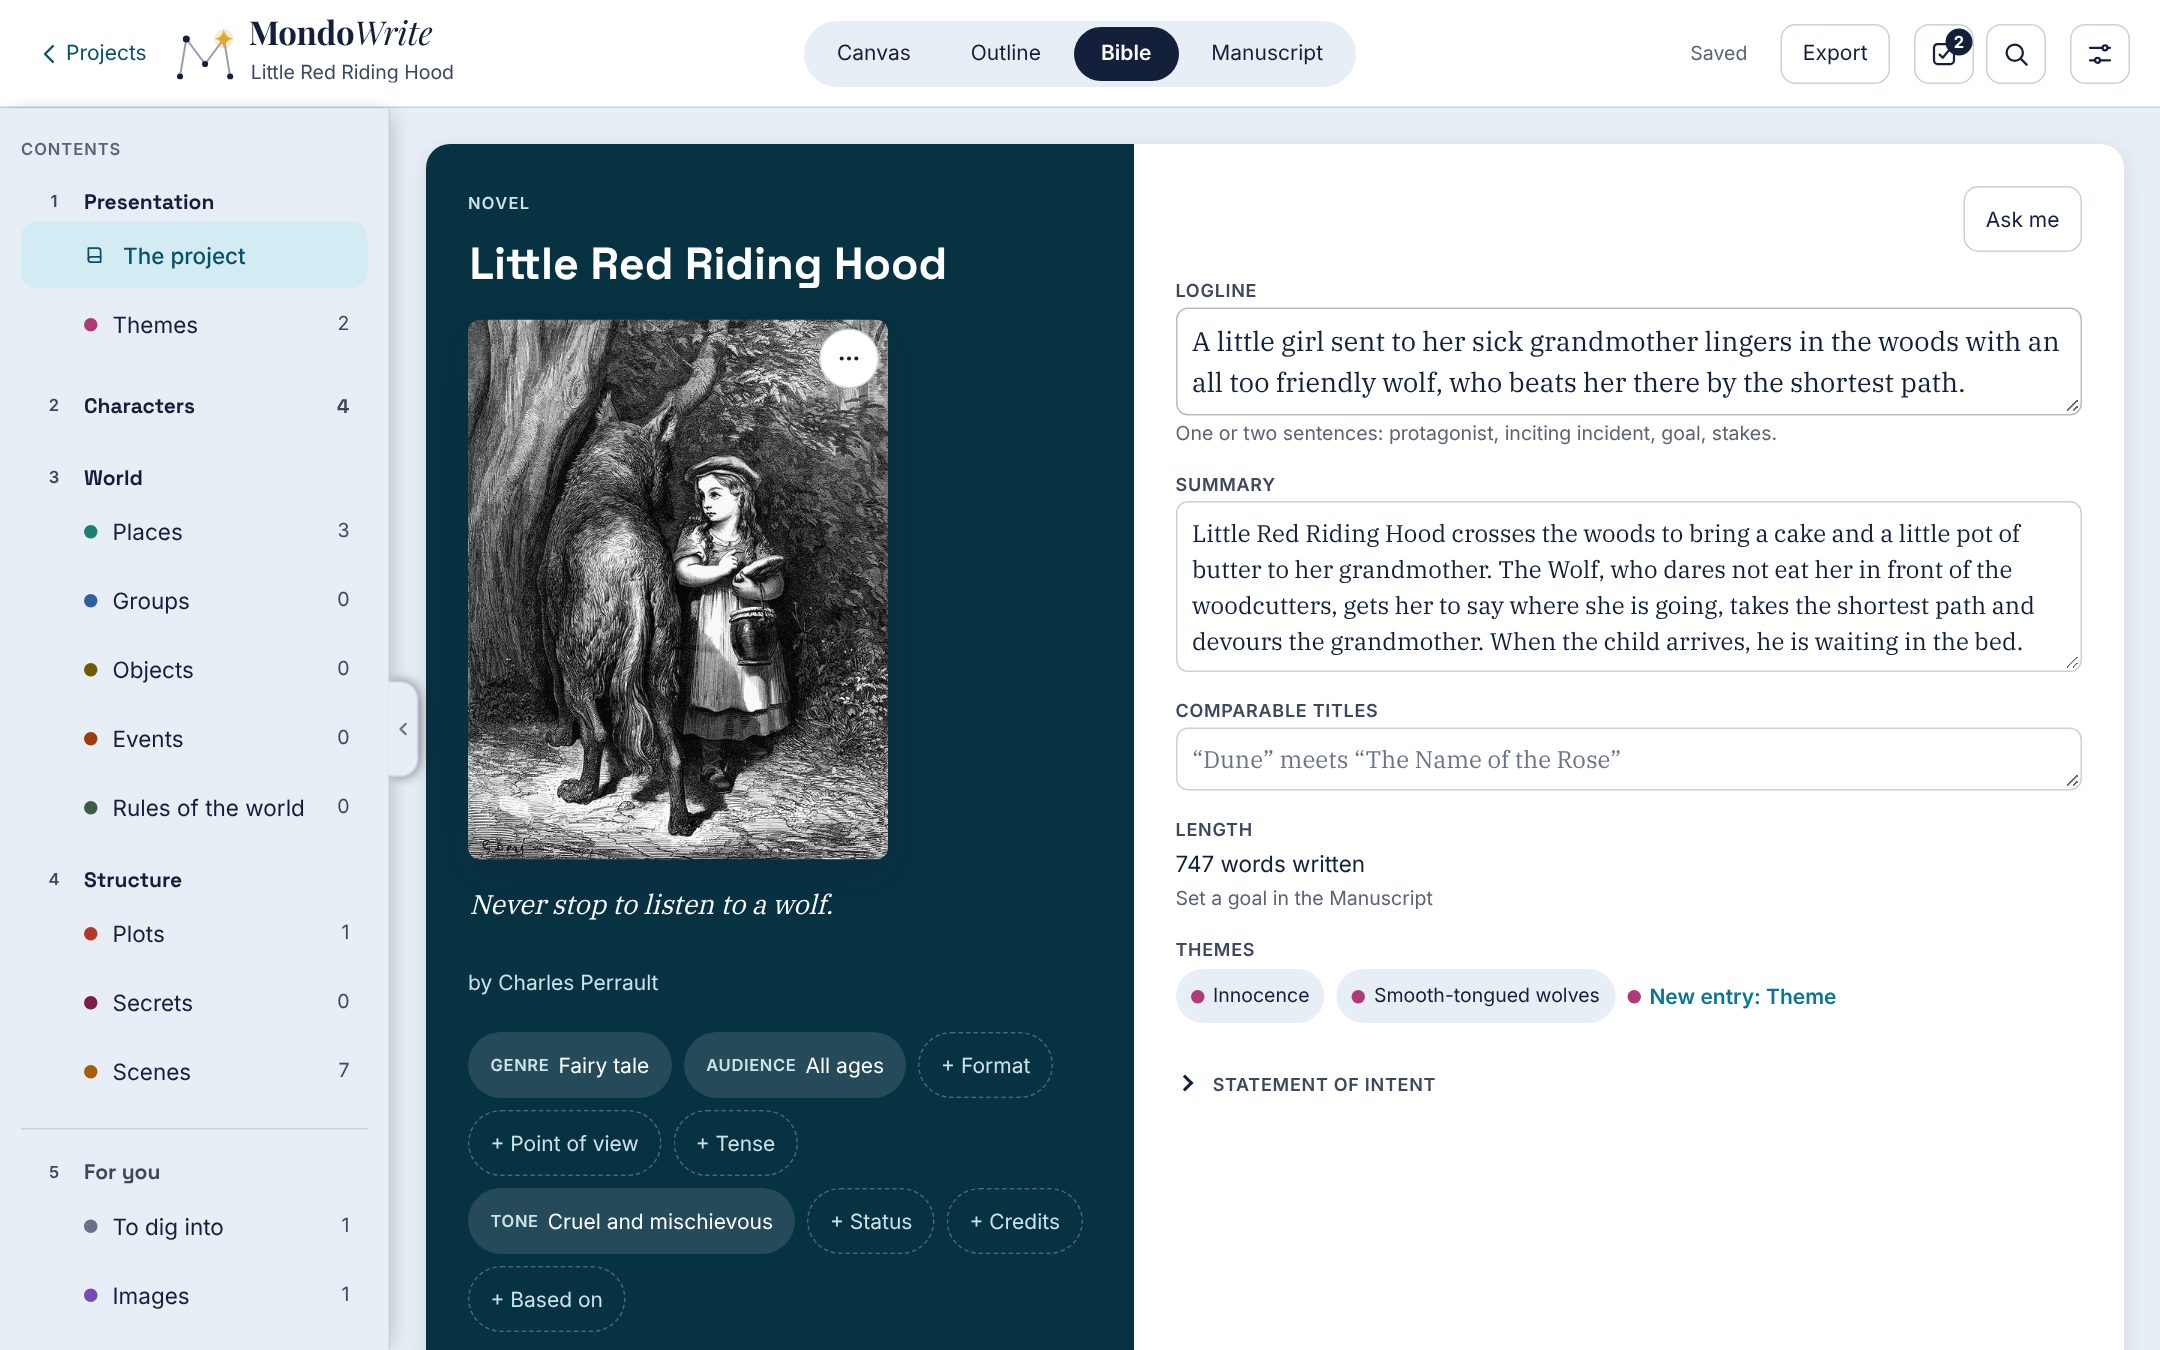
The project cover
The Bible opens on the cover: your book’s identity card, useful to present it to a publisher, an agent or a producer.
- the jacket: title, tagline (one line that makes people want more) and chips for genre, audience, format, point of view, tense, tone, status (first draft, rewriting…), credits and the work the project is adapted from (Based on). Suggestions are offered, or free text with Other;
- under the title, the book cover (or the film poster for a screenplay): Add a cover (Add a poster) opens the Photos window, for an image from your device or a free photo; you can also drop the image on the jacket. Its ⋯ menu replaces or removes it (the file stays in the project folder). It is also the cover of the Bible PDF;
- the logline (who wants what, what stands in the way, what is at stake), the summary, the comparable titles (“Dune” meets “The Name of the Rose”) and the statement of intent;
- the length, computed from the manuscript (words written and goal), and the themes, which are your Theme cards.
Ask me, top right of the cover, asks one question at a time for each empty field (“Who wants what, what stands in the way, and what’s at stake?” for the logline). Your answer goes as it is into the field, with Add; Another one moves to the next question. Like the character assistant, it never answers for you.
In a screenplay, the cover follows the Format chip: until it is chosen, it guesses nothing and asks you to choose it. For a series, it also has a folding part, Writing the series, for everything that helps a producer believe in it and a writer join it: Why now, Why me, The promise (what viewers come back for, episode after episode), What it is not, The arena, Before the pilot (what happened before episode one), What holds them together (why your characters cannot walk away), The engine (the central conflict that makes the episodes), A typical episode, The season’s question, Where the season ends, Future seasons, Do, Don’t, Where it could go next and Other platforms (podcast, graphic novel, game: only printed in a document you send). Two more chips under the title: Shape (episodic, serialized, hybrid) and Pilot (premise pilot or template pilot).
For a miniseries, the same sections, without future seasons: the question and the ending cover the whole miniseries.
For a film (feature, short, TV movie), the part is called Writing the film: Why now, Why me, What it is not, Director’s note (how you see it: image, sound, pace), Feasibility, Do, Don’t and Ideas to keep. The Treatment (the whole film told in 5 to 10 pages) is optional: Add a treatment shows it. Feasibility comes already filled in from the screenplay (scenes, pages, locations, interior and exterior, day and night, speaking parts, main locations): change it and add to it (period, effects, stunts); Take the figures from the screenplay again works it out afresh. A film has no episodes and no Shape or Pilot chips. A section already filled in that does not belong to the chosen format moves to Other sections: nothing is lost.
Episodes live in the outline, season by season; the cover says how many there are and takes you there (See the episodes, New episode). In the Bible, the Episodes section (Structure) lists them with their season: change a title in place, write the synopsis, or Write the episode to open it in the Screenplay view. + New season and + New episode in this season are there too. The series bible export reads these episodes: their list, their plots and characters (those of the episode’s scenes, through threads and lines) and the thread grid.
Under the note of intent, a discreet marker gives its length: a page is about 450 words.
A character’s entry
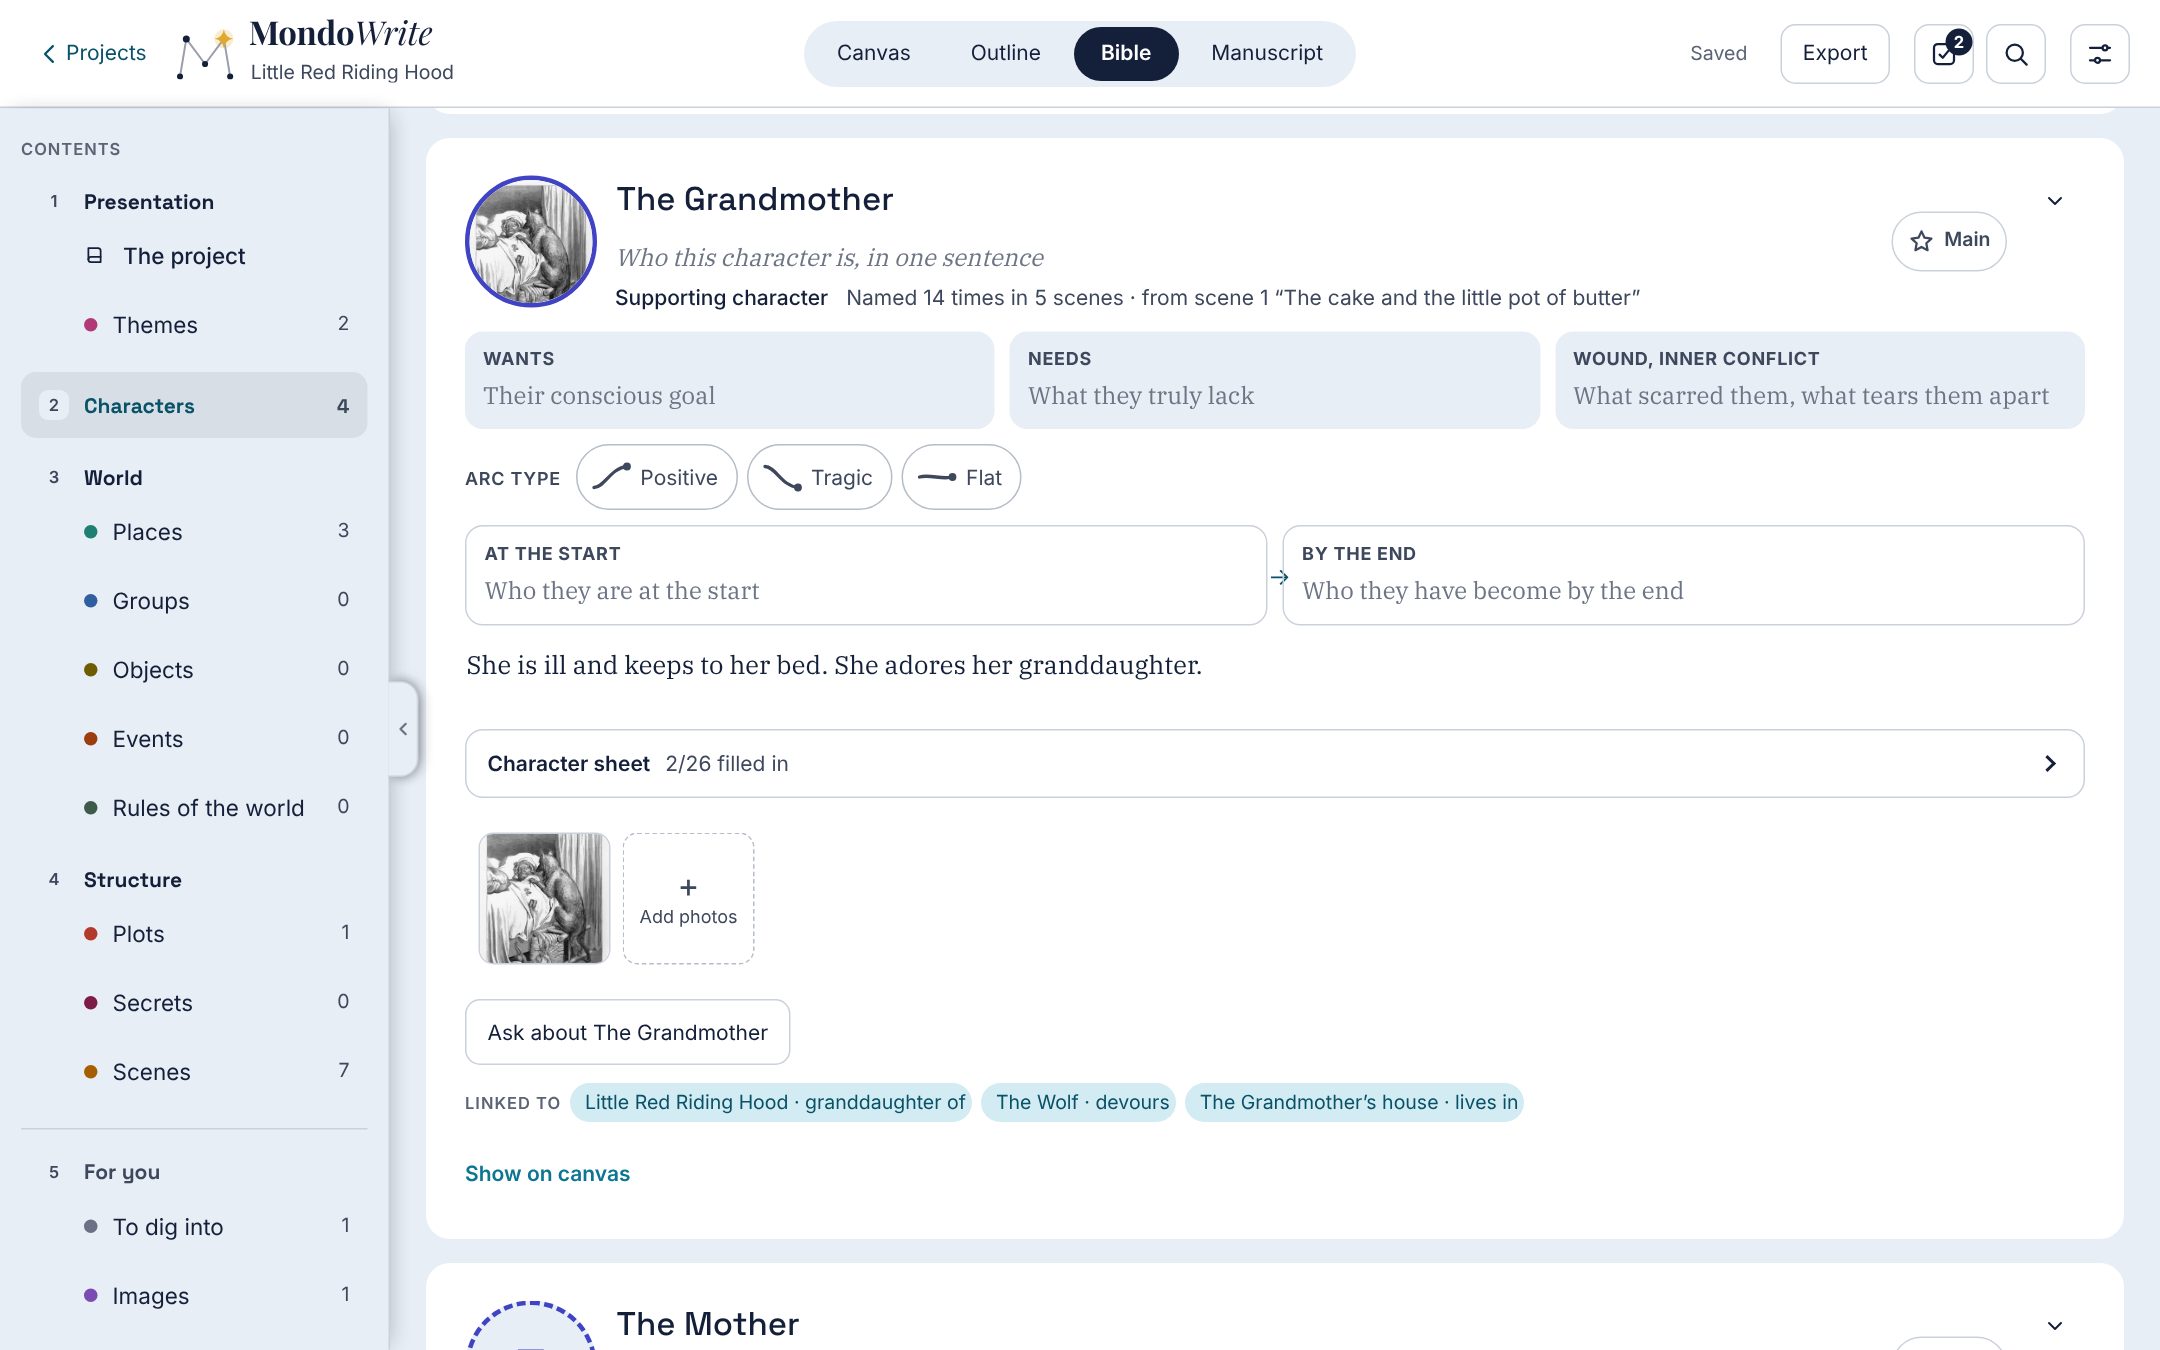
Each character has an entry that gets to the point:
- their portrait (the card’s image, in a circle), their role, and on one line how many times they are named in the manuscript, in how many scenes, starting from which;
- under their name, their hook: who they are, in one sentence. The pitch pack uses it too;
- the Main button (a star) marks them as a main character: they come first in the section and, in a pack you send out, keep their full sheet; the others are grouped under “Also”;
- their motor: what they want (Wants), what they need (Needs), and their Wound, inner conflict. If their role says “antagonist”, the motor becomes Motivation, Strength, Flaw;
- their arc type, drawn: Positive (they grow), Tragic (they fall), Flat (they don’t change but change the world), then their arc in two steps: At the start and By the end;
- your free text (the card’s text), editable in place;
- the folded character sheet: gender, age, occupation, nicknames, origin, appearance, personality, voice, fear, secret, relationships… Everything is optional. Empty fields wait under Add if useful: a tap opens one. You will also find the three levels of stakes there (Outer stakes, Relationship stakes, Inner stakes) and How to write them, useful for a series bible, then more to dig into: Paradox, Dilemma, their limiting belief, what they hold dear, their Blind spot, their strategy and what it costs them;
- the gallery of reference photos (Add photos), and the Linked to cards, with each thread’s label.
Suggest a name
For a character, Suggest a name… (the card’s ⋯ menu, the bottom of its sheet, or when typing a new name in the screenplay) opens a window: pick a Country, what you’re looking for (a first and last name, a first name, a last name) and the Gender, then a click on a name gives it to the card; More draws new ones. The lists ship with the app (offline). For France and the United States they come from official registers (INSEE; Social Security Administration and Census): the draw follows how common each name is, and Born in the picks the decade of birth (prefilled from the card’s age, as of today; for a historical story, pick the decade by hand). Other countries use plain lists with no period or frequency: the draw only takes the country and gender into account. A first or last name already used by a card in the project is not suggested.
The character assistant
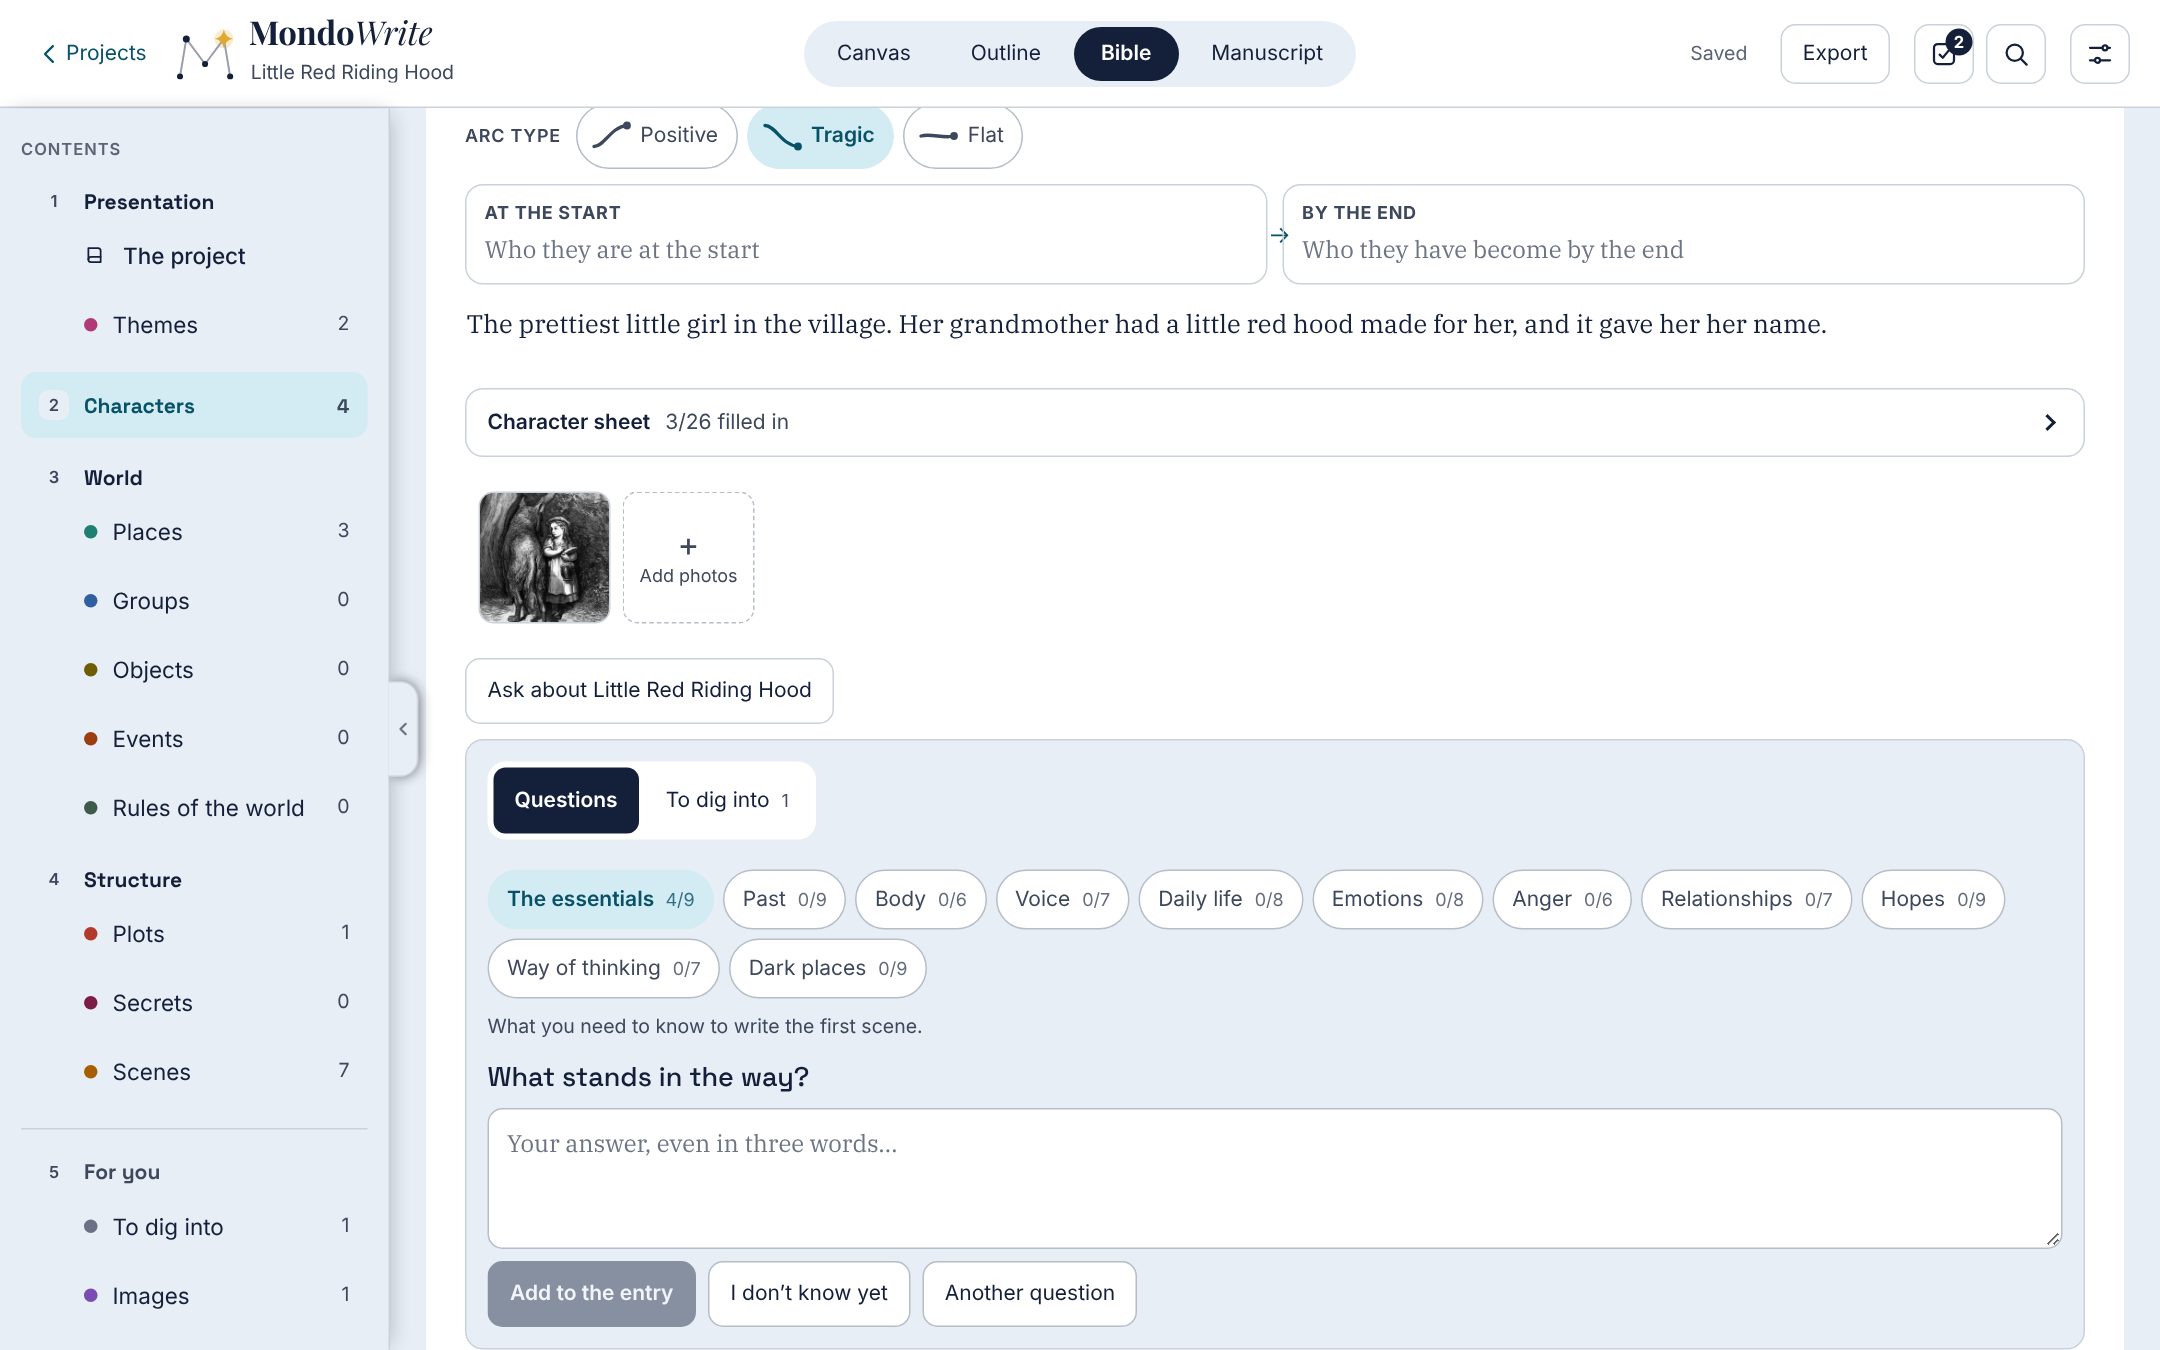
Ask about … opens the assistant, which helps you dig into a character by asking questions, one at a time. It never answers for you.
- Questions are sorted by theme: The essentials, Past, Body, Voice, Daily life, Emotions, Anger, Relationships, Hopes, Way of thinking, Dark places. Each theme shows how many questions have an answer.
- Write your answer, even in three words, then Add to the entry. If the question matches a field of the sheet, the answer goes into that field; otherwise it is kept in Answers to questions, below the sheet.
- I don’t know yet keeps the question for later, in the To dig into tab (and in “To do”). Another question moves to the next one.
- With an AI plugged in, Tailored asks for a question written from the entry, and AI summary puts what you wrote in order (see the AI chapter).
The relationship map
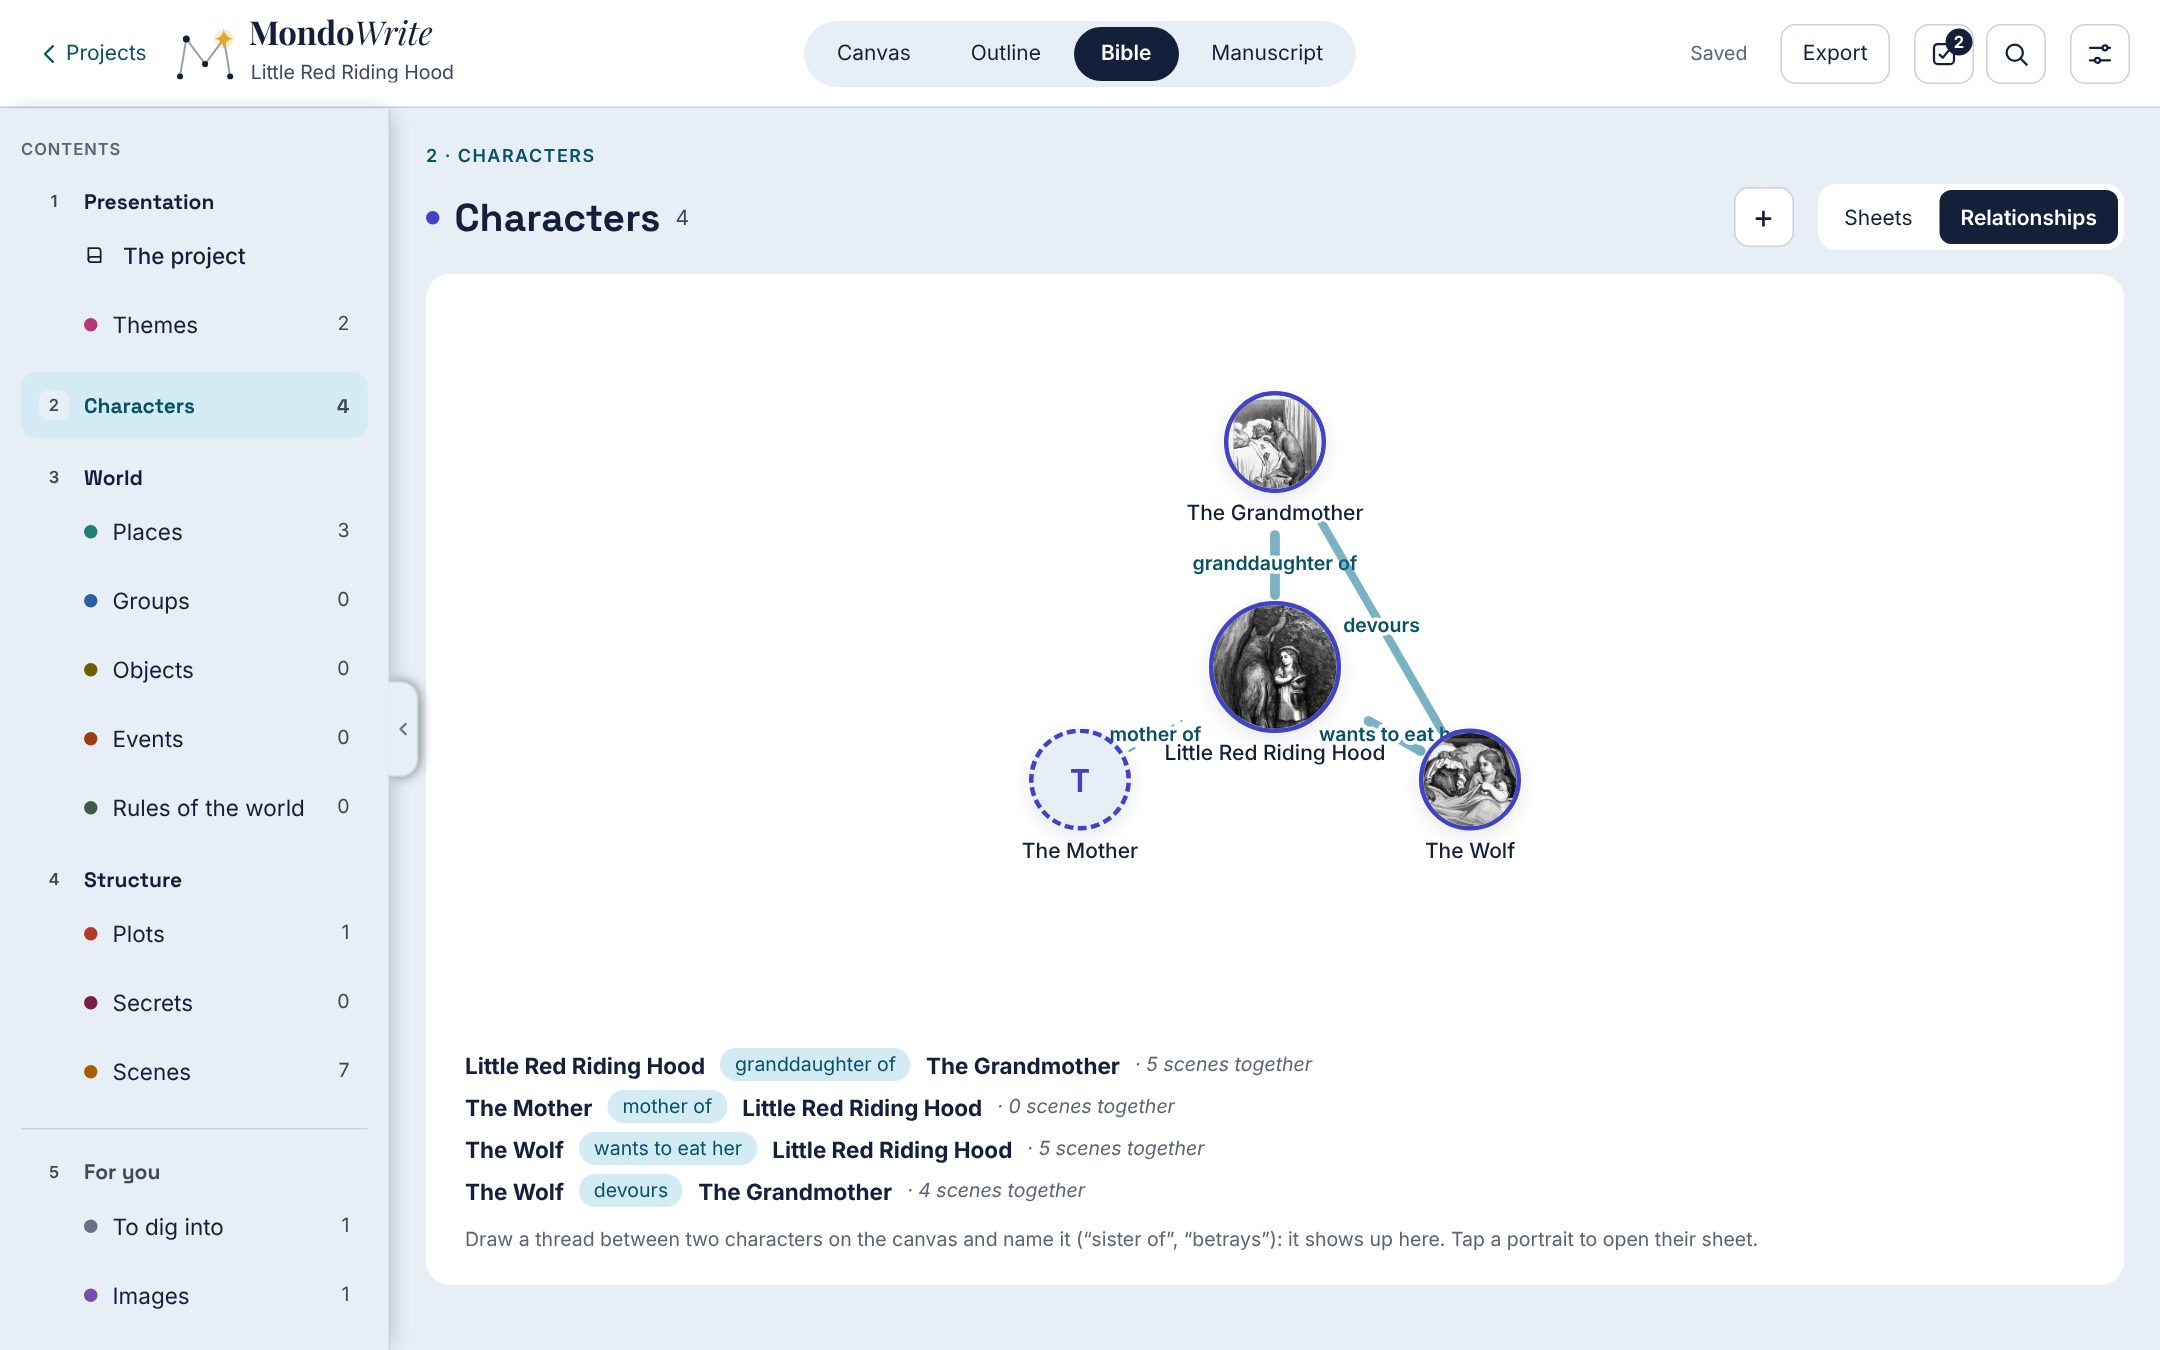
In the Characters section, the Relationships tab draws the characters and the threads that connect them on the canvas, with their labels, then the list of relationships. Draw a thread between two characters and name it (“sister of”, “betrays”): it shows up here. Tap a portrait to open their entry.
A thread gets thicker with the number of scenes the two characters share, and the list spells it out (“3 scenes together”). A dotted thread joins two characters who never share a scene: a relationship the story doesn’t show yet.
Figures under each entry
Under each character’s name, a discreet line gives their scenes (and, in a screenplay, their lines and share of speaking time); under each place’s name, its scenes (and for a location, its pages, interior or exterior, day or night). Everything is read from your text. The details, sorting and CSV export are in the Statistics window, opened from the Manuscript or the Screenplay (see “Project statistics”).
Other entries
Each type has its sheet, folded under the text:
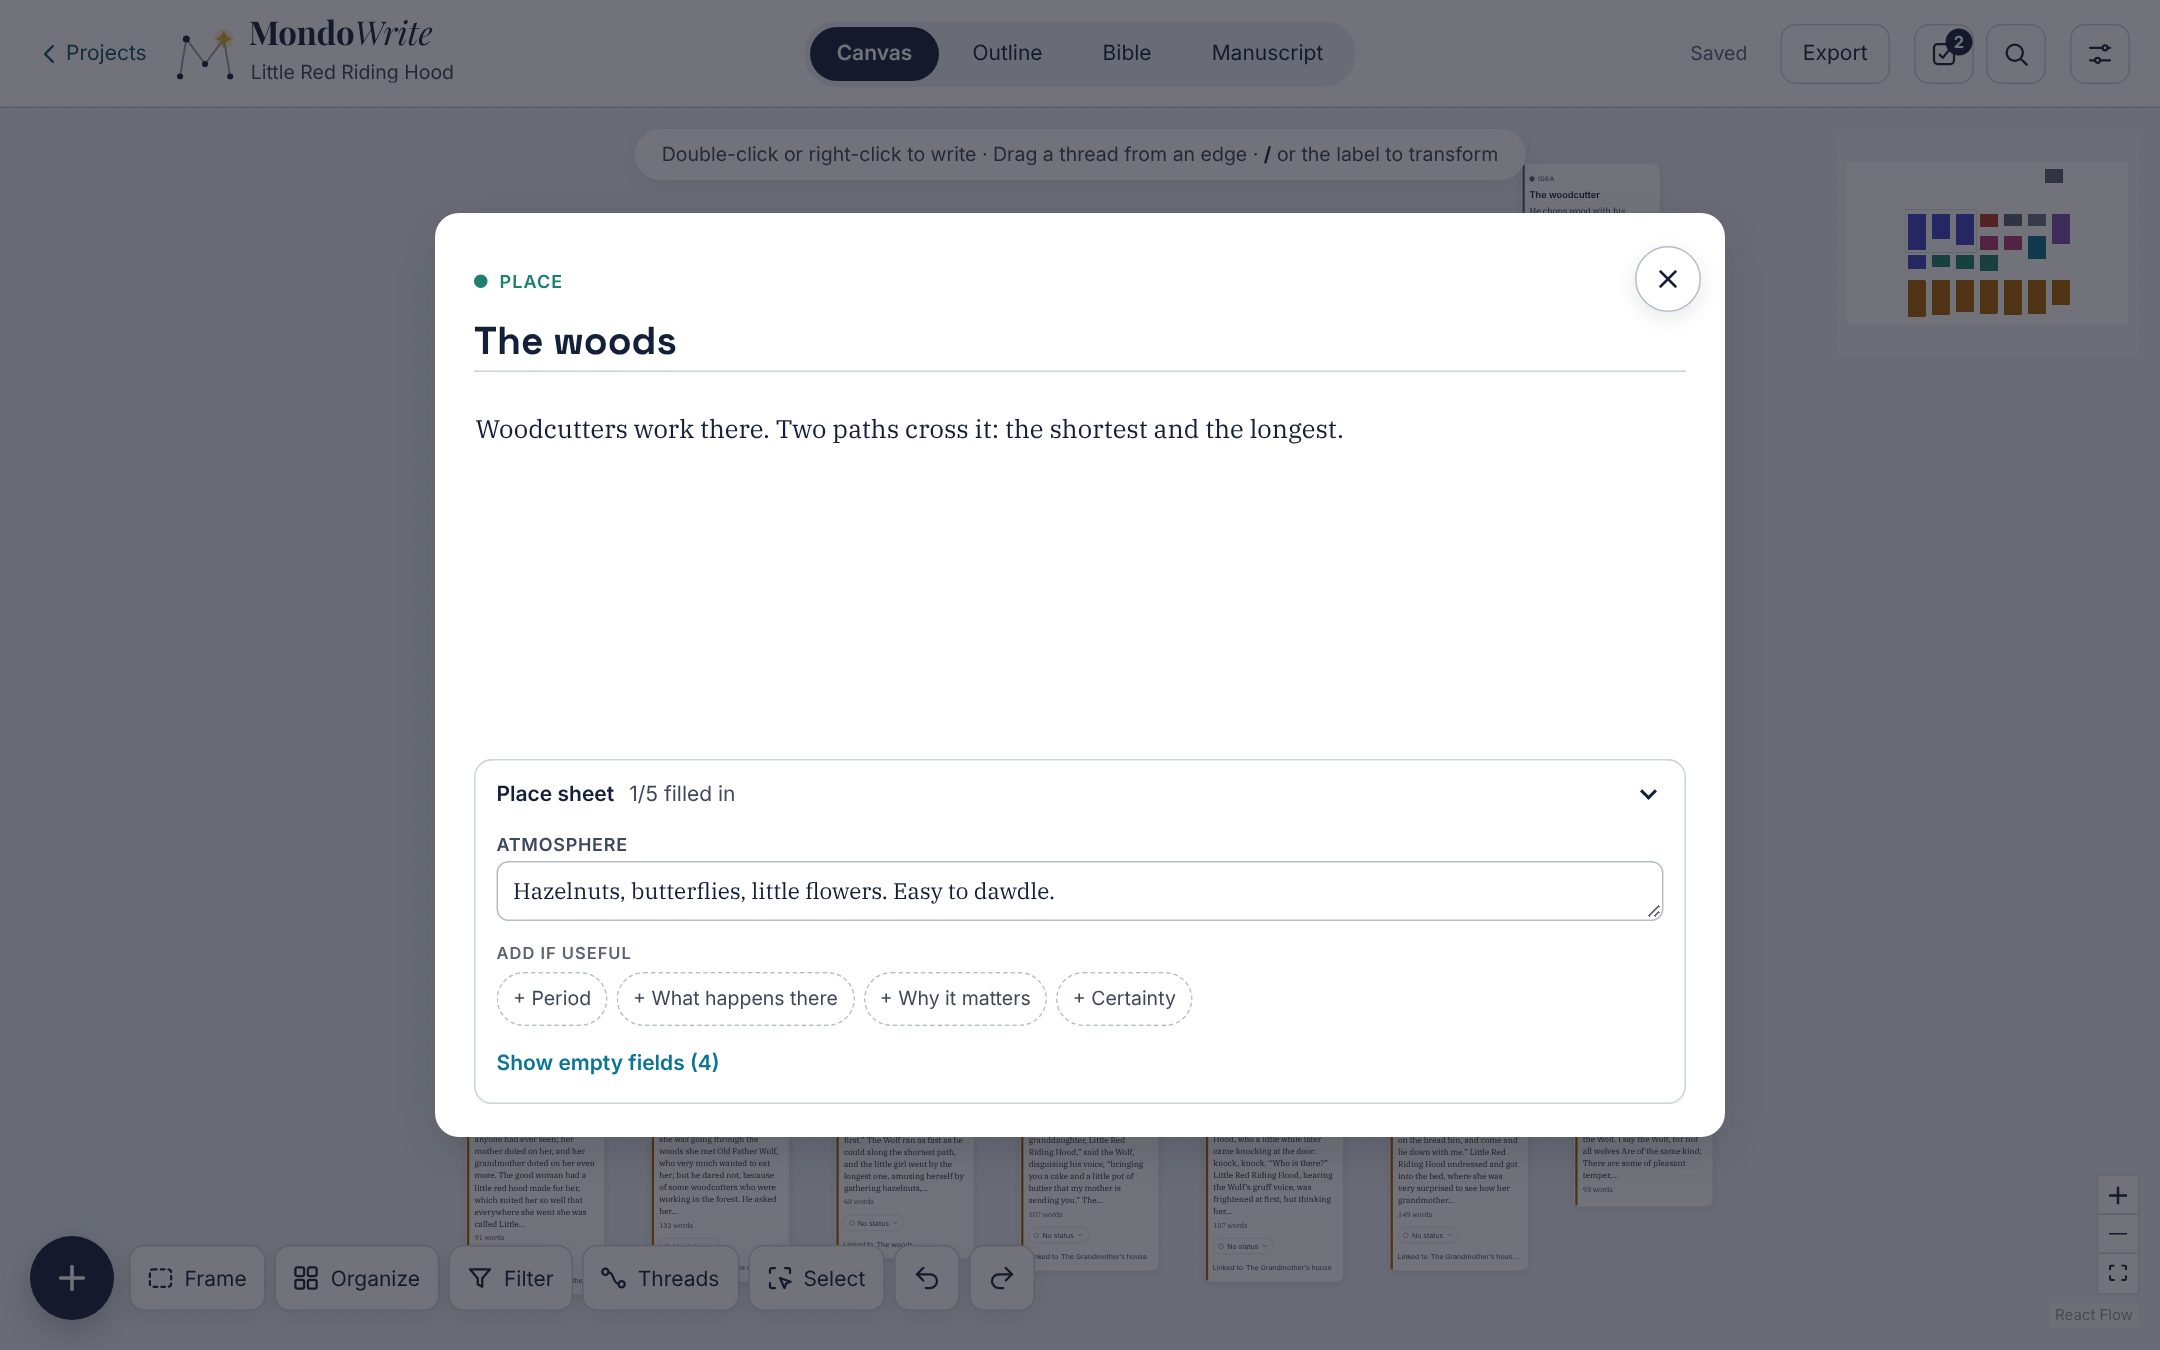
- Place: period, atmosphere (sounds, smells, light), what happens there, why it matters. The number of scenes set there is shown.
- Plot: nature, dramatic question, stakes, trigger, obstacles, turning point, resolution.
- Group, Object, Event, Rule, Secret: see “Card types”.
- Scene: its synopsis, its status and the start of its text (a click opens it to write), then, if useful, its goal, its obstacle, its turn and what changed by the end.
- Question: its Status (open, decided, dropped) and what was decided. A settled question moves to the end of the section, in gray.
- Link, Image, Document: address, author, publication, date accessed, what you take from it, its reliability. Fill in from the page fetches the title and author from the web page.
Every sheet except a scene’s has a Certainty box: Settled, Tentative or To explore. It tells you what you can build on; it never appears in a document you send.
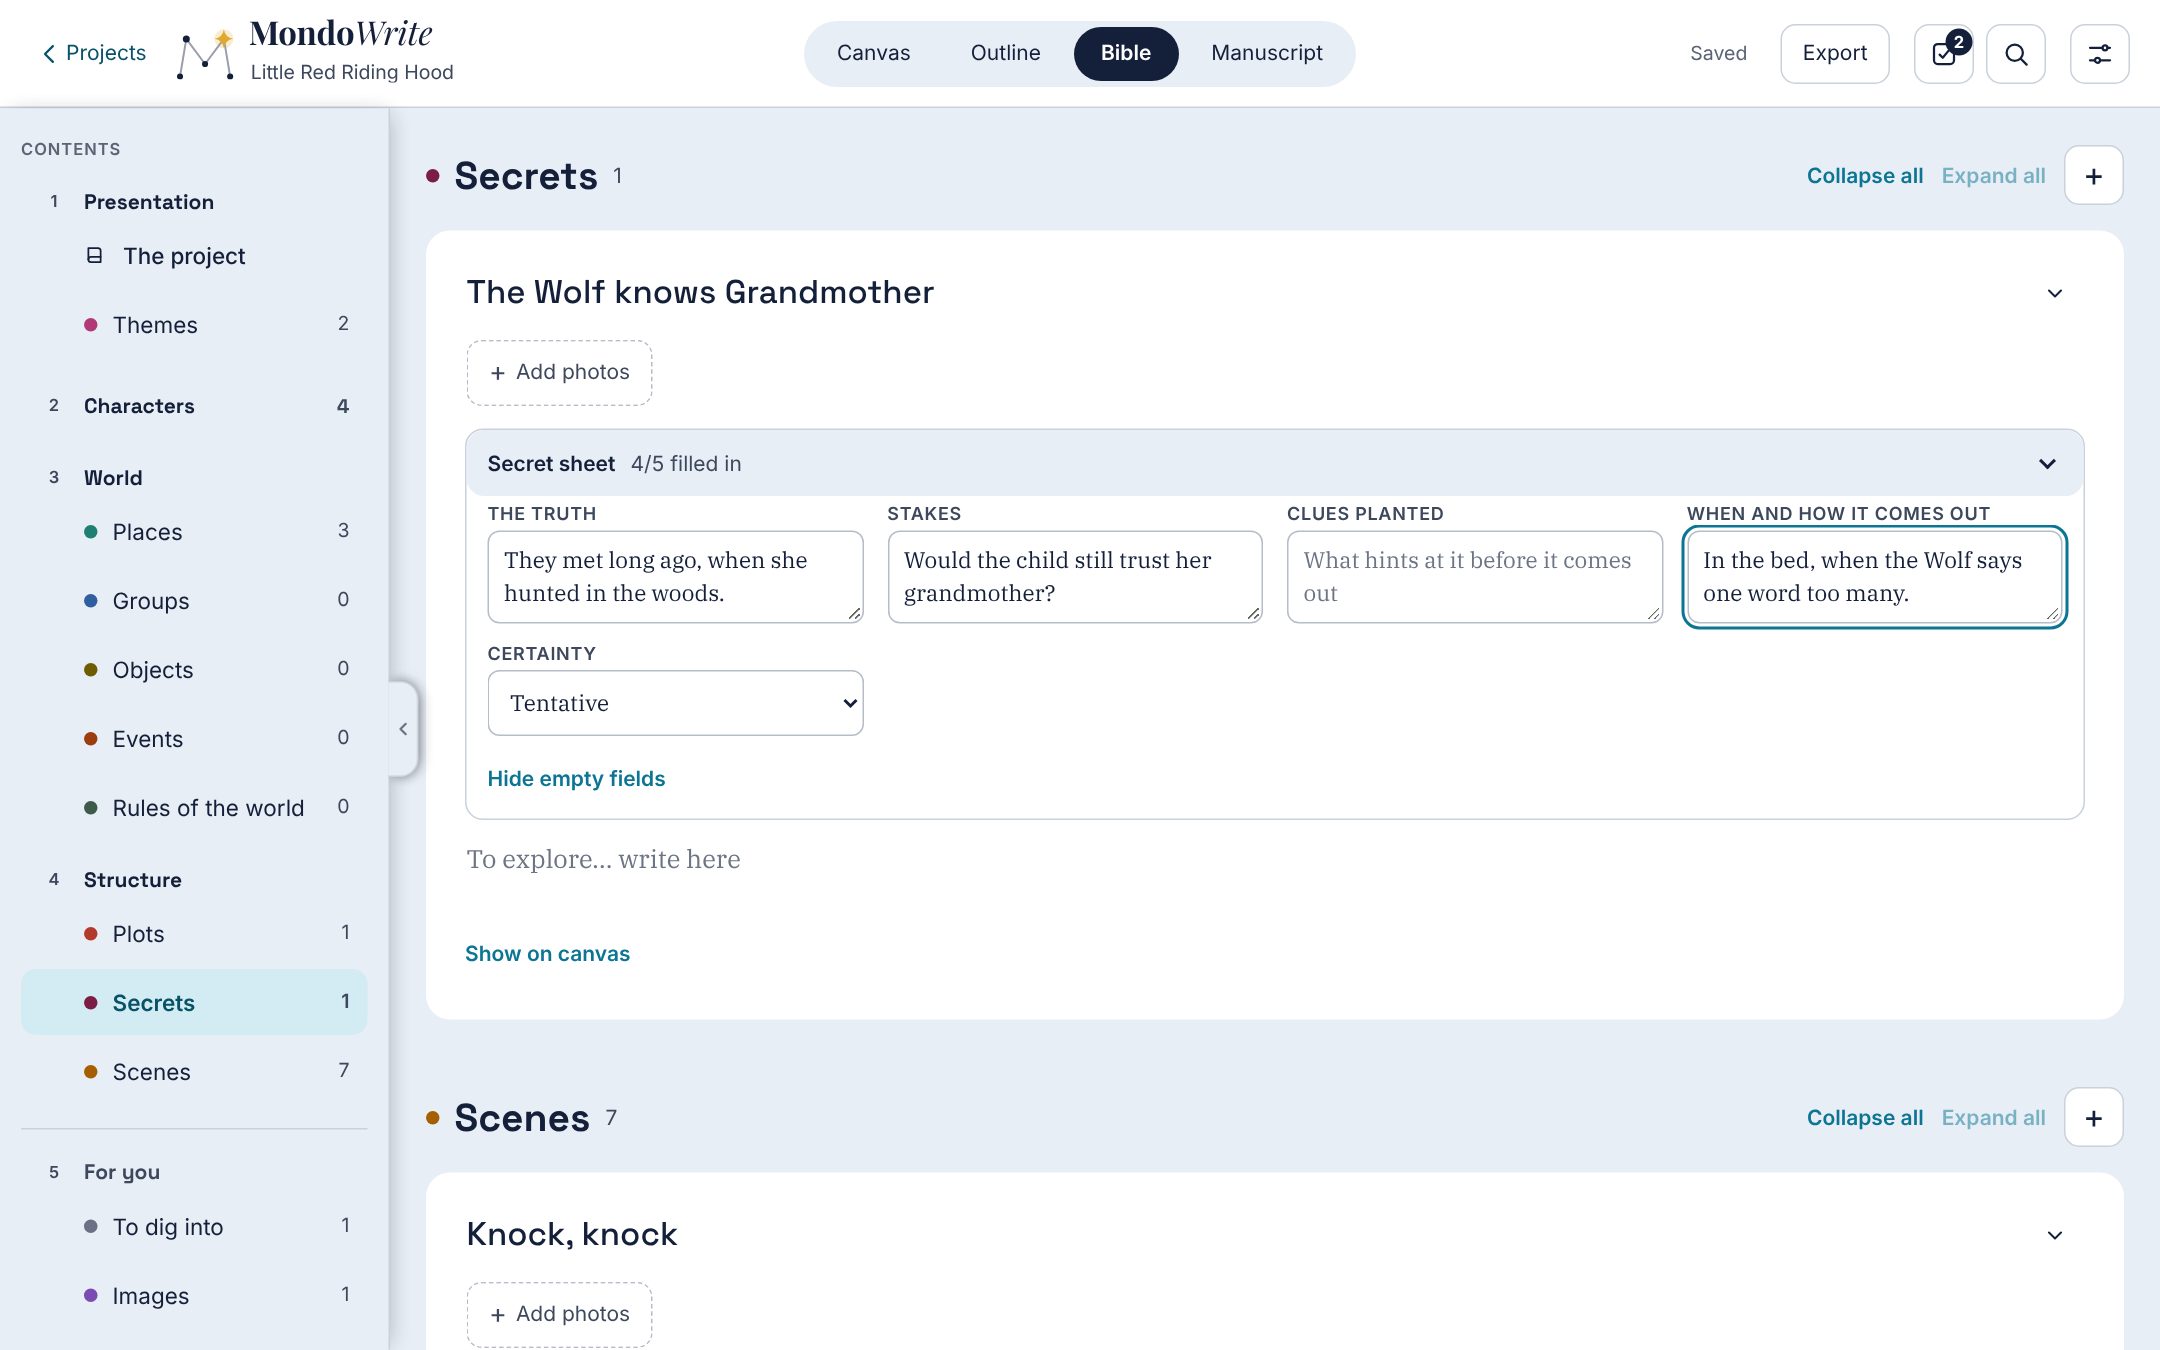
Questions To dig into and loose ideas have their own sections too. Show on canvas, at the bottom of each entry, shows its card in the spotlight: the others fade until you click the background or press Esc.
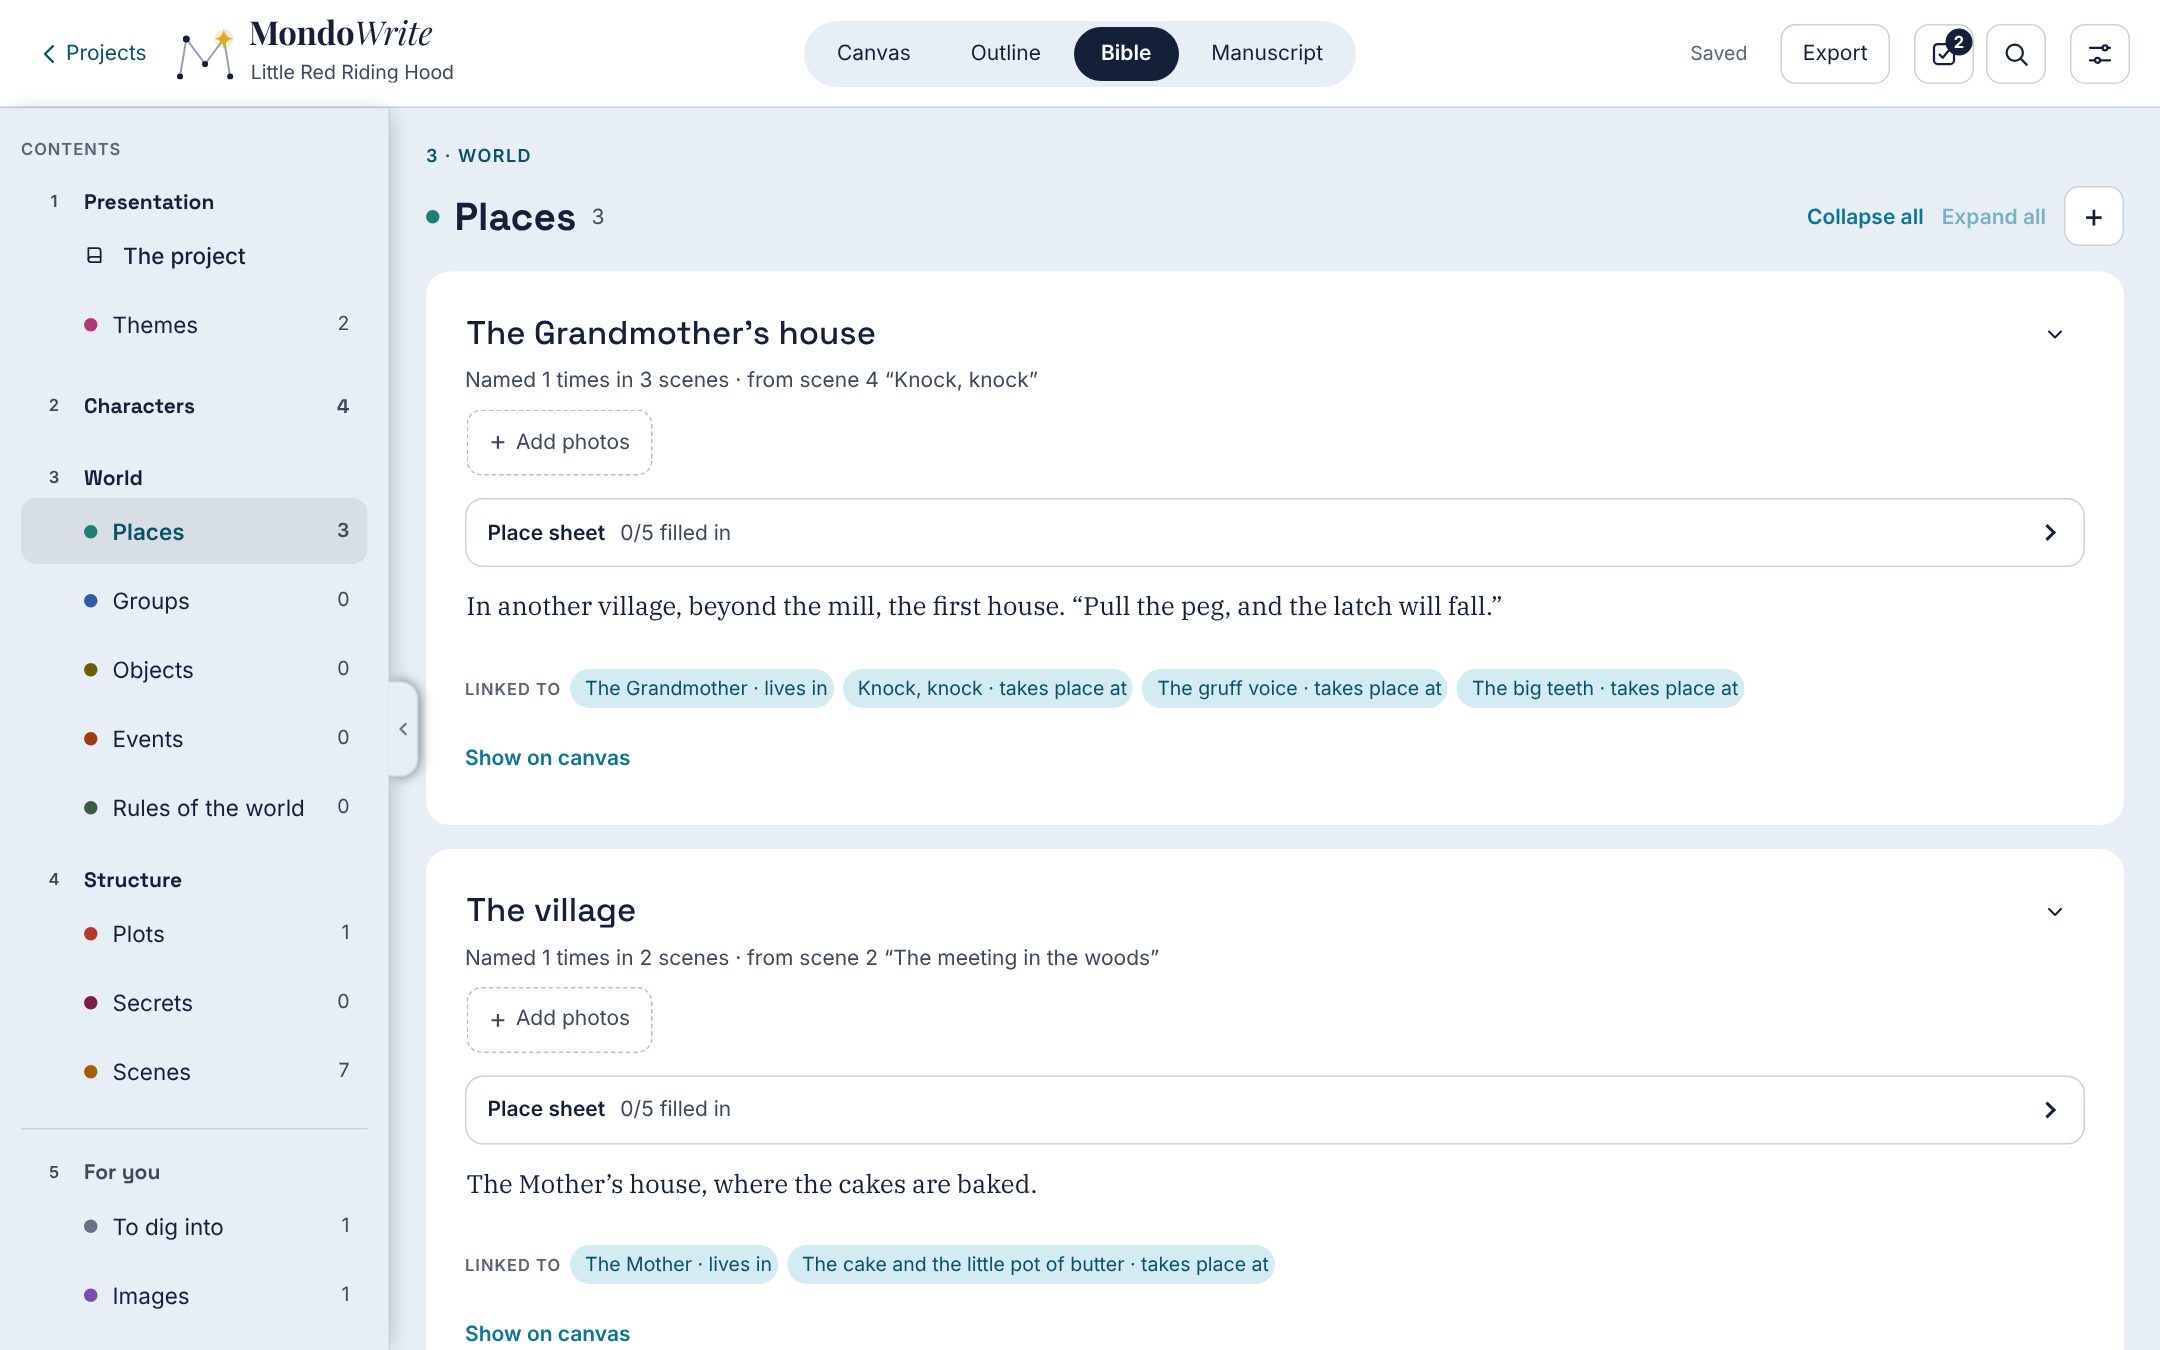
Chapter 7The Outline
The Outline shapes the story: the order of scenes, their place in a structure, their chapters. It contains only scenes: those of the canvas, the Bible or the Manuscript, always the same ones.
Templates
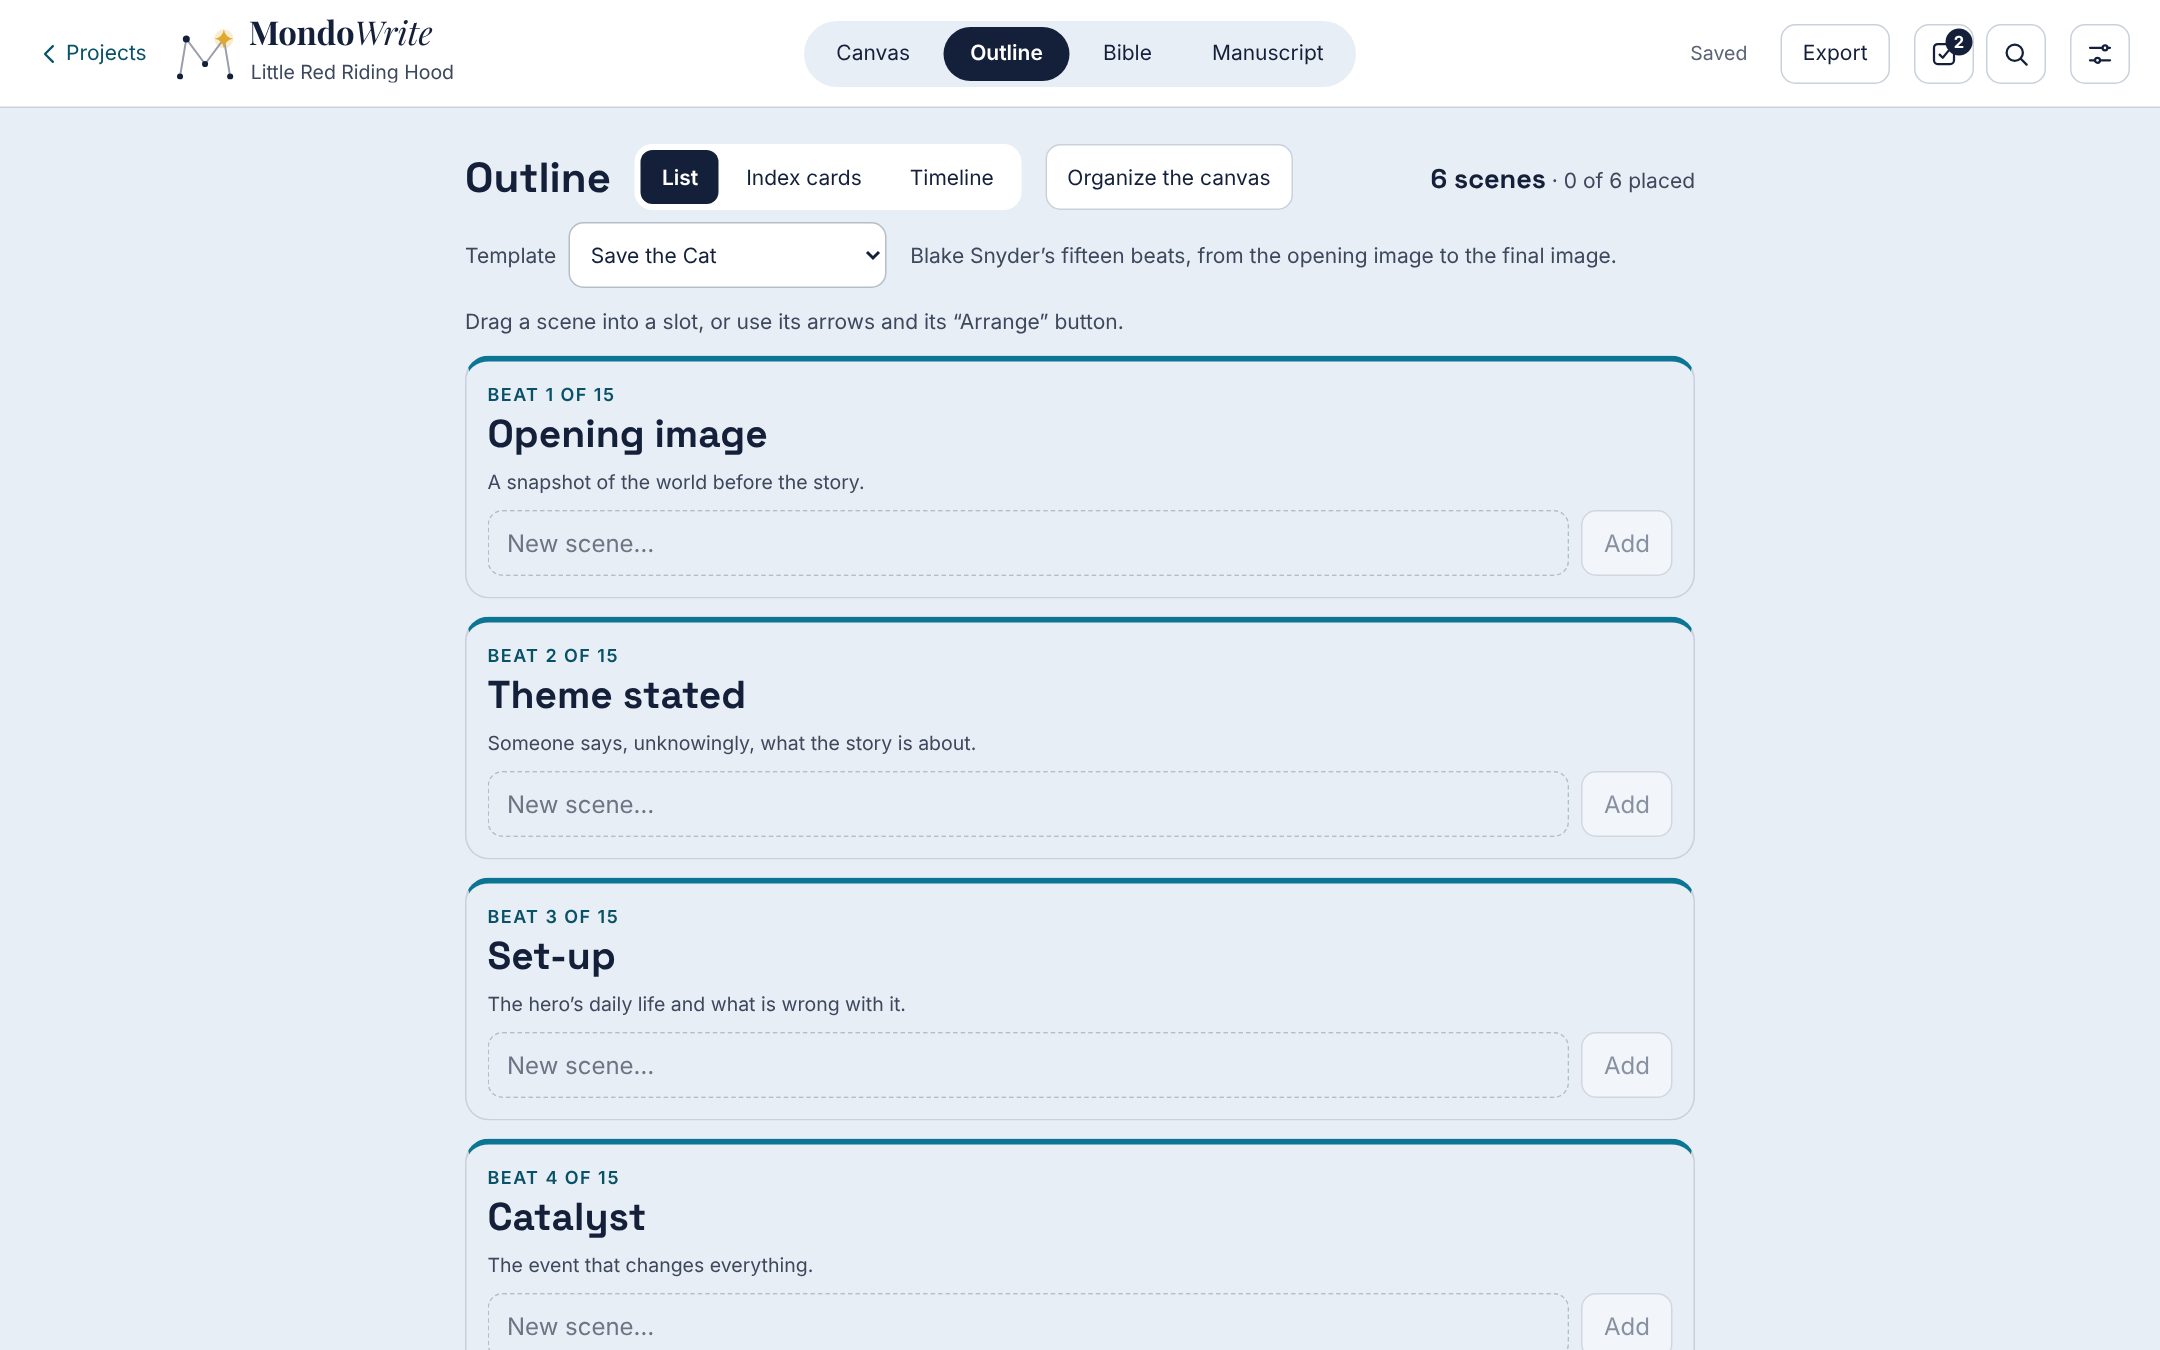
The Template menu offers a structure, with a sentence that explains it:
- Free: a single list, in the order you arrange the scenes;
- Three acts: setup, inciting incident, confrontation, midpoint, crisis, climax, resolution;
- Save the Cat: Blake Snyder’s fifteen beats, from the opening image to the final image;
- Hero’s journey: Christopher Vogler’s twelve stages, after Joseph Campbell;
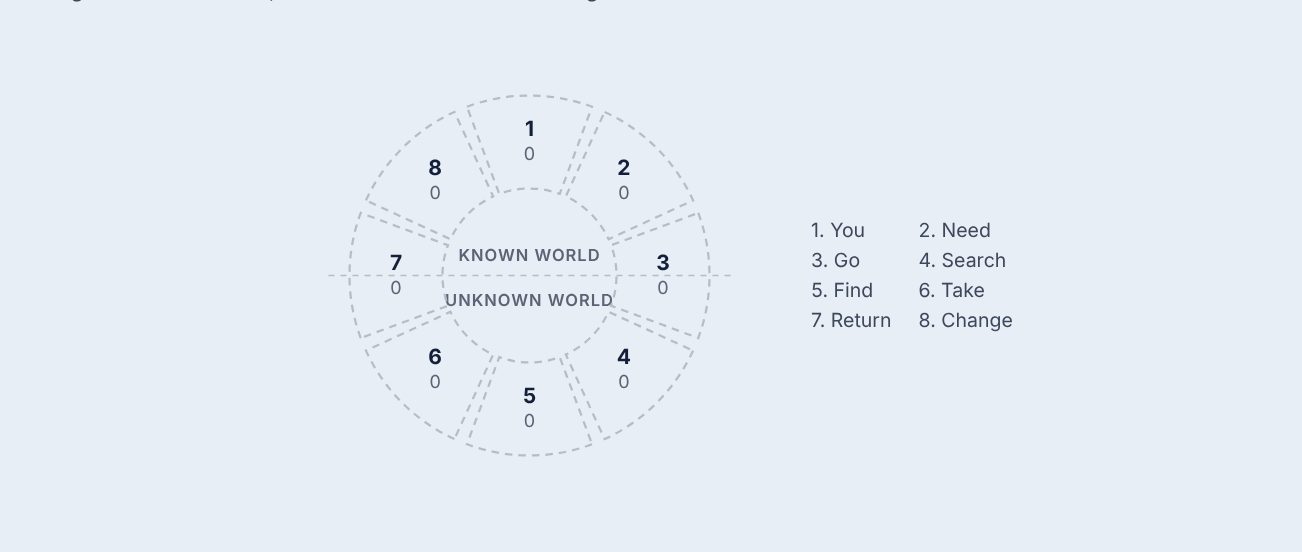
- Dan Harmon’s story circle: eight steps in a circle, from comfort to change;
- Five-act pyramid: Gustav Freytag’s pyramid, from exposition to denouement;
- Six stages (Hauge): six stages and five turning points around the hero’s visible goal;
- Seven points: Dan Wells’s structure, built from the end;
- Kishōtenketsu: four movements with no conflict required (introduction, development, twist, reconciliation);
- Romance: meeting, falling, breaking apart, coming back;
- Mystery: the crime, the investigation, the false lead, the revelation, the confrontation, the resolution.
Each beat has a name, a hint, and a usual place in the story, shown by the story ribbon (see the Manuscript). Changing templates loses no arrangement: each template keeps its own. Each beat opens with its rank (“Beat 3 of 15”), a large title and its number of scenes; chapters come below, smaller, as on the canvas.
Dan Harmon’s story circle is also drawn as a circle: the known world at the top, the unknown below, and the number of scenes in each step. An empty step is dashed; touch a step to go to its beat.
My templates
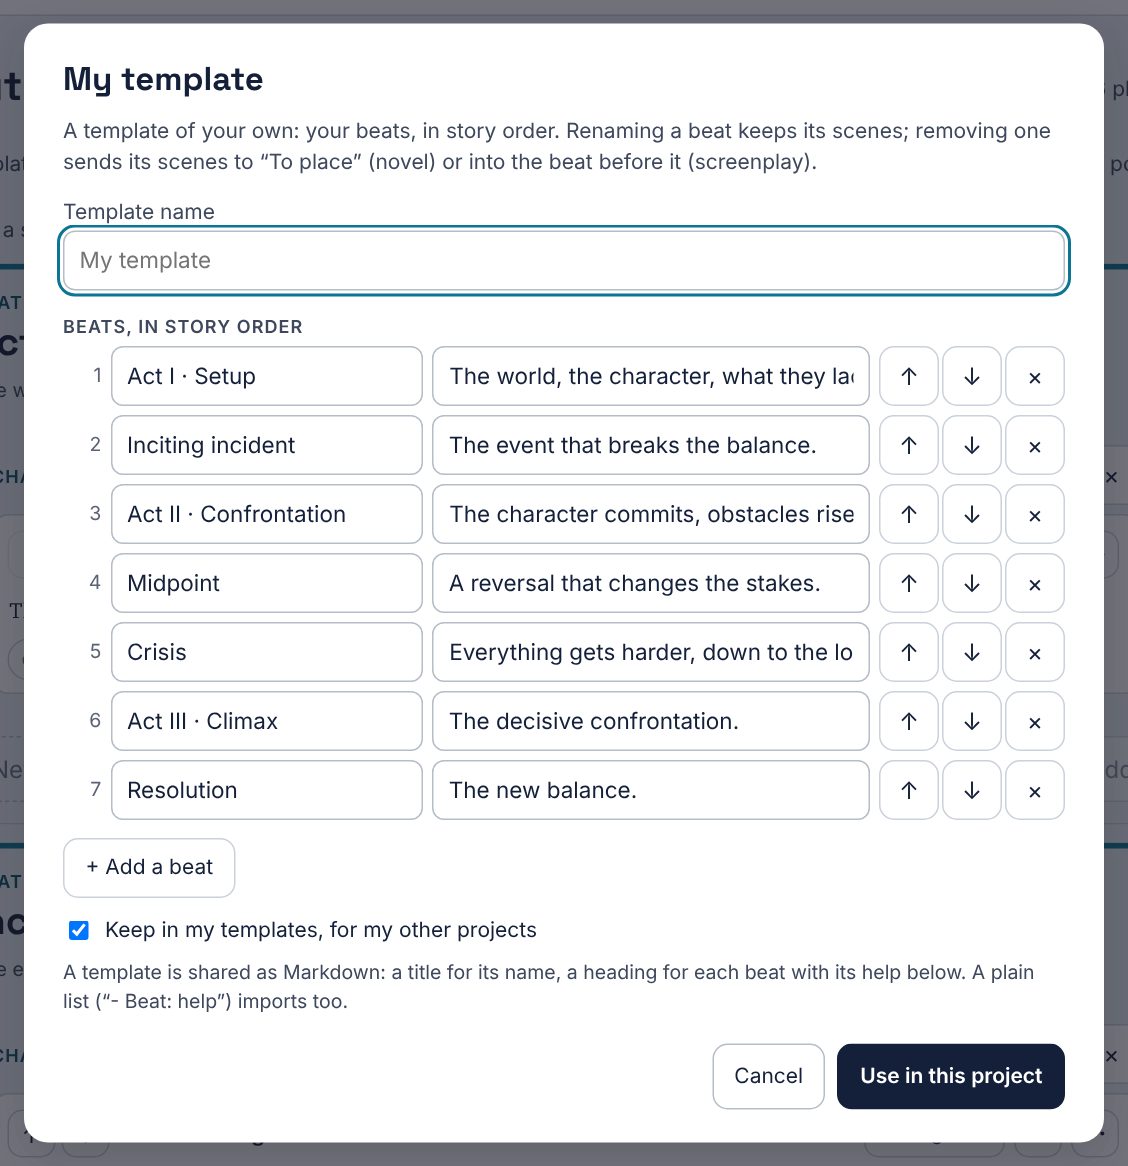
In the Template menu, Create a template… opens the list of beats, filled in with those of the current template: rename them, write what goes in them, change their order, remove some, add others. Scenes follow their beat, even renamed. Keep in my templates then offers it in all your projects, novel or screenplay; Edit the beats… brings it back later. A removed beat sends its scenes to “To place” (in a screenplay, into the beat before it).
To share a template (with a co-writer, between two devices, or from a structure found elsewhere): Export this template…, in the same menu, saves it as a Markdown file (the template’s name as the title, each beat as a heading, its hint below), readable in any text editor; for a kept template, Manage my templates… (same menu) opens their list: each one’s ⋯ button offers Export… and, in red, Remove from my templates (Undo brings it back while the message shows). Removing a template doesn’t change any project already using it. Import a template… reads such a file, but also a plain list (“- Beat: hint”, one beat per line) or a JSON file, and opens the editor filled in: check the beats, then Use in this project. Nothing enters the project before that click.
Arrange scenes
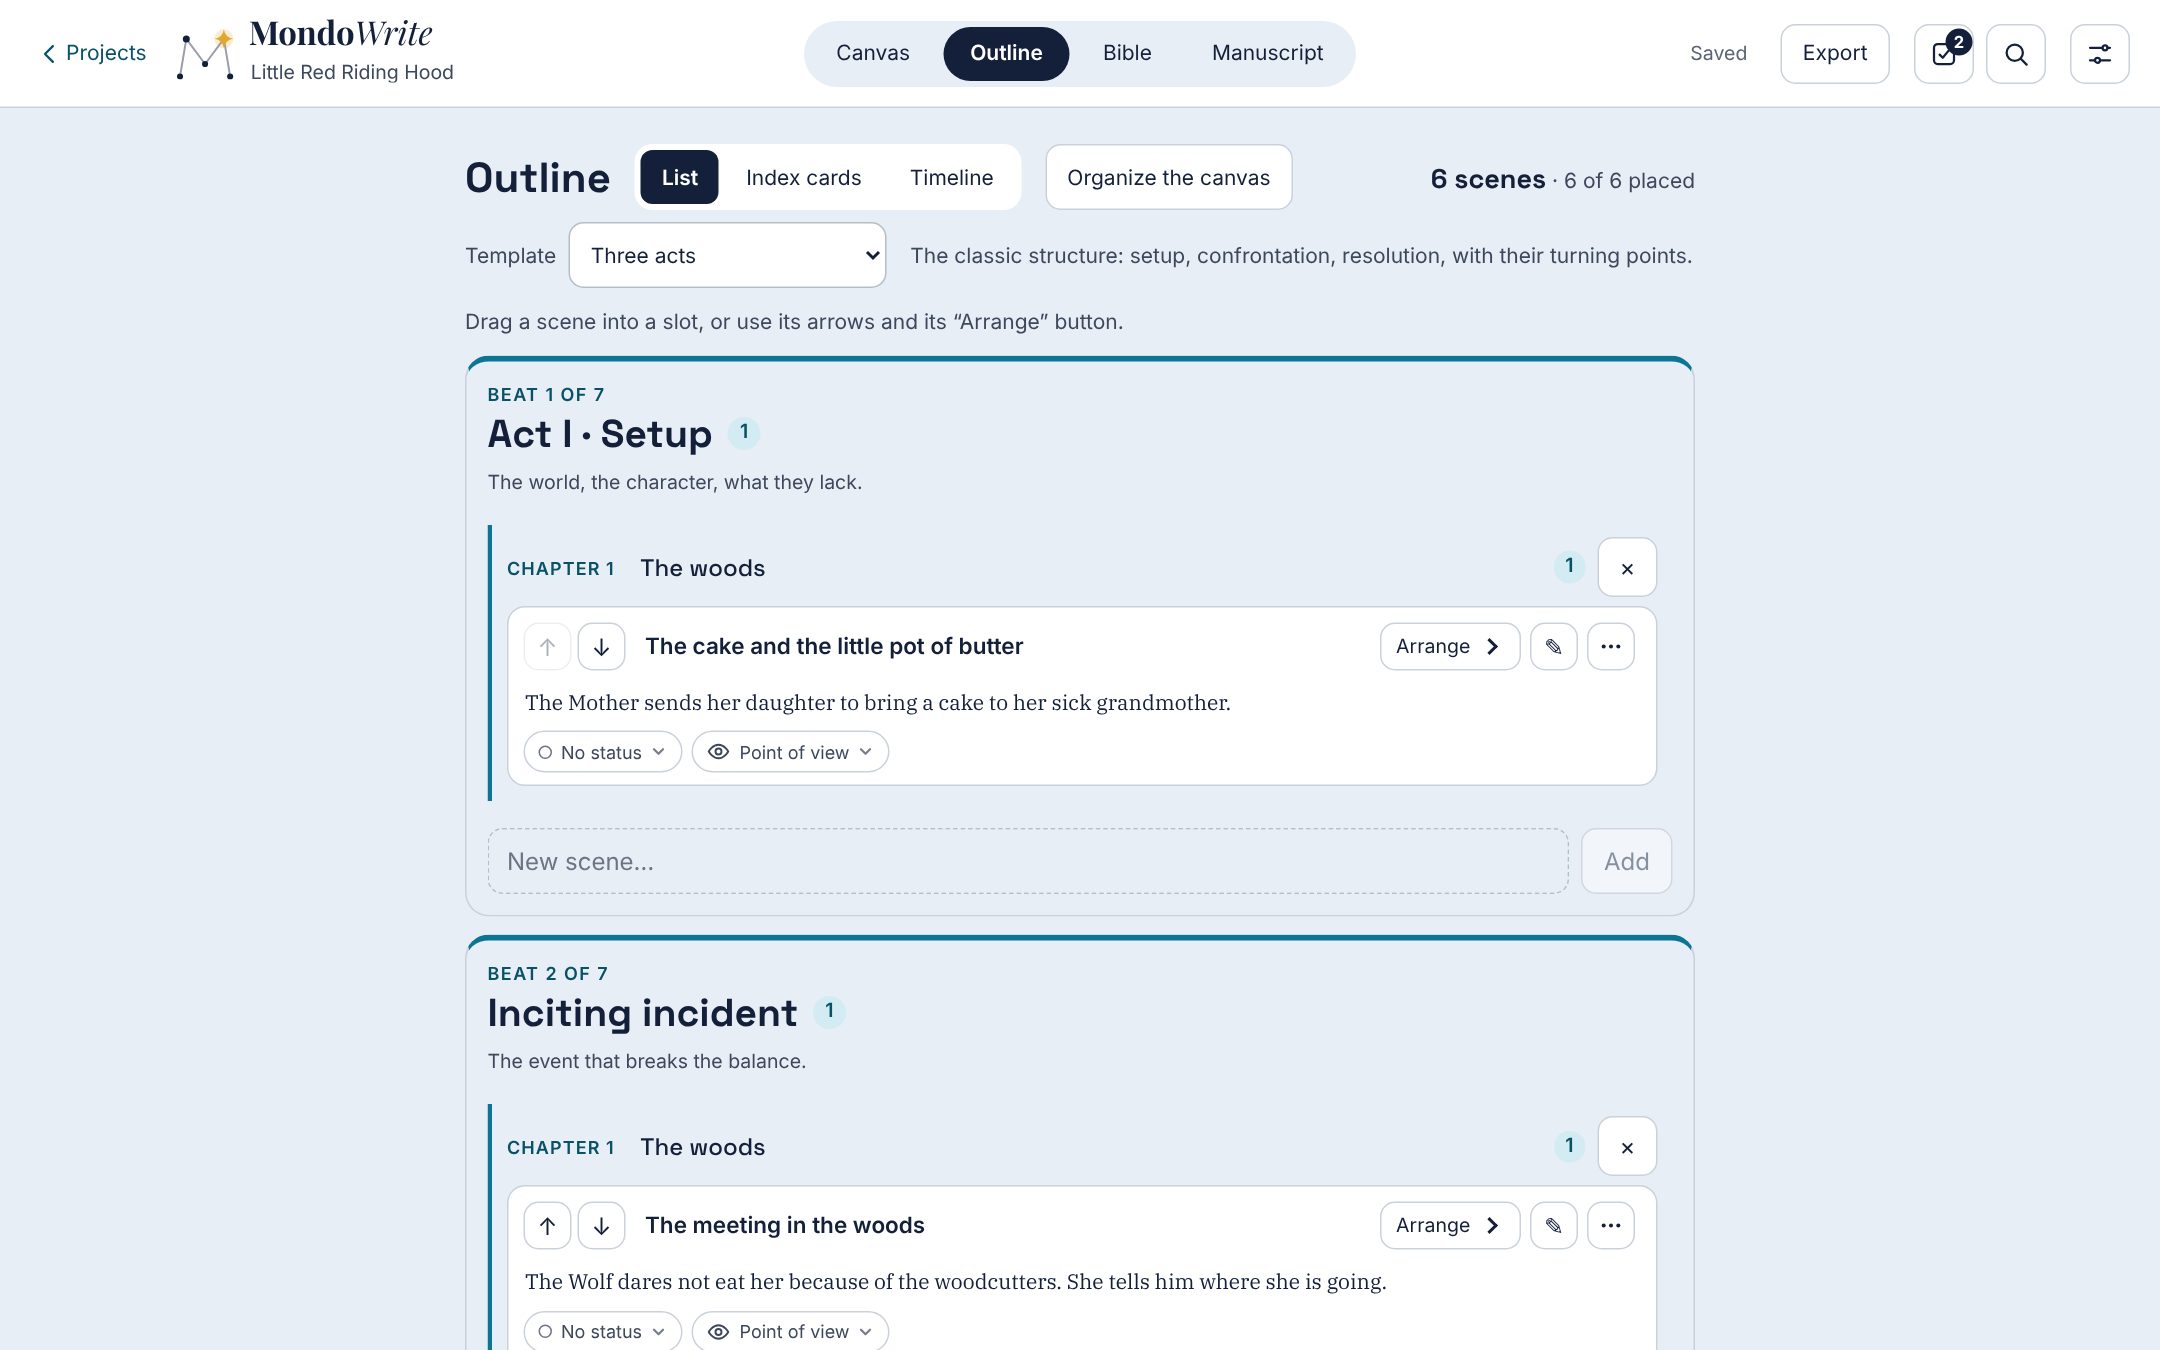
In the List layout, each scene shows its title, its synopsis, then its status and point of view. Its chapter and box wait behind the Arrange button, next to the pencil: one tap opens them under the scene. A screenplay’s outline looks the same. To move a scene:
- drag it into another beat or to another place;
- or use its arrows, or Arrange then Move to.
Scenes not yet placed wait in To place, in canvas order. New scene… at the bottom of each beat creates a scene right there (and its card on the canvas). The pencil (✎) opens the scene in the Manuscript; the ⋯ button offers Show on canvas and, in red, Move to trash.
Chapters
Chapters divide the story. A scene’s Chapter menu offers New chapter from here; each chapter may have a title (optional). Chapters are numbered automatically, from their place. Deleting a chapter gives its scenes back to the previous chapter: no scene is deleted. In the Manuscript, you can also start a chapter from the keyboard (see below).
List, index cards, timeline
Three layouts of the same outline:
- List, to read and reorder;
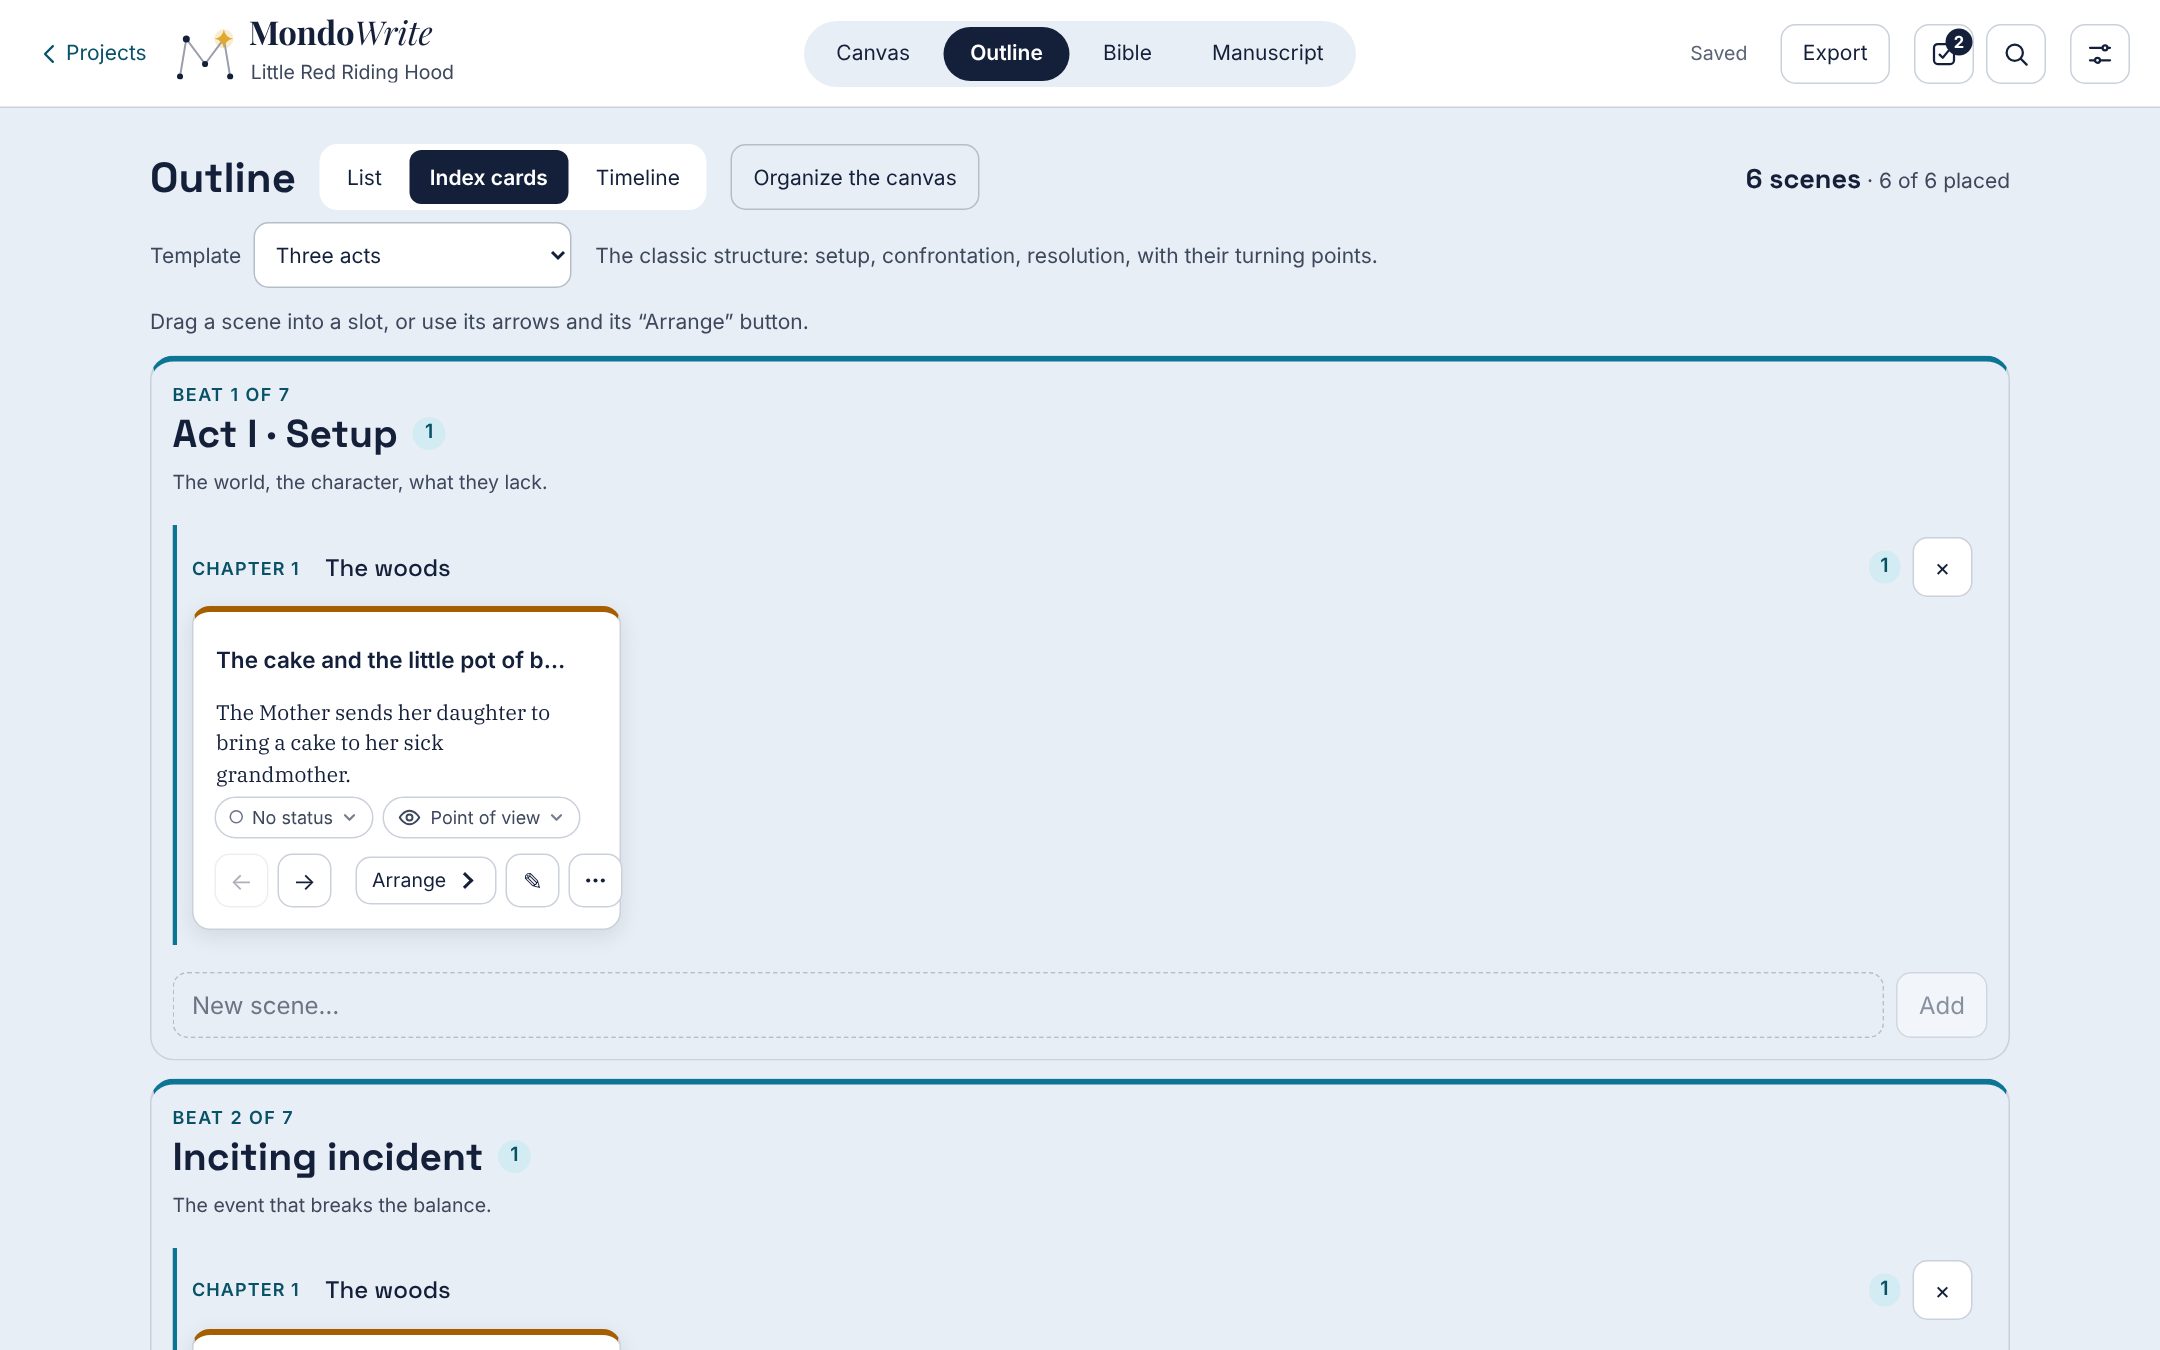
- Index cards, like cards spread on a table;
- Timeline: one column per scene, one row per plot, theme, character and place. A filled dot means a thread between the card and the scene, a hollow dot that the scene names it in its text. Tap a cell to draw or remove the thread. The column of cards stays frozen on the left while the scenes scroll beneath it.
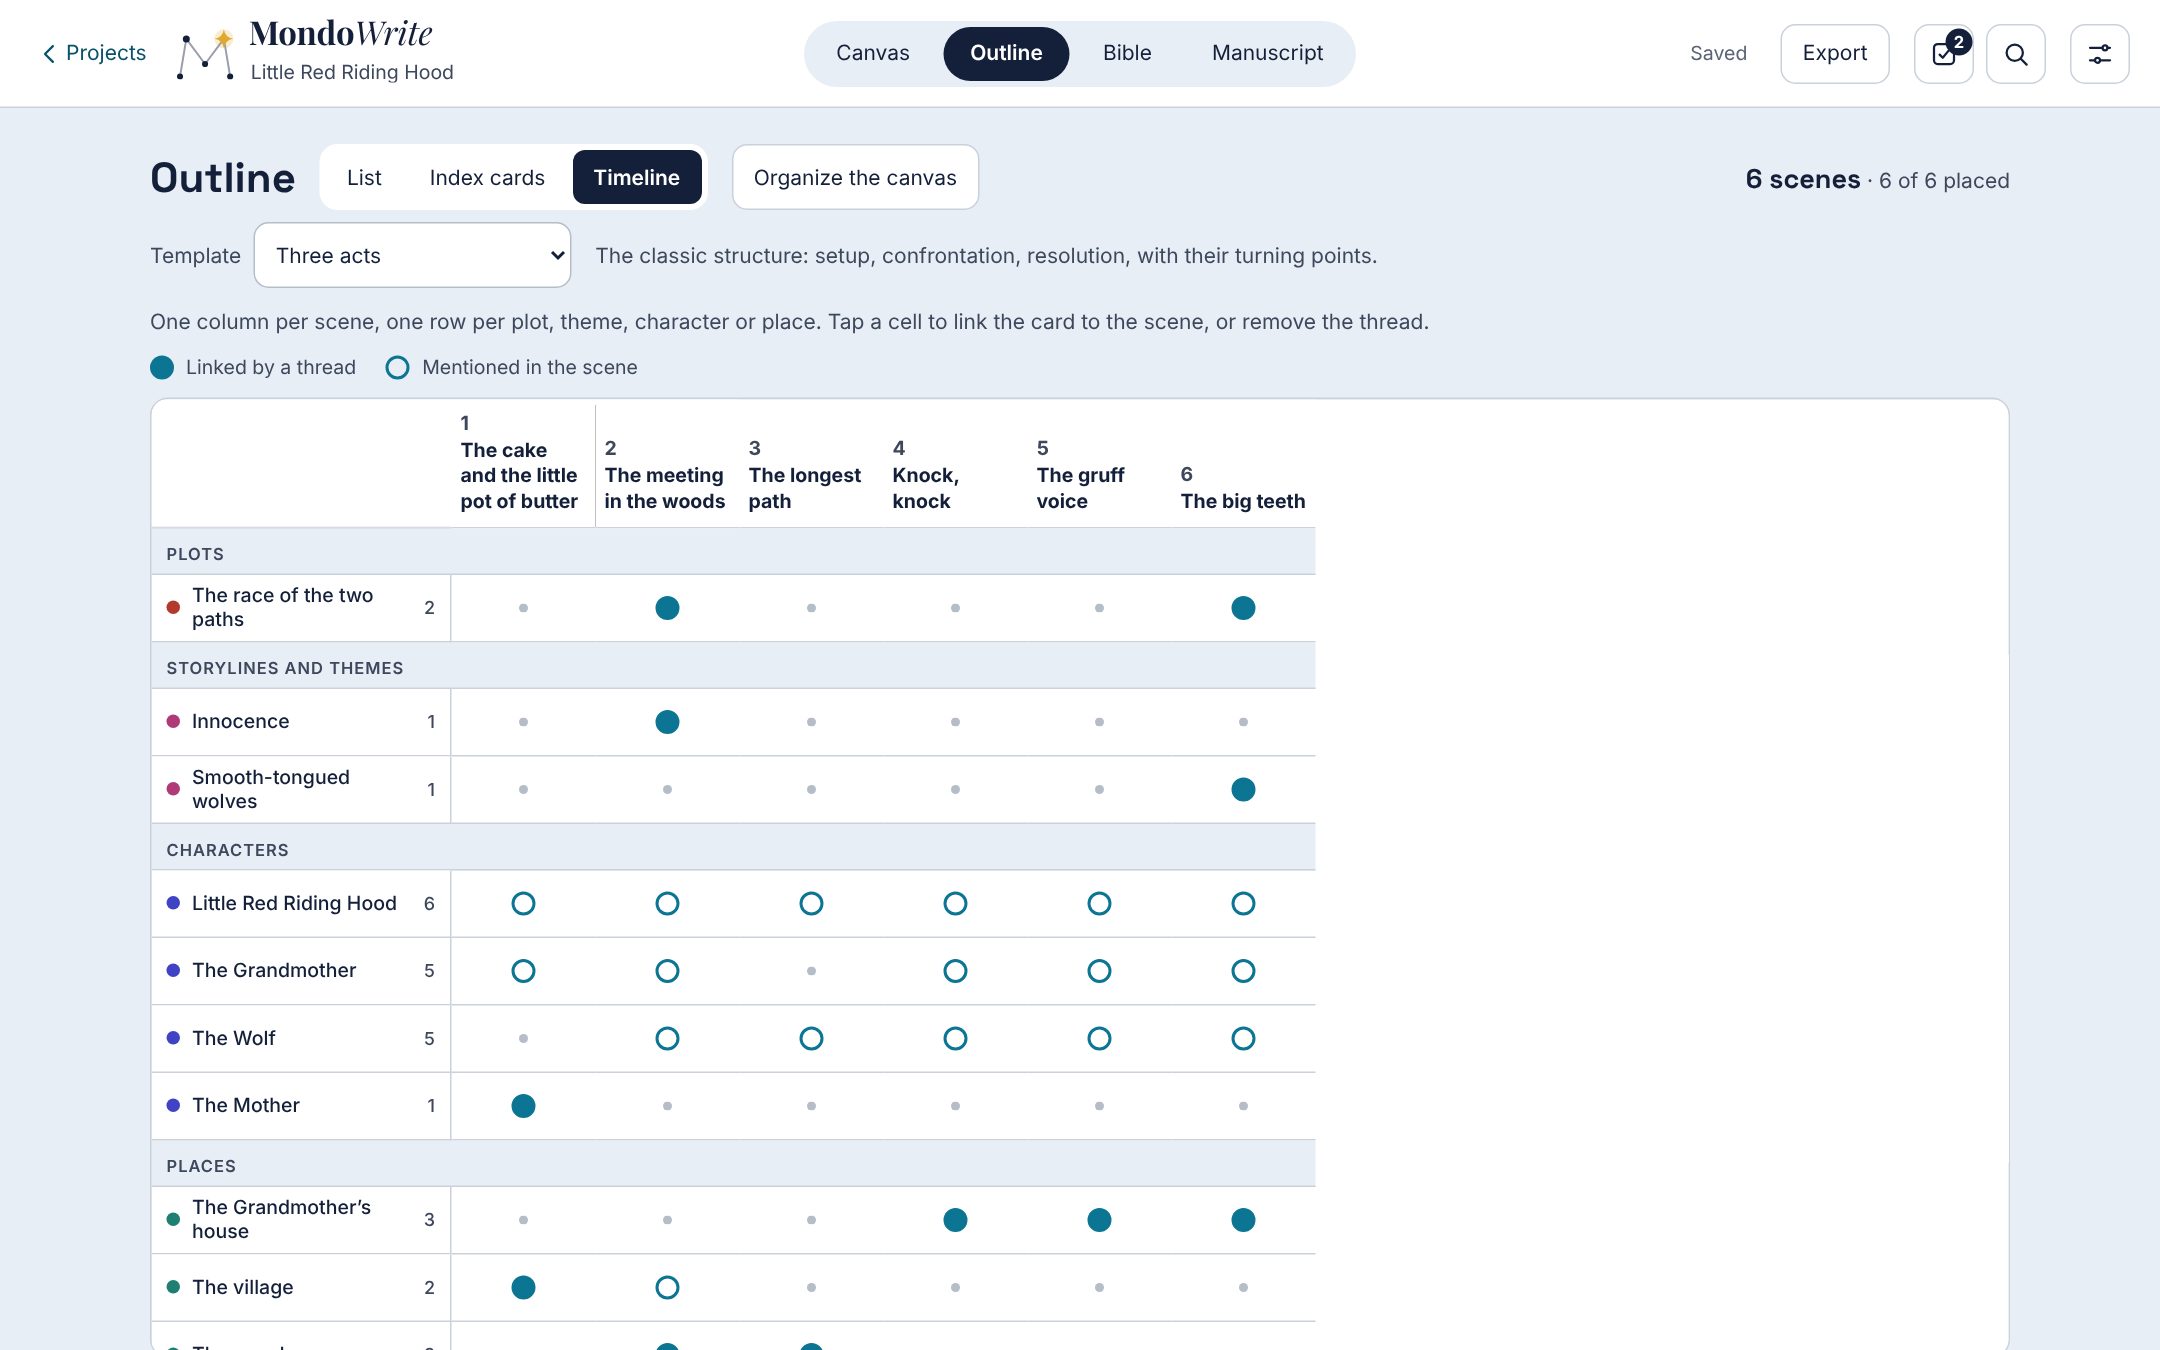
Organize the canvas also arranges the canvas from the outline: one template beat, then one chapter, per frame.
Chapter 8The Manuscript
The Manuscript is where you write: the whole book, scene after scene in outline order, on pages laid out like a book’s. Scenes follow one another without a break, and what you type goes into the scene where the cursor is.
The story ribbon
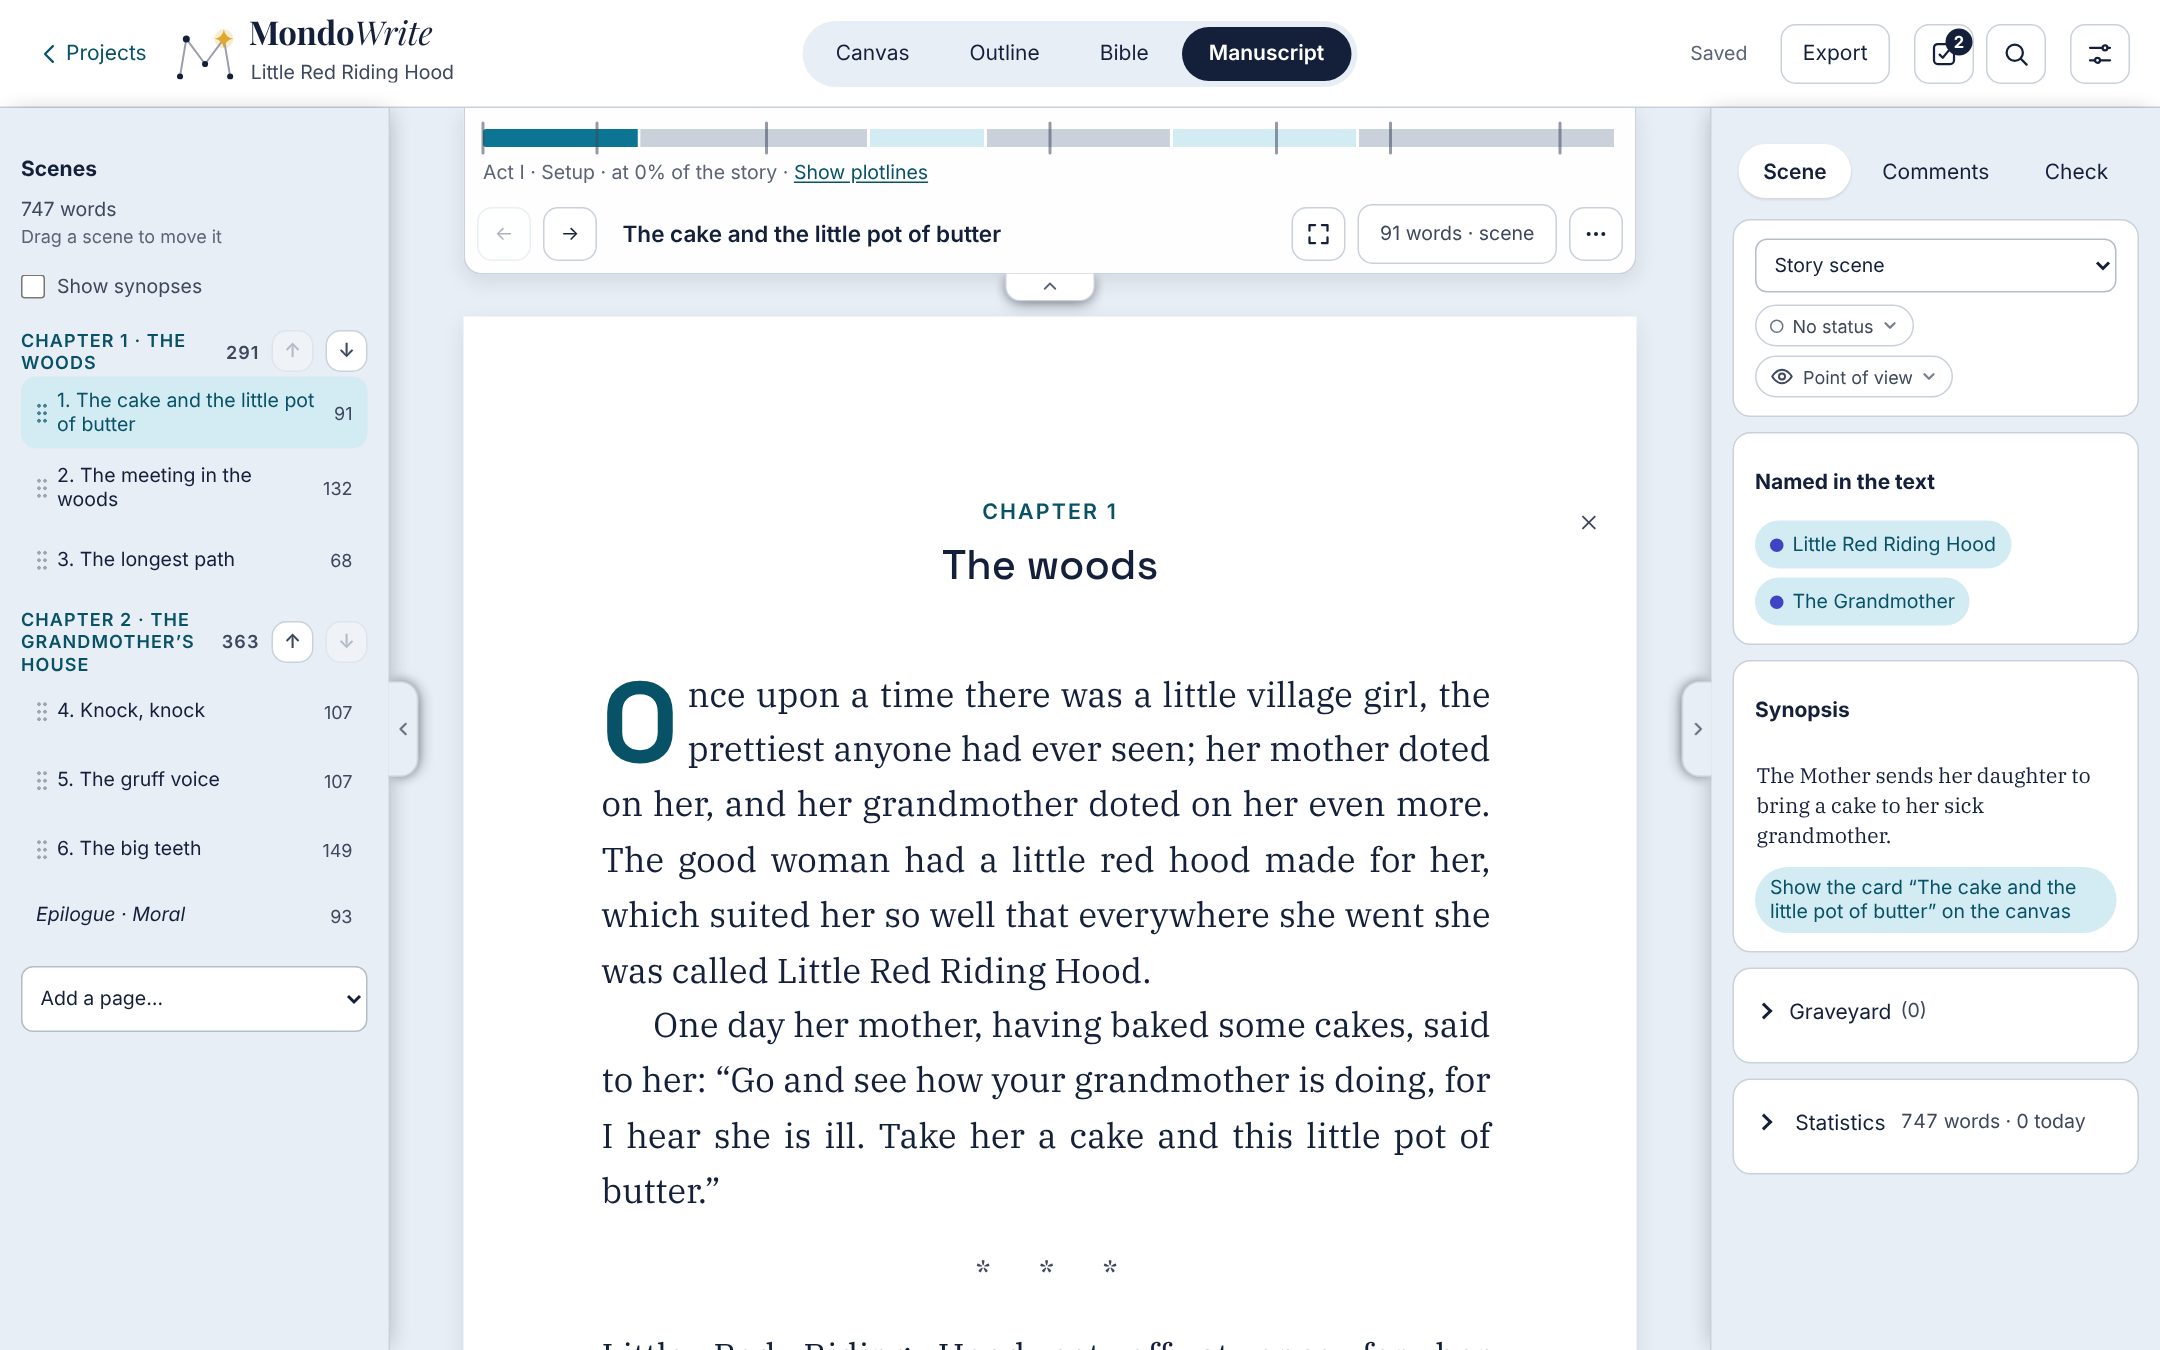
Once a template is chosen, a thin band at the top of the bar (and under the Screenplay’s bar) shows the structure of your text as it is: each beat takes the room its scenes really take, in words (pages in a screenplay). A thin mark shows where each beat usually begins in that structure: the gap shows without anything being imposed. Touch a scene on the ribbon to go there; the line below says which beat you are in and where in the story. While little is written, each scene counts as an equal share.
- Show plotlines adds one row per Plot card: solid for scenes linked by a thread, light for scenes that mention it.
- Show the curve appears as soon as two scenes have filled in For the hero, the scene ends (better, worse, neither) in their sheet: the curve rises and falls with the hero’s fortune, scene by scene.
The scenes column
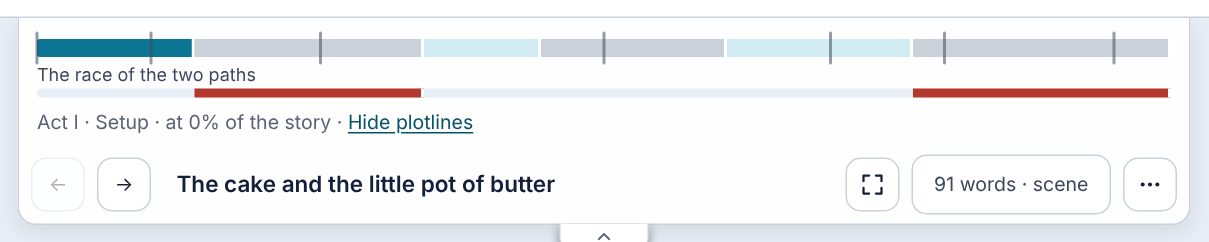
On the left, all the book’s scenes, by chapter, with their word count. A click opens a scene. To move one, drag it (onto the top half of another scene to put it before, the bottom half to put it after), or use its arrows or Alt ↑ ↓. It takes the chapter and beat of its new neighbour. A whole chapter moves too, by dragging its title or with its arrows.
The page
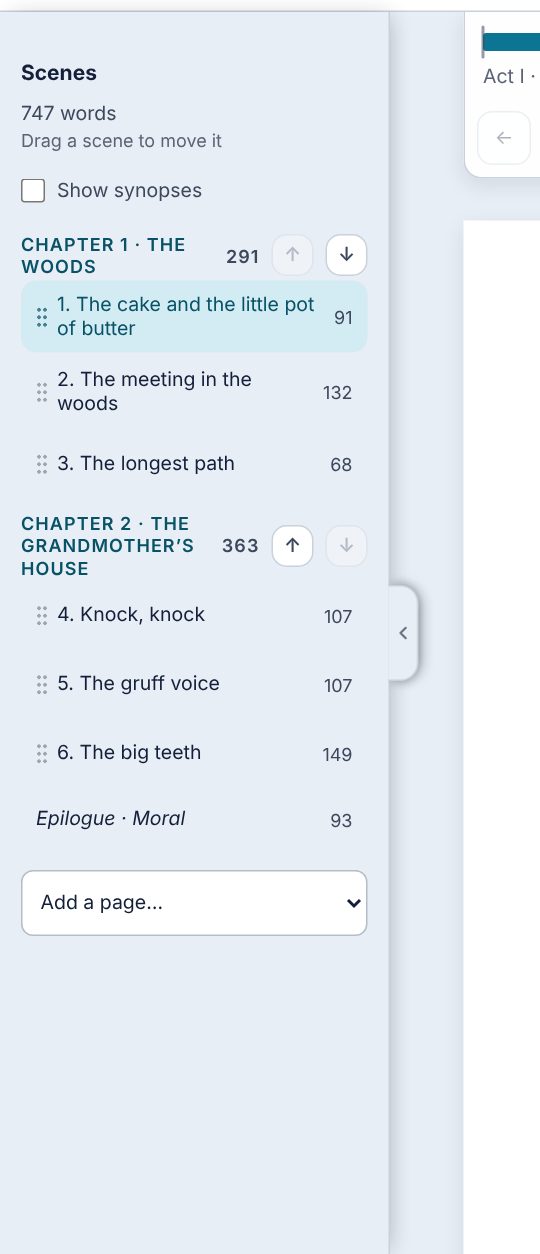
Above the page, a single row: the scene arrows, the scene title, the Focus mode button (two corners spreading apart), the word counter (not on iPhone) and a ⋯ button for the rest: Focus mode, Listen, Reading voices…, Replace, Go to…, Check, Statistics and, in red, Move to trash. The chapter number and title sit in the top margin; the first letter of a chapter becomes a drop cap when you are not writing in that paragraph. The scene’s synopsis shows as a watermark in a scene that is still empty, like an outline note. The scene’s page type, status and point of view sit at the top of the Scene tab in the right-hand column.
Font and line spacing. Settings › Writing offers several fonts for the page (IBM Plex Serif by default, Literata, EB Garamond, Atkinson Hyperlegible, very legible, and Courier Prime, like a typewriter) and a line spacing (Default, Single, 1.5, Double). It is a device setting, for the screen only: exports keep their format. With wider line spacing, each page holds fewer lines, and the book has more pages on screen. A font from this computer… takes any installed font: pick it from the list (on a computer) or type its name; the field shows in that font. If another device lacks it, the page keeps the default font there.
Just write. If you use neither the canvas nor the Bible, check Just write in Settings › Writing: your projects open on the Manuscript (or Screenplay), and the top bar shows only that. Nothing is removed: All views brings the others back, and Ctrl 1 to 4 still takes you there.
Page zoom. Ctrl + and Ctrl − enlarge or shrink the whole page, without changing its layout or page breaks; Ctrl 0 returns to normal size. The setting is also in Settings (Page zoom) and, on Mac, in the View menu. It also applies to the Screenplay sheet. Enlarged beyond the window, the page scrolls sideways.
Split a scene, start a chapter
You can divide the story without leaving the keyboard:
- Enter twice (on an empty line) splits the scene: a new scene is born, the rest of the text moves into it, and its card appears on the canvas just below the previous one;
- Enter three times starts a new chapter;
- Backspace in the newly born, still empty scene undoes the split.
An Undo message shows for ten seconds after each split.
Merge two scenes. The opposite of a split: in the bar’s ⋯ menu, Merge with next scene joins the current scene with the next one in the same chapter. The second scene’s text, synopsis, threads and comments join the first, and its card goes to the trash, from which you can restore it. An Undo message puts both scenes back as they were. The command is also in the ⋯ menu of each scene in the Outline (Merge with next), in the Screenplay (the next scene, with no section between them) and, on Mac, in the Edit menu. Backspace at the very start of a scene also merges it into the previous one.
Book pages
A published book also has pages outside the story. The Add a page… menu, below the scenes column, creates them: Title page, Copyright, Dedication, Epigraph, Prologue, Epilogue, Acknowledgments, About the author. They place themselves at the start or end of the book and are each laid out in their own way (a centred italic dedication, a copyright page in small print…). The page type menu, in the bar, turns a scene into a book page and back.
Scene status
Each scene has a status, in the order it moves forward: To write (empty dot: nothing written yet), Draft, To revise, Revised or Done. You choose it wherever you see the scene (the Scene tab of the Manuscript’s right-hand column, the card, the Bible, the Outline), and a coloured dot recalls it in lists. The statistics count finished scenes.
Point of view
When several characters tell the story, the Point of view pill, next to the status, says who narrates the scene. Type a name to search your characters, or to create one (Create “name”). The narrator shows on the card, in the Outline, and in colour on the story ribbon. In the scene list, Their point-of-view scenes keeps only one narrator’s scenes (the others fold into a single line), and the canvas can be filtered the same way. A character’s sheet in the Bible says how many scenes they narrate.
Versions of a scene
Before you rewrite a scene, keep today’s text: in the bar’s ⋯ menu, Keep this version… (Ctrl Alt S). Give it a name if you like (“Before cutting the dream”). Scene versions… opens the list: pick a version to read it, or Compare with the current text or another version (removed words struck through in red, added words underlined in green). Go back to this version puts its text back in the scene; the previous text is kept as a version first, so nothing is lost. The version’s ⋯ menu copies, renames or deletes it (a message lets you undo). Each version is a file in the project’s versions/ folder, readable outside the app.
Footnotes
To add a note (a source, a detail), put the cursor where the reference goes and press Ctrl Alt F, or select a word and tap Note in the bar that appears. A small number appears in the text and a window opens below it to write the note; Enter takes you back to the text. Clicking the number reopens the note, and Delete the note removes it. Numbers follow on by themselves throughout the book. When you export, the note becomes a real footnote in Word, a note that opens with a tap in the EPUB, and a note at the end of the chapter in the PDF and the paperback. In the scene’s file it is written as in Markdown: [^1] in the text, [^1]: text at the end.
Comments
To note a remark about a passage without touching the text, select it, then tap Comment in the bar that appears (Ctrl Alt M). The passage is tinted and the Comments tab of the right-hand column opens, ready for your text. Clicking in the passage brings back its comment; clicking the comment’s quote brings back the passage. Resolve files it under Resolved (the passage is no longer tinted), Reopen brings it back, and the ⋯ menu deletes it (a message lets you undo). Open comments are also listed in To do. In a screenplay, a comment covers a whole action or line of dialogue: put the cursor in it, then Comment on this element in the ⋯ menu. Comments live in the project’s commentaires/ folder, readable outside the app, and never appear in an export.
Synonyms
Put the cursor in a word (or select it), then press Ctrl Alt Y (Cmd Alt Y on a Mac), or touch Synonyms in the formatting bar, or pick Synonyms for the Word… in the command palette. A window lists the synonyms by sense; a click (or Enter) replaces the word and keeps its capital letter. Nothing is replaced without your choice. In a screenplay, the shortcut works in actions and dialogue. The dictionary is French: it downloads once, the first time you ask for synonyms (internet needed), then works offline. When the interface is in another language, the window simply says so.
Statistics and goals
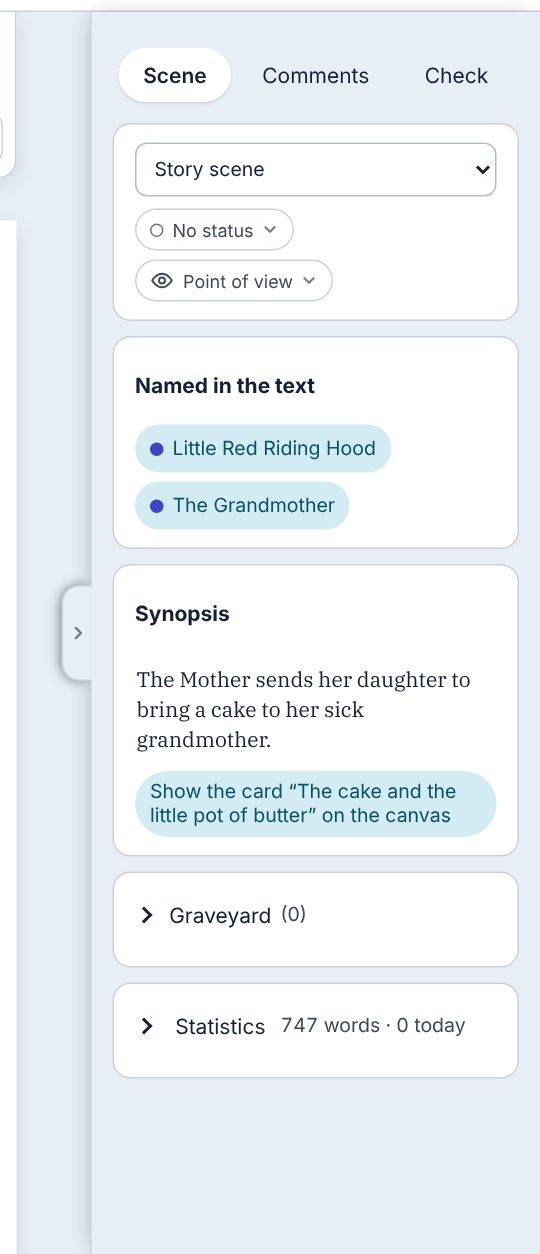
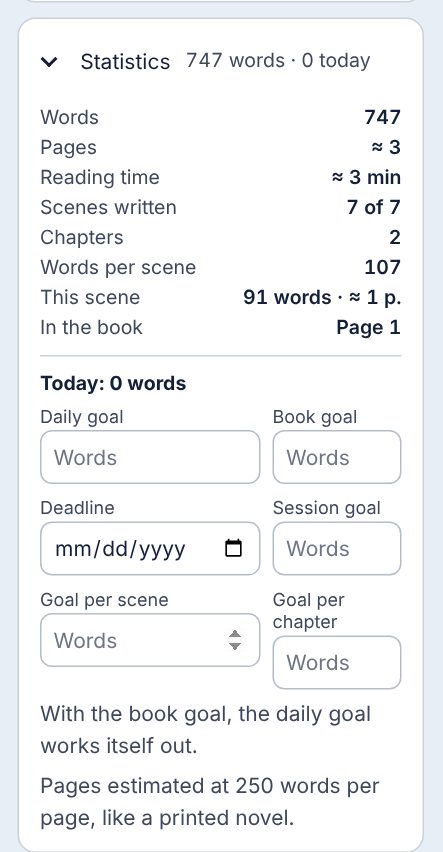
The right column starts with the scene: its page type, status and point of view, then Named in the text lists the characters and places it names (a click shows their card), then come its Synopsis, editable in place, and the Graveyard (folded to one line while it is empty). At the very bottom, Statistics is folded to one line (words in the book, words today); touch it to open it, and it stays open until you close it. Inside are the book’s statistics: words, pages (estimated at 250 words a page, like a printed novel), reading time, scenes written, chapters, words per scene, and for the current scene its word count and place in the book. Set a Daily goal and a Book goal in words: today’s progress, the number of days in a row and the book’s progress are shown. To go further: a Deadline (the daily target is then computed for you from the words left and the days left), a Session goal (the words written since you started, with a ✓ when reached, focus mode included; New session starts again from zero), a Scene goal and a Chapter goal. These goals are saved with the project.
Create a card as you write: /Name
To create a character or a place without leaving your sentence, type / followed by the name, anywhere in the text (after a space, a parenthesis or a quote): “/Lighthouse of Pious Wishes” accepts names of several words. The menu offers Character or Place; the card is created in the background, the name stays ordinary text (no link is left in the manuscript) and you keep typing. You fill in the card later in the Bible.
Another way: select a name you have already written and type /, or tap the Character or Place button in the small bar that appears on the selection.
The Graveyard
A passage you are unsure about does not have to be deleted. Select it and press Ctrl Shift K (or, on a touch screen, tap the Graveyard button in the selection bar): it leaves the text and joins the Graveyard in the right column, with the scene it came from. Put back returns it exactly where it was; if the text has changed since, it goes to the closest spot, and to the end of the current scene if the original scene no longer exists. The Graveyard is kept in the project. A passage must lie within a single scene.
The panels
The scenes column and the right column fold away: a handle on the edge of the page opens and closes them, and MondoWrite remembers your choice. On a narrow screen (iPad upright, iPhone) they become drawers over the page, closed by default on a phone.
The spell checker
The system spell checker is set in Settings, Spell checker: Except manuscript and screenplay (the default: your scenes’ text is not underlined while you write), Everywhere or Nowhere. On Mac, iPad and iPhone, the system underlines words as you type them or come back to them: text already written is not always checked in full as soon as it opens. Unchecking Keyboard suggestions and autocorrect stops the iPad, iPhone or Mac keyboard from suggesting words and correcting your text for you.
Focus mode
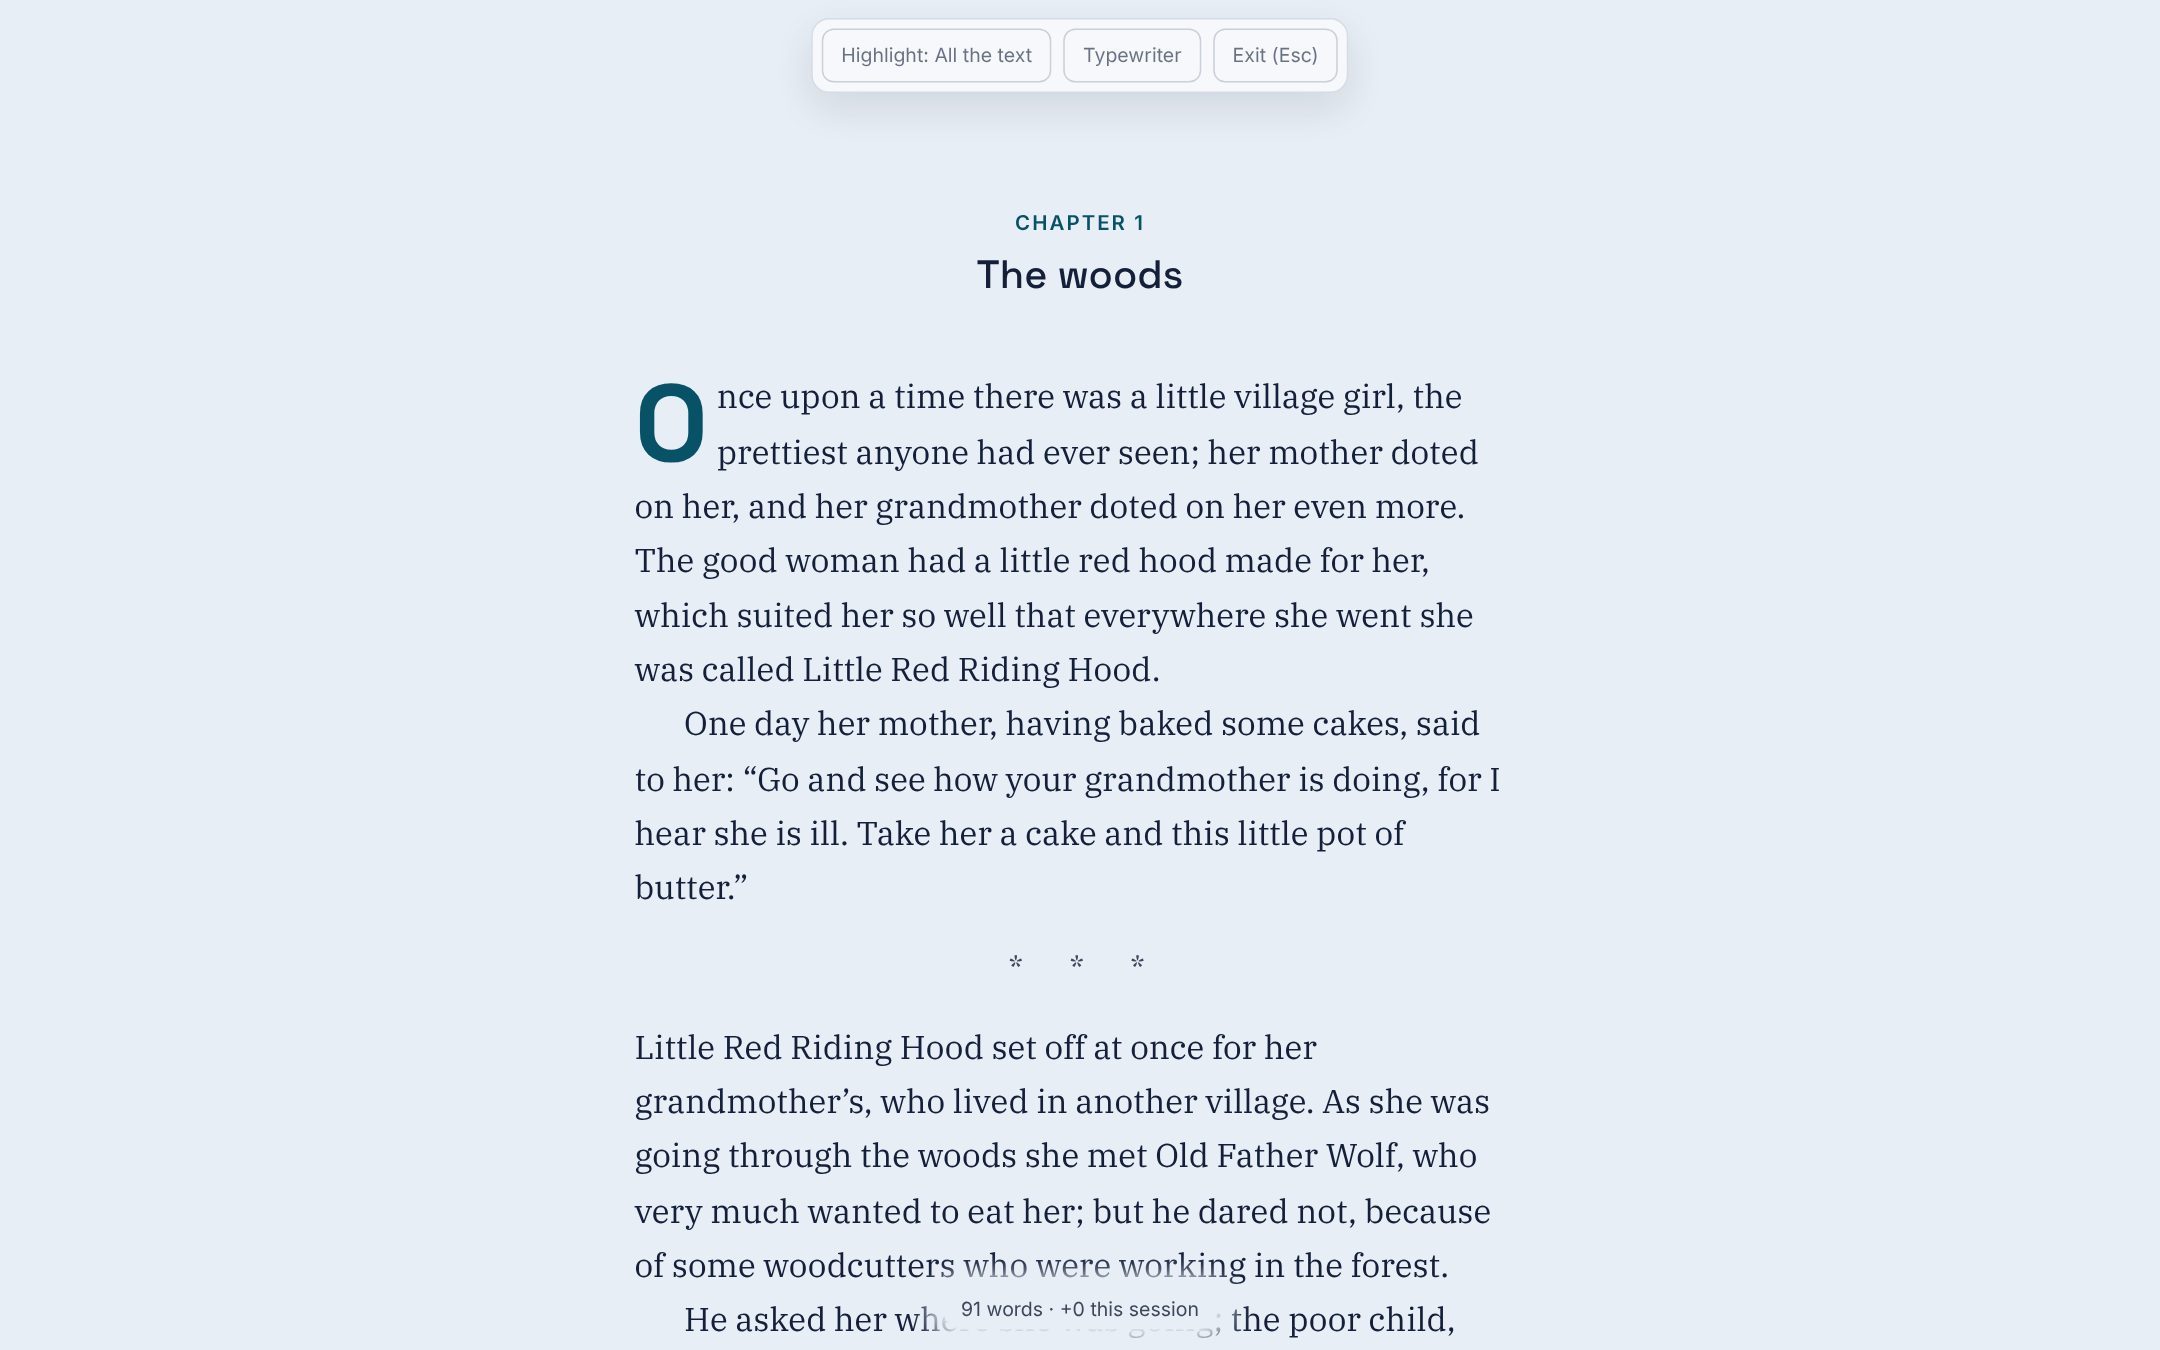
Focus mode (Ctrl Shift F) keeps only your text, in a column in the middle of the screen, left-aligned and without hyphenation, as in iA Writer. As soon as you type, the top bar and the pointer fade away; move the mouse (or touch the screen) to bring them back. At the bottom, a small counter comes back whenever you pause: the words of the scene and those written during the session.
In the bar, Highlight cycles through the modes (all the text, the sentence, the line, the paragraph), also with Ctrl Shift E; Typewriter keeps the current line in the middle of the screen. In Settings, you choose the column width (narrow, medium, wide) and, on a computer, going full screen. Esc leaves it. The Screenplay has the same focus mode, keeping its standard format.
Typography as you type
As you write, MondoWrite sets the right typography: curly quotes “ ”, apostrophe ’, ellipsis …, dash from two hyphens, and in French « » with their non-breaking spaces. The Typography as you type setting chooses: follow the interface language, one of about twenty languages (German „ “, Spanish « » without spaces, Swedish ” ”…), or none. Handy when you write in another language than the interface’s.
Find and replace
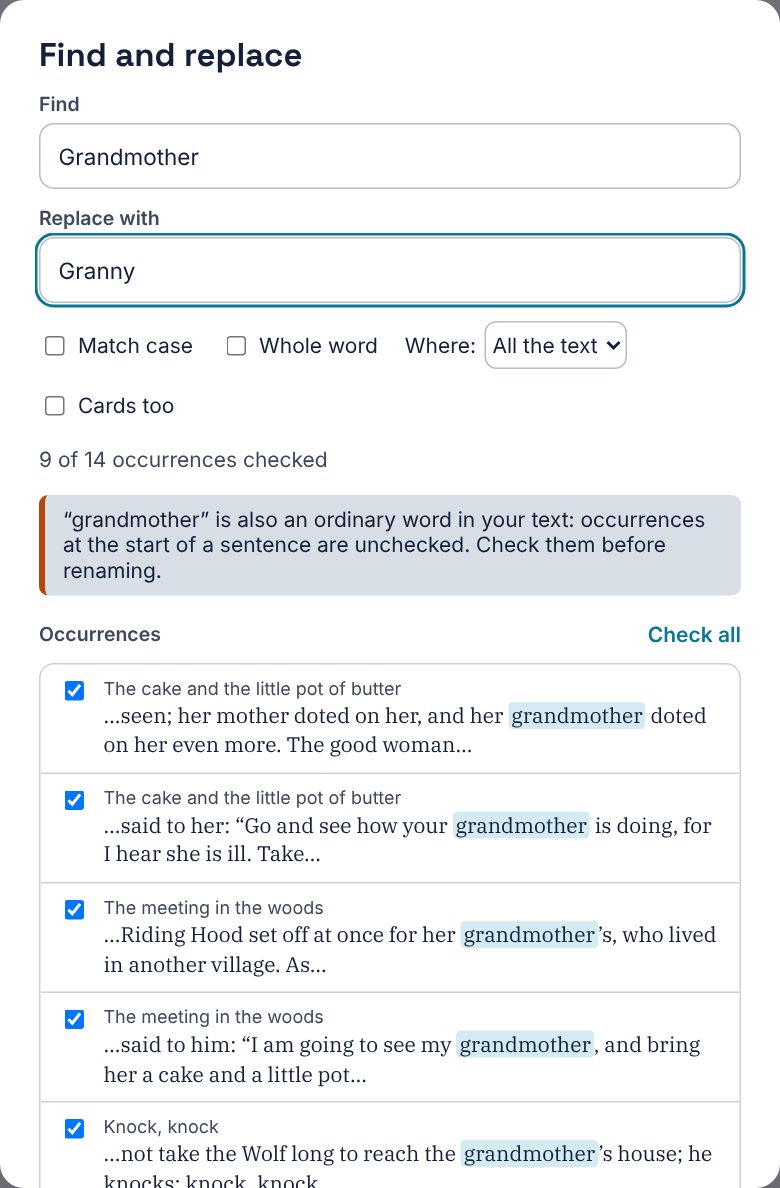
Replace (Ctrl Shift H) searches the whole text or the current scene, with or without the cards. Match case and Whole word refine the search; the number of matches shows as you type. The replaced word keeps its capitals. Undo puts everything back. @ mentions are never touched: they already follow their card. Each match is listed with the sentence around it: uncheck the ones to leave as they are.
Rename everywhere… (a card’s ⋯ menu) only replaces the name as you wrote it, or in capitals: a character called Rose never changes “the sun rose”. If the name is also an ordinary word in your text (Will, Hope, Grace…), MondoWrite says so and unchecks the matches at the start of a sentence, where the word and the name look the same: read them before renaming.
Go to a page, a scene, a chapter
Go to… (Ctrl G, in the ⋯ menu of the Manuscript and the Screenplay, and from any view) opens a small window: type a number to go to that page, or to the scene with that number in a screenplay (the chapter with that number in a novel), or a word from the title of a scene, a chapter or a synopsis. The manuscript’s “to revisit” passages and the screenplay’s [[…]] notes are there too. Enter takes you to the first place found; the arrows pick another one.
Command palette
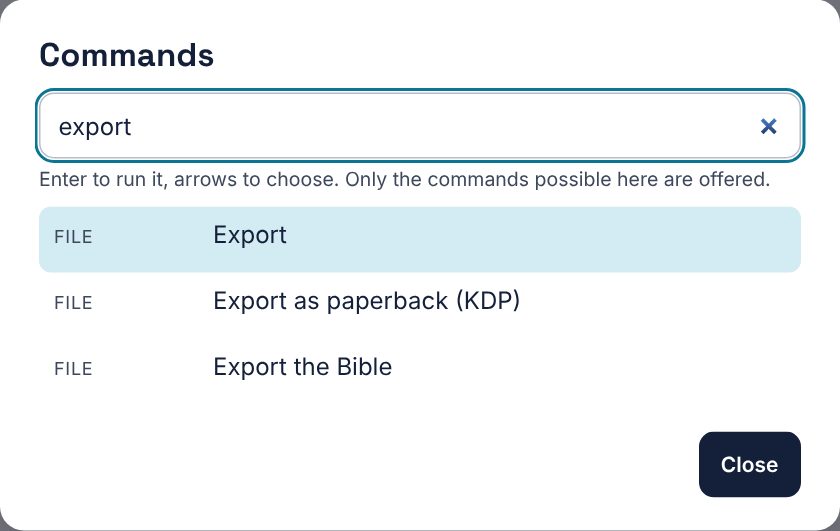
Go to… takes you to places; the palette takes you to actions. Ctrl K, anywhere (projects page included), opens a field: type the name of what you want to do, organise, export, focus mode, statistics… and Enter runs it. The arrows choose another command; the group (File, Edit, View…) is on the left and the shortcut, if there is one, on the right, so you learn it along the way. Only the commands possible where you are are offered: no focus mode on the canvas, no “Organize Canvas” in the Manuscript. With the mouse or a finger, the palette opens from All commands…, at the foot of the search (the magnifier in the top bar). These are the same commands as the Mac menu bar: on Windows and Linux, it is the way to find everything from the keyboard.
Listen to your text
Listen reads the text aloud from where you are, with the voices installed on the device (nothing goes online): in a screenplay, the narrator reads scene headings, action and transitions, and each character speaks their lines in their own voice; in a novel, the narrator reads everything, to the end of the book. The passage being read is highlighted and the page follows it. Pause, Resume and Stop replace the button while reading; typing in the text stops it too.
Listen is in the bar’s ⋯ menu; while reading, the bar shows Pause, Stop and the voices arrow. Reading voices… (same menu) or that arrow opens the choice of voices: the narrator’s, each character’s (otherwise a voice is picked for them, always the same one), the speed and, for a screenplay, whether to read parentheticals. These choices stay on the device, since voices differ from one device to another.
Check the text
Check (in the bar’s ⋯ menu) opens the tab of the same name in the right column, next to In this scene. Nothing is re-read while the tab is closed (typing stays smooth); once open, it updates after you pause, and the number of items found then appears in the menu and on the tab. It points out what deserves a look, without ever correcting anything: a name spelled almost like an entry’s (“Inés” for “Inès”), two spaces in a row, a space before a comma or a period, the same word back within a few words in a paragraph (Close repetitions). Touch an item to go to the passage, selected in the text. On a long enough manuscript, Most used words lists the words that come back most, leaving out function words and proper nouns: touch a word to see each of its uses in “Find and replace”. Rename everywhere… opens “Find and replace” with the right name; Ignore removes the item from the list until the app is closed.
It also asks questions about the story, never errors: the character marked as main is not the one seen in the most scenes (“Who do we really follow?”); a main character has not filled in their “Wants” box; a series has no episode yet; a secret has no planned reveal, or comes out with no clue planted before; an object is named in only one scene (set up without paying off, or paying off without being set up); a template beat begins more than ten points from its usual place (from six scenes on, according to the story ribbon: the question leads to its first scene). Touch the question to open the profile; It’s intended sets it aside.
Project statistics
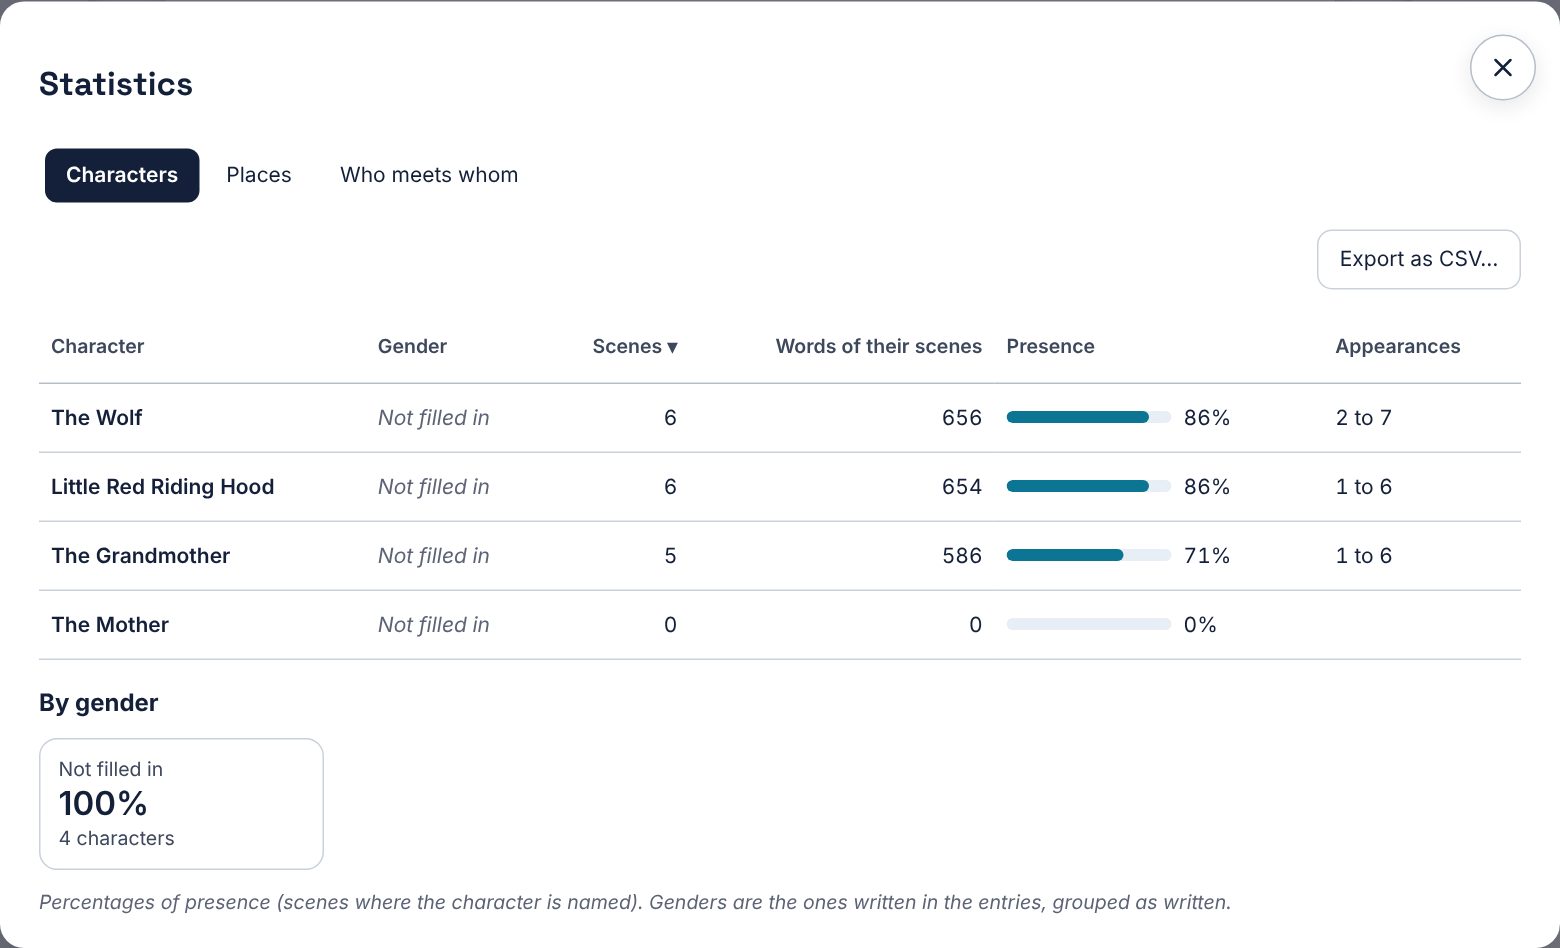
Statistics (in the ⋯ menu of the Manuscript and Screenplay bars, and in the Mac View menu) opens a window that counts, in your text, what you can’t see while writing. Nothing is typed in or saved there.
- Characters: for each one, their scenes, lines and words spoken (screenplay), their share of speaking time (or their Presence in a novel, the scenes where the text names them) and their appearances, from first to last scene. Touch a column title to sort, a name to open their entry. Below, By gender groups the values of the entries’ “Gender” field as you wrote them.
- Places (Locations in a screenplay): for each place, its scenes, its share of the story, its appearances and the characters met there. In a novel, a scene takes place somewhere when a thread links it to that place on the canvas, or when its text names it.
- Who meets whom: a table of the scenes each pair of characters shares (they speak or are named in them). Touch a cell to list their shared scenes and open one. Beside it, the most present pair and the characters who never meet: nothing wrong in itself, it’s a question to ask yourself.
Each tab has its Export as CSV…, for a spreadsheet.
Write from the card
A Scene card carries its text. On the canvas, it shows its synopsis, the start of its scene and its word count. Expanded, it becomes a page where you write the scene, the same as in the Manuscript; Open in Manuscript takes you there.
Texts without a card
Deleting a Scene card never deletes its text. If a scene has lost its card, it appears in Texts without a card, at the bottom of the column: Recreate the card puts it back in the book.
Chapter 9The Screenplay
In a screenplay project, the Manuscript becomes the Screenplay view: an editor in standard film format, which saves the text as Fountain, an open format read by Highland, Fade In, WriterSolo, Slugline or Trelby. The Outline lists the scenes in screenplay order.
Switch to screenplay
Create a project with A screenplay, import a Fountain or Final Draft file, or switch an existing project in Settings › This project › Project type. The vocabulary follows: Places are called Locations, a Scene card’s title is its heading (“INT. LIGHTHOUSE - NIGHT”), and length is counted in pages and minutes (one page is about one minute), shown in the top bar.
The editor
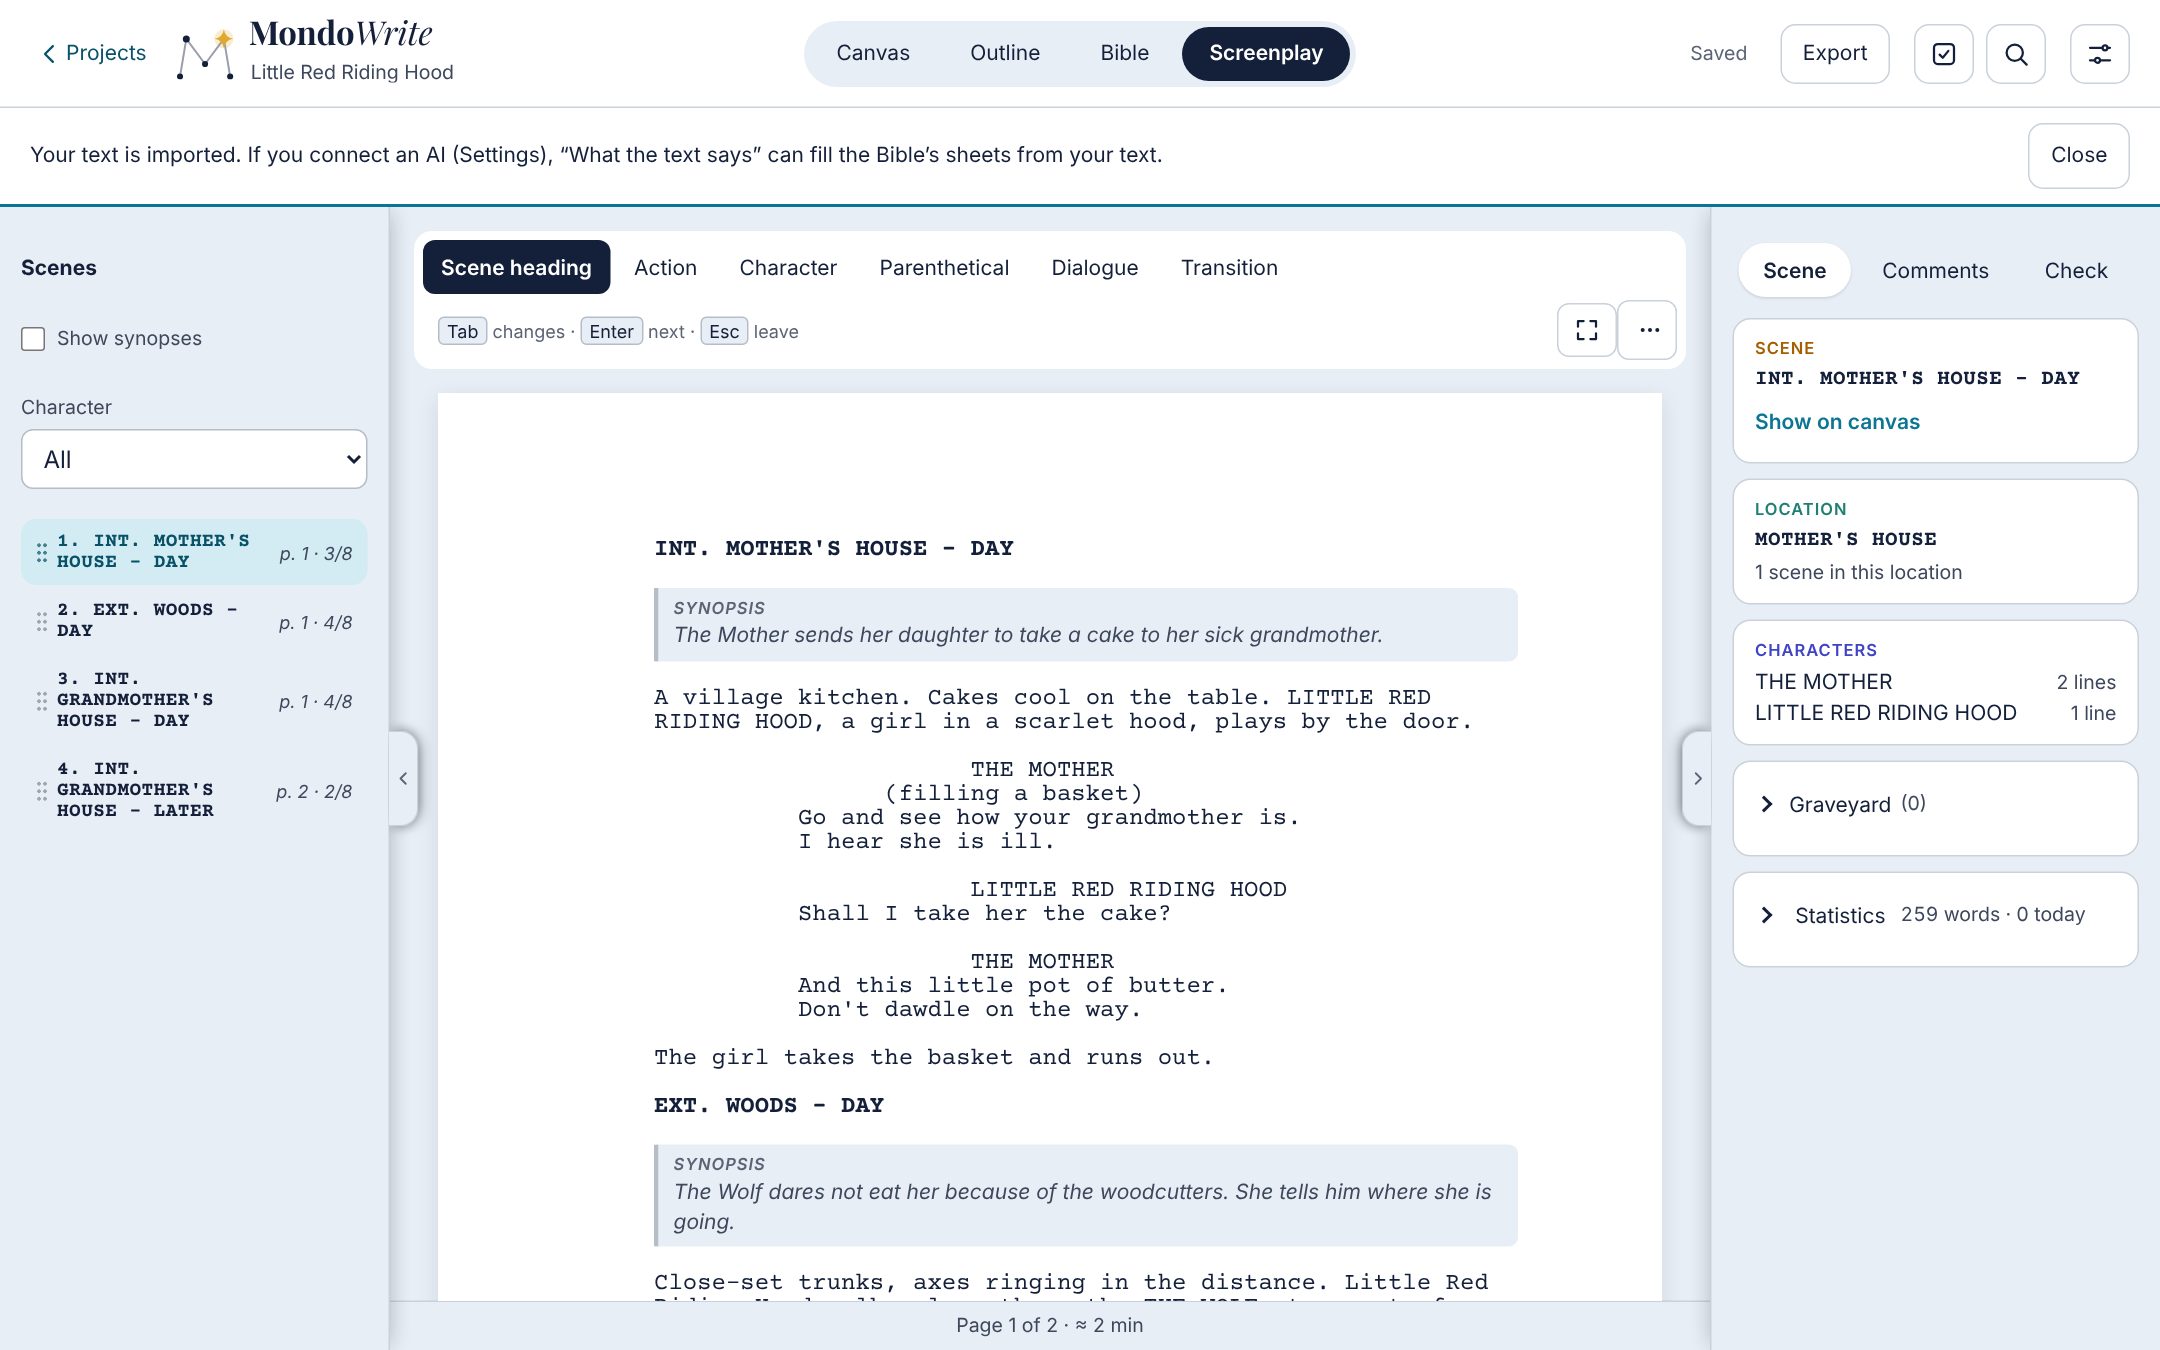
The screenplay is made of elements: Scene heading, Action, Character, Parenthetical, Dialogue, Transition. The bar above the page shows the current element and lets you change it with a click. From the keyboard:
- Tab changes the element type (Shift Tab the other way);
- Enter moves to the next logical element: character then dialogue, dialogue then action…;
- Esc leaves the page and hands over to the element bar.
The bar reminds you of these keys until you have changed element five times with Tab; it then fits on one row. Likewise, the hint at the top of the canvas fades once you have created a card, drawn a thread and changed a type. The Guided tour brings them back.
On iPhone, the bar is folded at the top of the page: it only shows the type of the current element. Tap it to open the panel (the six elements, then the Focus mode button and the ⋯ menu: Listen, Graveyard, Replace, Go to…, Check); it closes as soon as you pick an element. The Statistics window, too wide for a phone, isn’t offered there: open it on iPad or a computer.
The app recognises what you type: a line starting with “int.” or “ext.” becomes a heading, a parenthesis under a character a parenthetical. The element you are writing switches to capitals when needed. The page is cut into real pages (Letter or A4), with the page number and length at the bottom.
Autocomplete
While you write a heading or a character name, MondoWrite suggests the locations and characters from the Bible, times of day (DAY, NIGHT…), extensions (V.O., O.S., CONT’D). Choose with the arrows and Enter. A new name offers to create its entry or location.
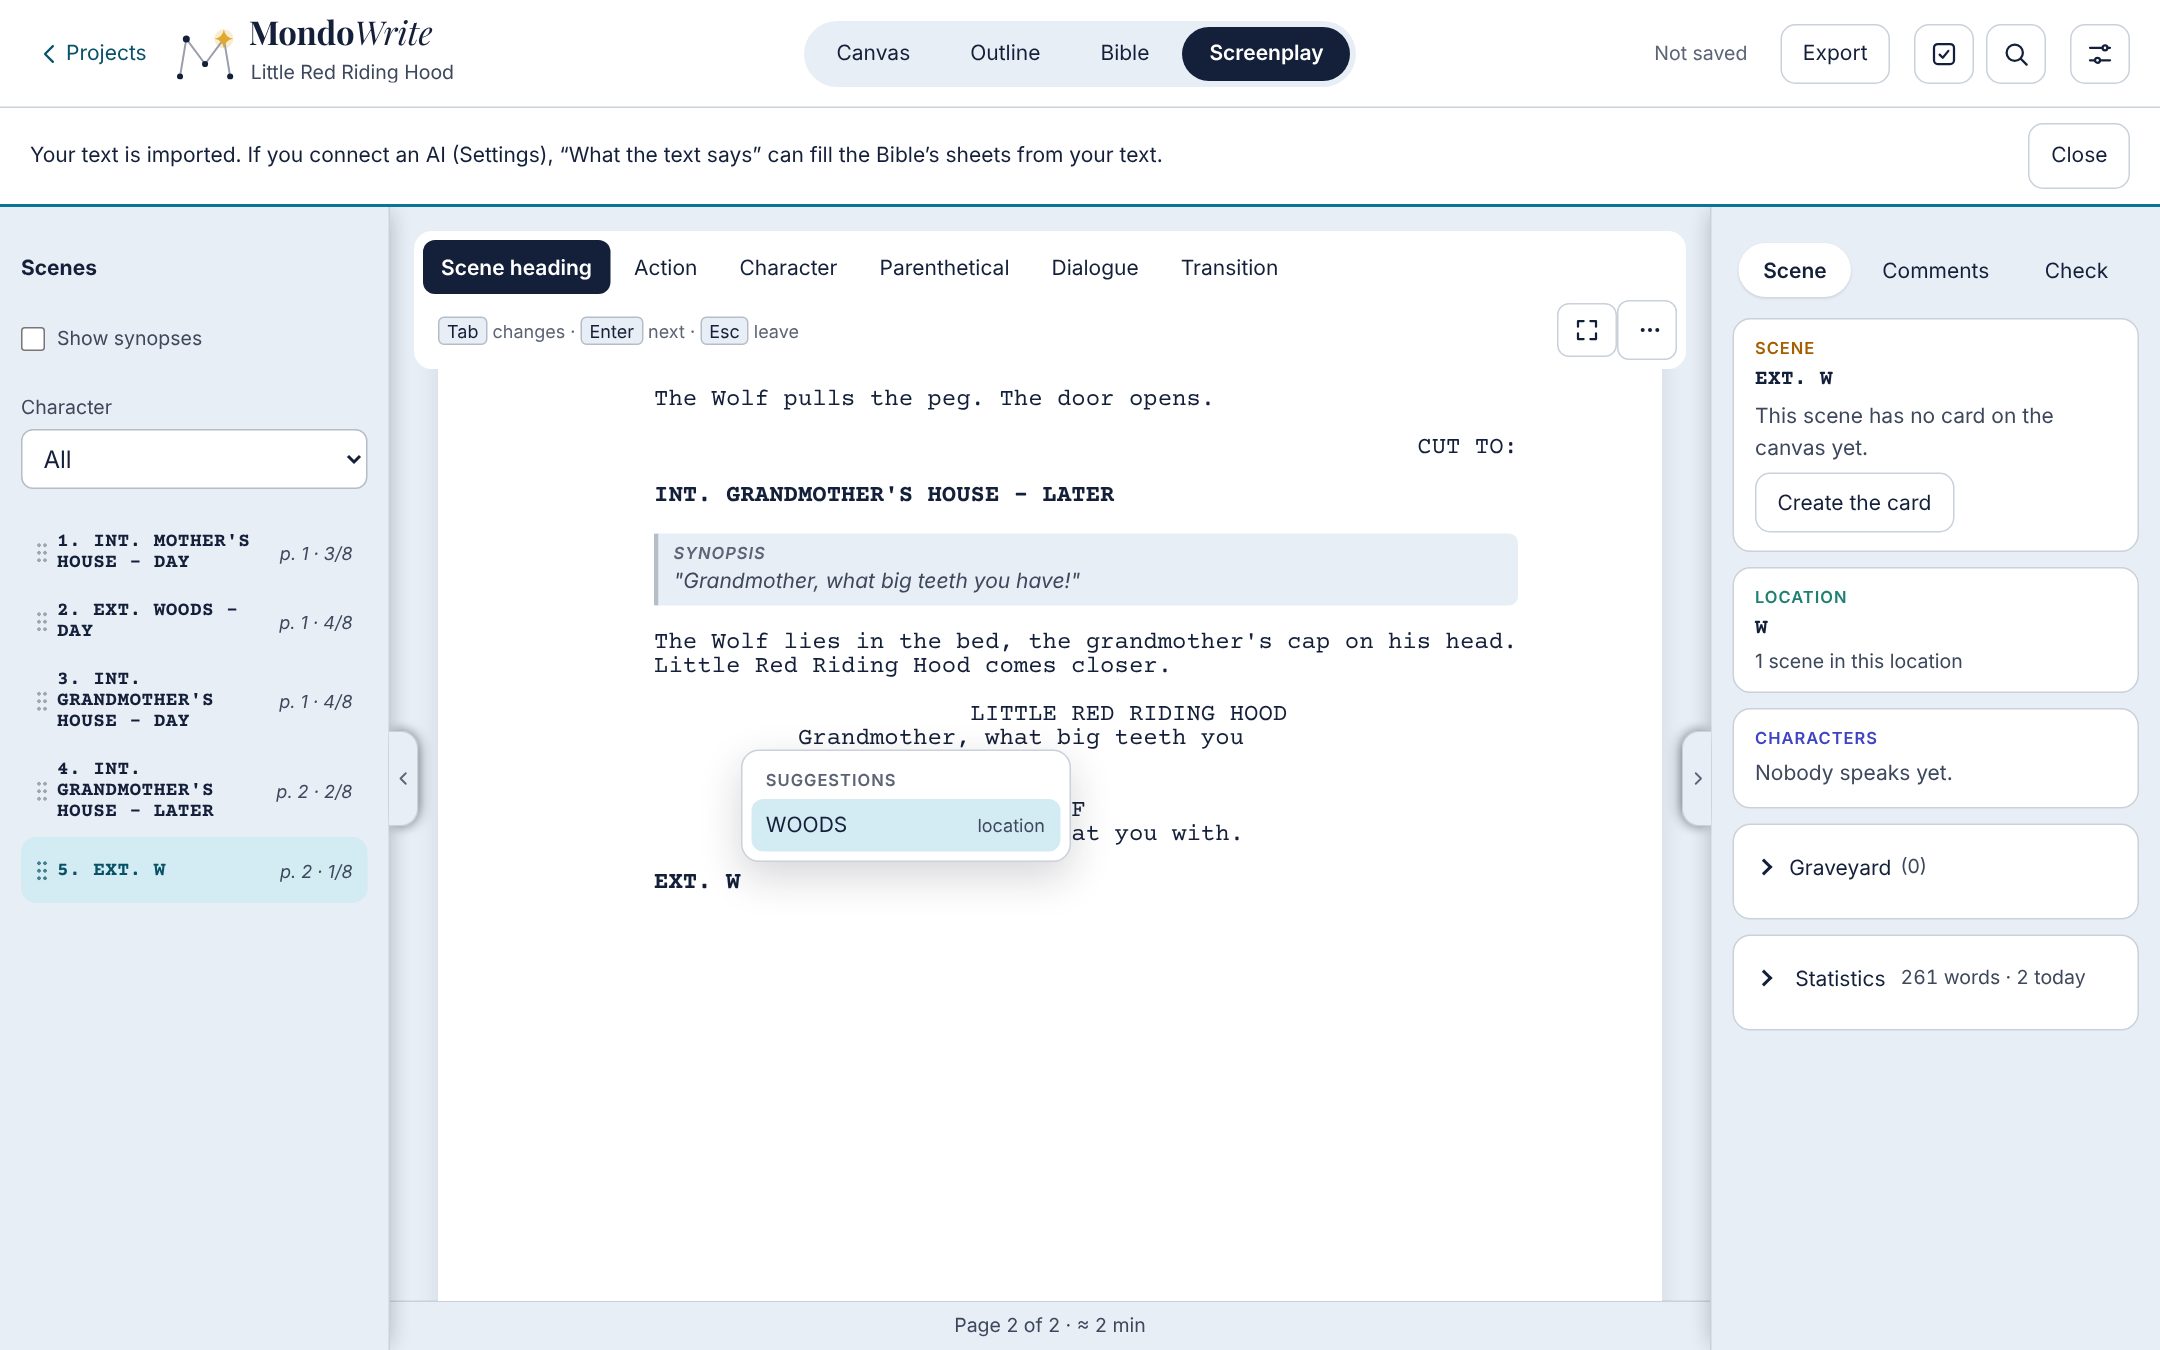
A scene or a character written in the screenplay gets its card on the canvas (with the location’s card and the “takes place in” thread), without anything being copied.
The scenes column and “In this scene”
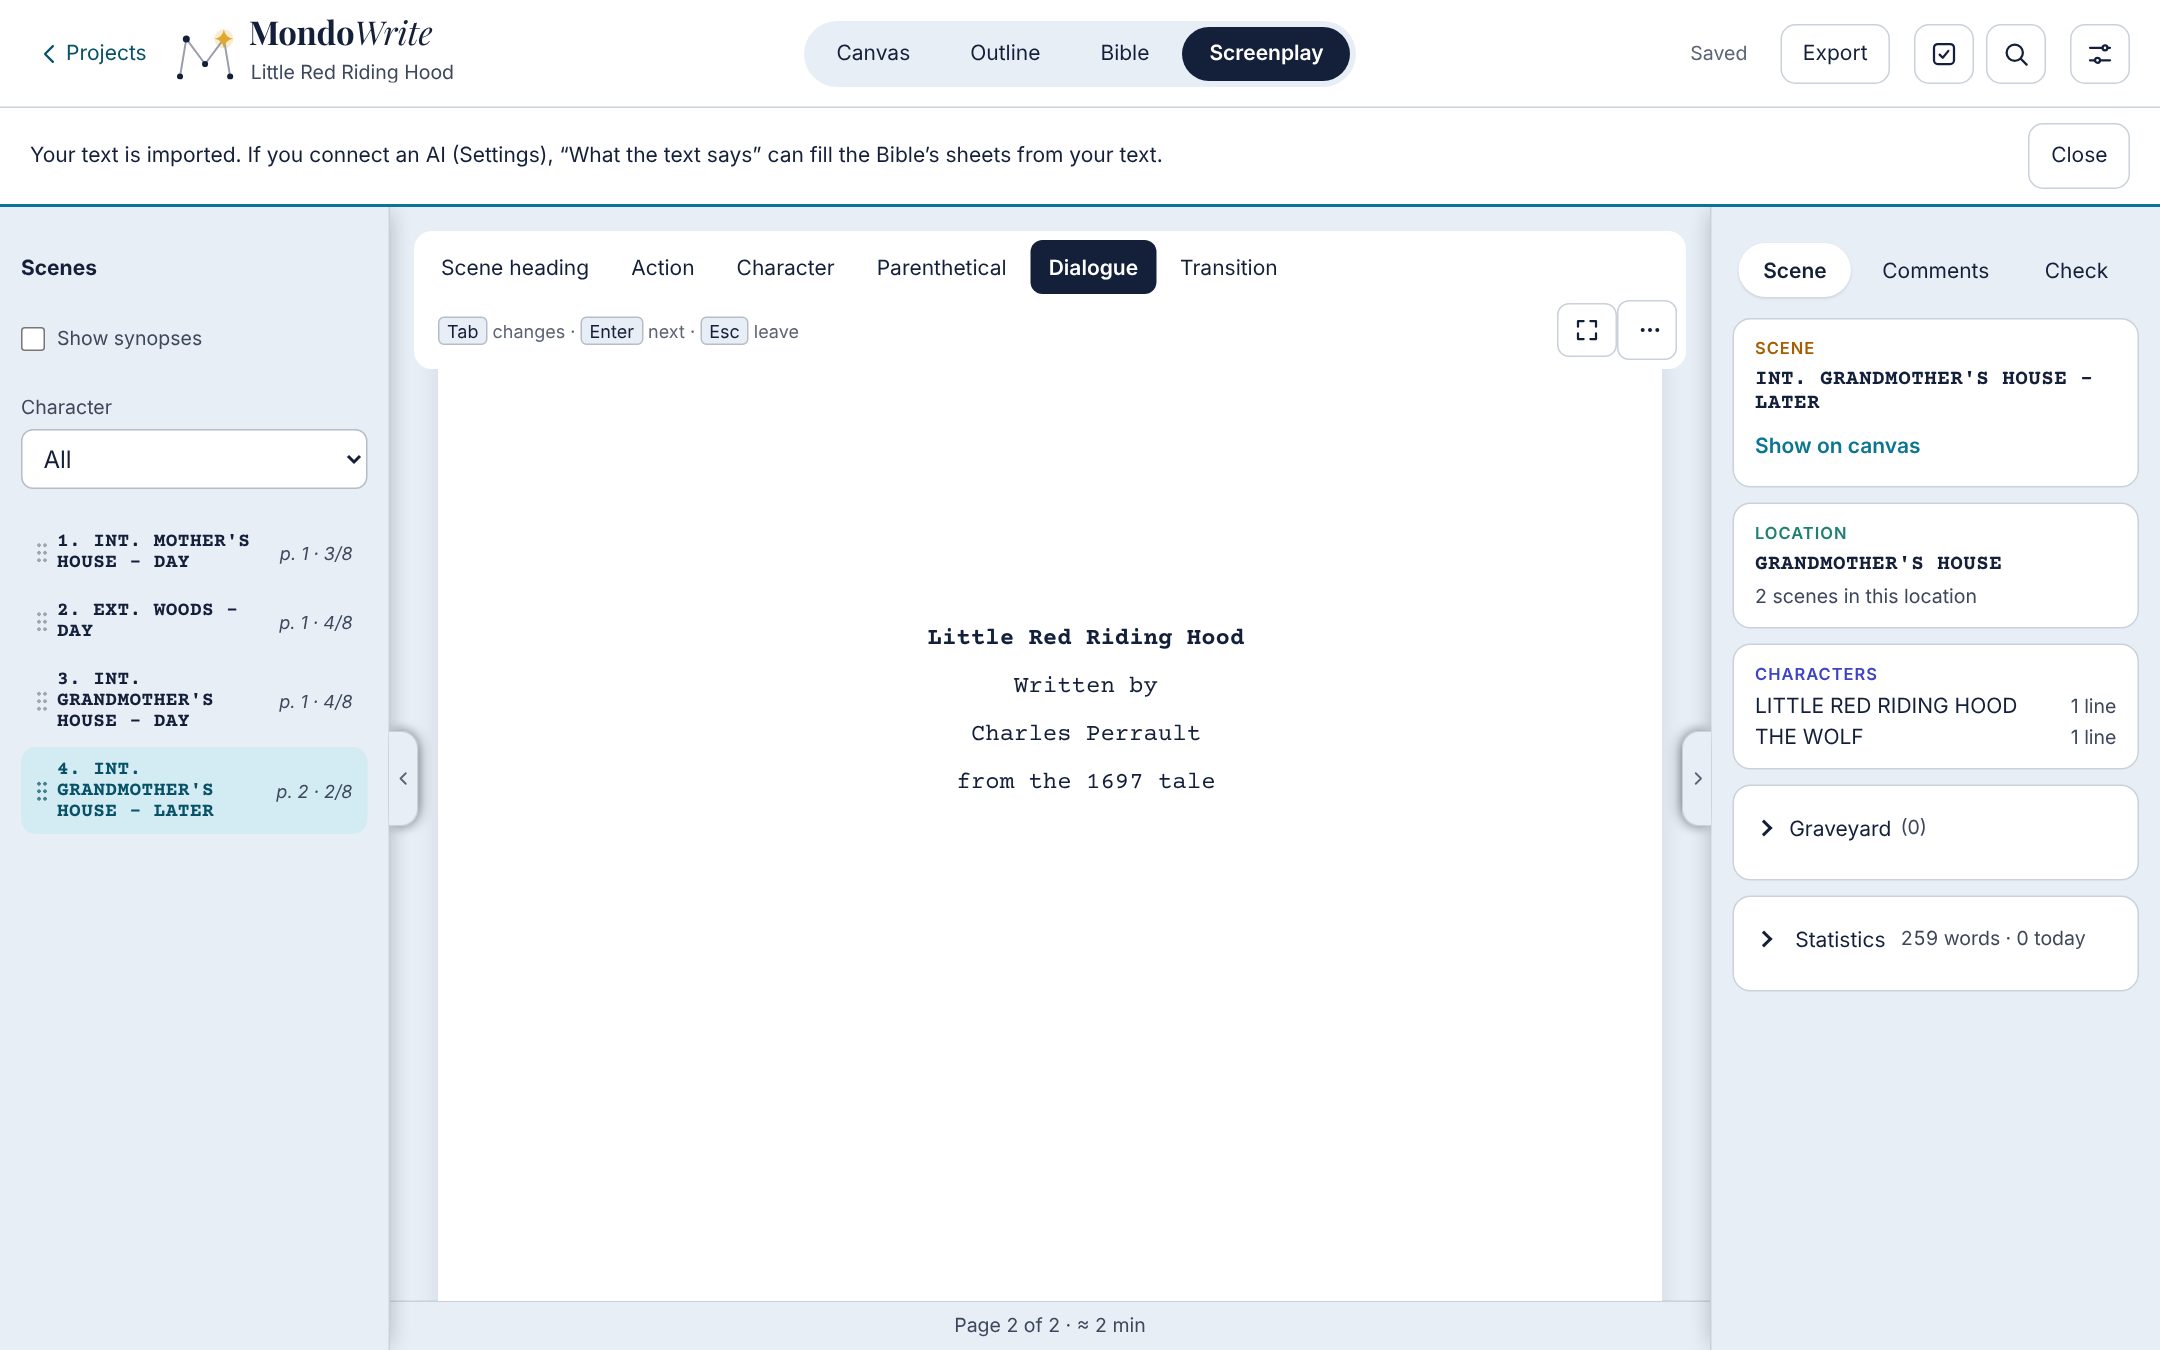
On the left, the list of scenes with their page; a click takes you there. The list shows only the headings, so you see as many as possible at once. They reorder by dragging their grip (⋮⋮ at the left of each scene), with their arrows or Alt ↑ ↓. On the right, the Scene tab shows the scene’s card, its synopsis (write or change it there, as in the Manuscript; it is a Fountain = … line under the heading, which the page doesn’t show and printing ignores), its location (with the number of scenes set there) and the characters who speak, with their number of lines. Both columns fold away with the handles on the edges of the page, as in the Manuscript (and become drawers on a narrow screen).
Title page and options
At the top of the page, the title page is filled in place: title, credit (“Written by”), author, source, contact, draft date. Your profile’s name is put there for every new screenplay.
Scene numbering and heading underlining (on screen, in the PDF and in the Final Draft export), as well as the page size (US Letter or A4), are set in Settings › This project. In the bar, Focus mode, Listen and the ⋯ menu (Graveyard, Replace, Go to…, Check, Statistics) work as in the Manuscript.
Statistics, Graveyard and focus mode
In the right column, after the scene and the Graveyard, Statistics (folded) gives the screenplay’s figures: words, pages (measured on the screenplay layout), running time, scenes written, and the daily and project goals. Words written in the screenplay count toward today’s progress and the days in a row, as in the Manuscript. The Graveyard: select a passage and press Ctrl Shift K to set it aside, Put back brings it back.
Focus mode keeps only the text, without page breaks, and works as in the Manuscript: bar and pointer hidden while you type, highlight with Ctrl Shift E, typewriter, counter when you pause (page, duration and words of the session). Esc leaves it.
Check the screenplay
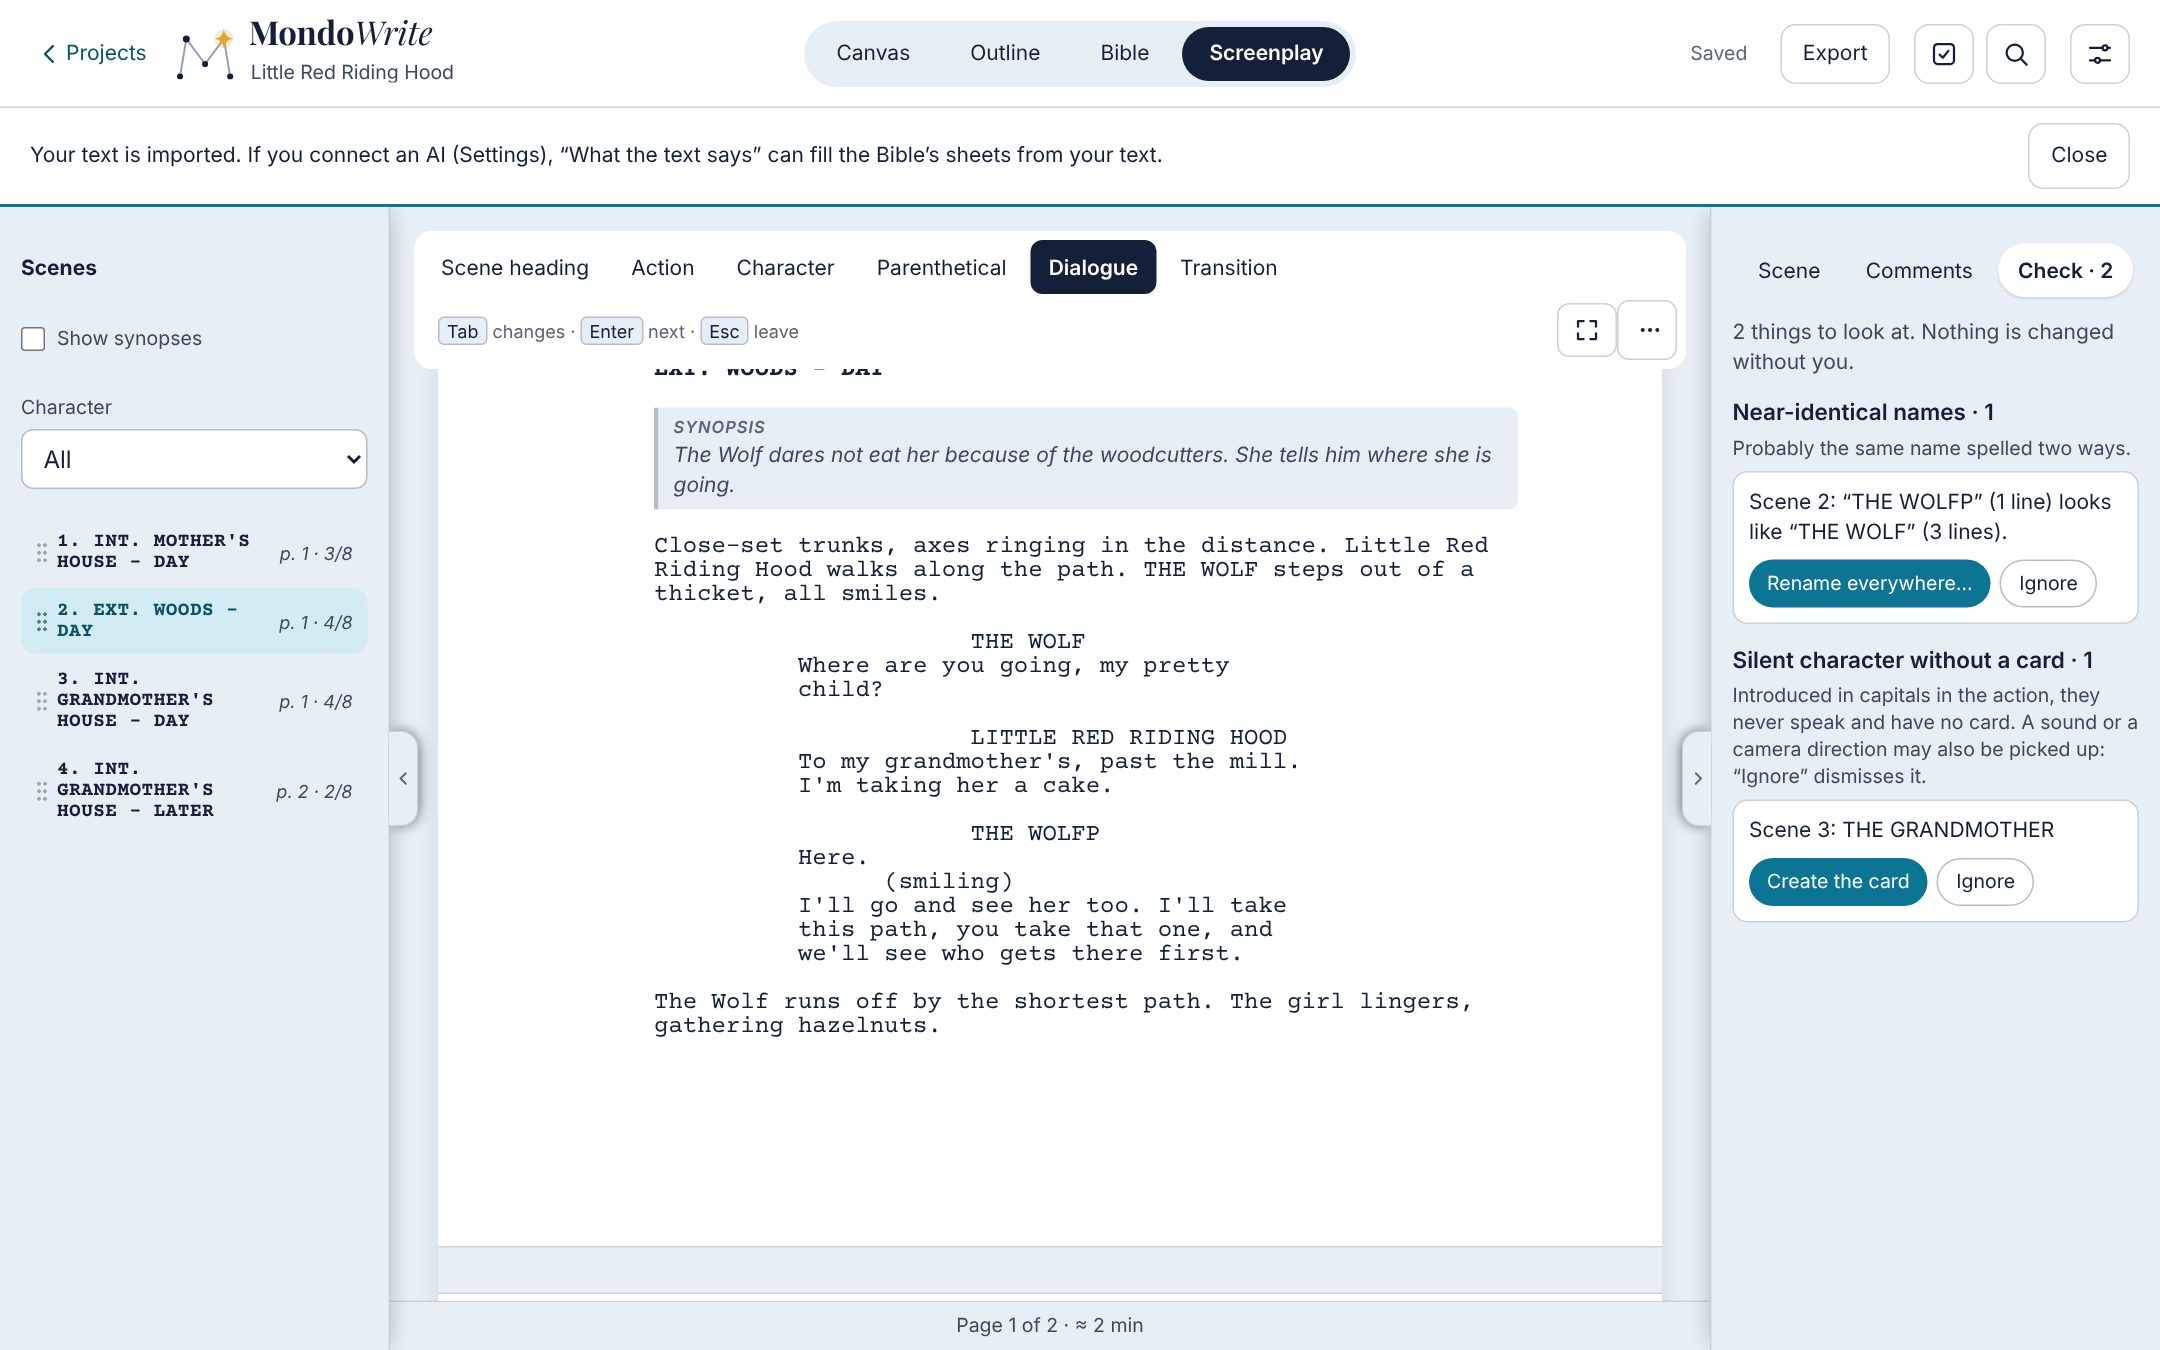
As in the Manuscript, Check opens a tab of things to look at: near-identical character names (“CHAPPERON” next to “CHAPERON”, with each one’s number of lines), a character who speaks without a card (Create the card; a typo on a known name is listed among the near-identical names, with Rename everywhere…), a silent character without a card (introduced in capitals in the action, they never speak; a sound or a camera direction may also be picked up, Ignore dismisses it), action longer than 4 lines, a heading without INT./EXT. or without a time, a character with no line, extra spaces, and the questions about the story (main character, “Wants” box, series without episodes, with New episode, secrets, objects, and the length of the pilot: about one page per minute, from the format chosen on the cover, for example 27 to 35 pages for 30-minute episodes). Touch an item to go to the element; nothing changes without you.
Filter by character
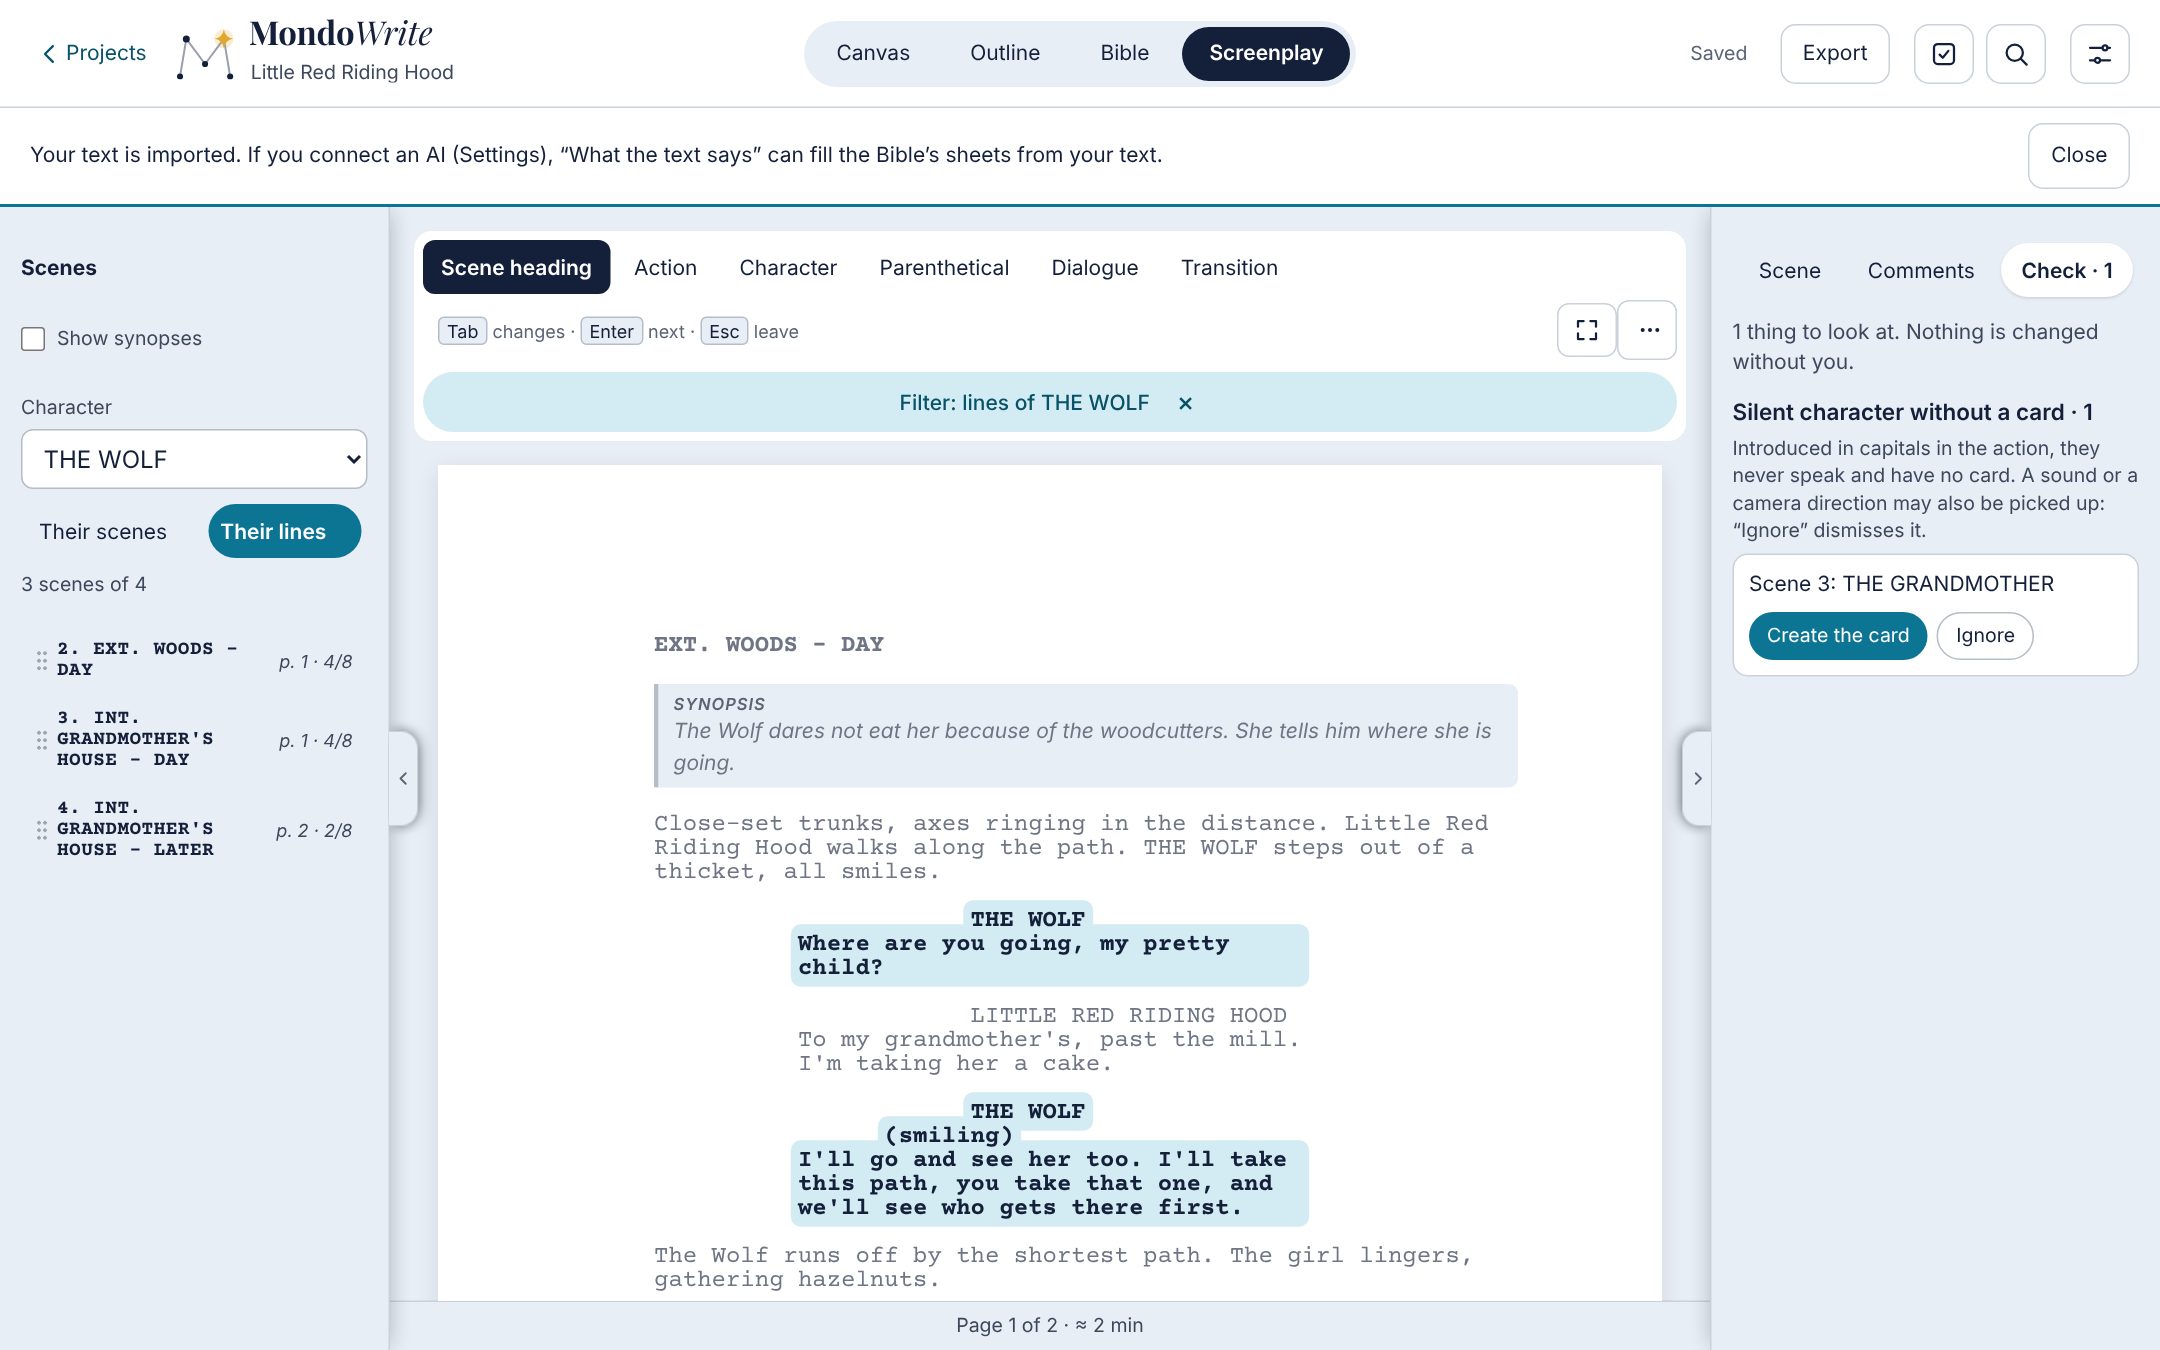
At the top of the scene list, choose a Character: Their scenes keeps only the scenes where they speak or are named in the action; Their lines also fades everything they don’t say. The faded text stays editable, and the sheet becomes continuous while the filter is on. The banner in the bar, or All, brings back the whole screenplay. From their entry in the Bible, See their lines in the screenplay sets this filter directly.
Revisions
When a screenplay circulates, each version has to be recognisable at a glance: changed lines carry an asterisk in the right margin, and each version has its own colour. That is the convention in every screenwriting program, and MondoWrite follows it. Nothing is mandatory: with no revision open, the text is never marked.
- Open a pass: the ⋯ menu of the Screenplay view, Revisions…. Pick a colour (in the usual order: blue, pink, yellow, green, goldenrod, buff, salmon, cherry, then it starts over), a date and, if you like, a name (“Shooting draft”), then Open the revision. A chip in the pass’s colour appears in the bar.
- Write: while the pass is open, every line you type, paste or change gets the pass’s colour as a light background and an asterisk in the margin. Removing words from a line marks it too, as in Final Draft. Character names are never marked. A line already marked by an older pass takes the mark of the newest.
- Close the revision stops marking; marks already placed stay.
- Clean new draft removes every mark without touching the text (you can undo it). Use it once the version is out, before opening the next pass.
Locking pages
As soon as pages have gone out to the team, Lock pages freezes today’s pagination and numbers the scenes. Each page keeps its number and starts at the same place: overflow takes a letter (12, 12A, 12B), a deleted page leaves “13-14” on the previous one, and a scene added between 12 and 13 becomes 12A. Unlock… asks for confirmation; scene numbers already set stay.
Once pages are locked, a scene you take out keeps its place: Omit scene (⋯ menu of the Screenplay view or of a scene in the outline, command palette, Edit menu on a Mac) leaves “OMITTED” in place of its heading, with its number, on the sheet and in the PDF. Its text and card go to the trash; Restore brings them back in place of “OMITTED”.
A way to work
- Write freely, with no revision and no lock, while the screenplay is yours alone.
- When it goes to the team, lock the pages. This is the white draft.
- Open the blue revision and make your changes. Export the PDF with Only the revised pages of the latest pass: the team prints only the pages that changed.
- For the next version, Close the revision, Clean new draft if you want to start from zero, then open the pink revision, and so on.
What becomes of the marks
- PDF: an asterisk in the margin of every line of the pass, and “Blue revision” followed by the date in the page header. With Coloured pages (PDF window), each revised page is printed on the paper of its latest pass, like the pages slipped into the team’s copies; pages with no revision stay white.
- Final Draft (FDX): the revisions are written into the file. We have not yet checked this in Final Draft itself; tell us what you see there.
- Fountain: the mark is a
[[cosmos:rev:2]]note at the end of the line, which other programs ignore.
Screenplay statistics
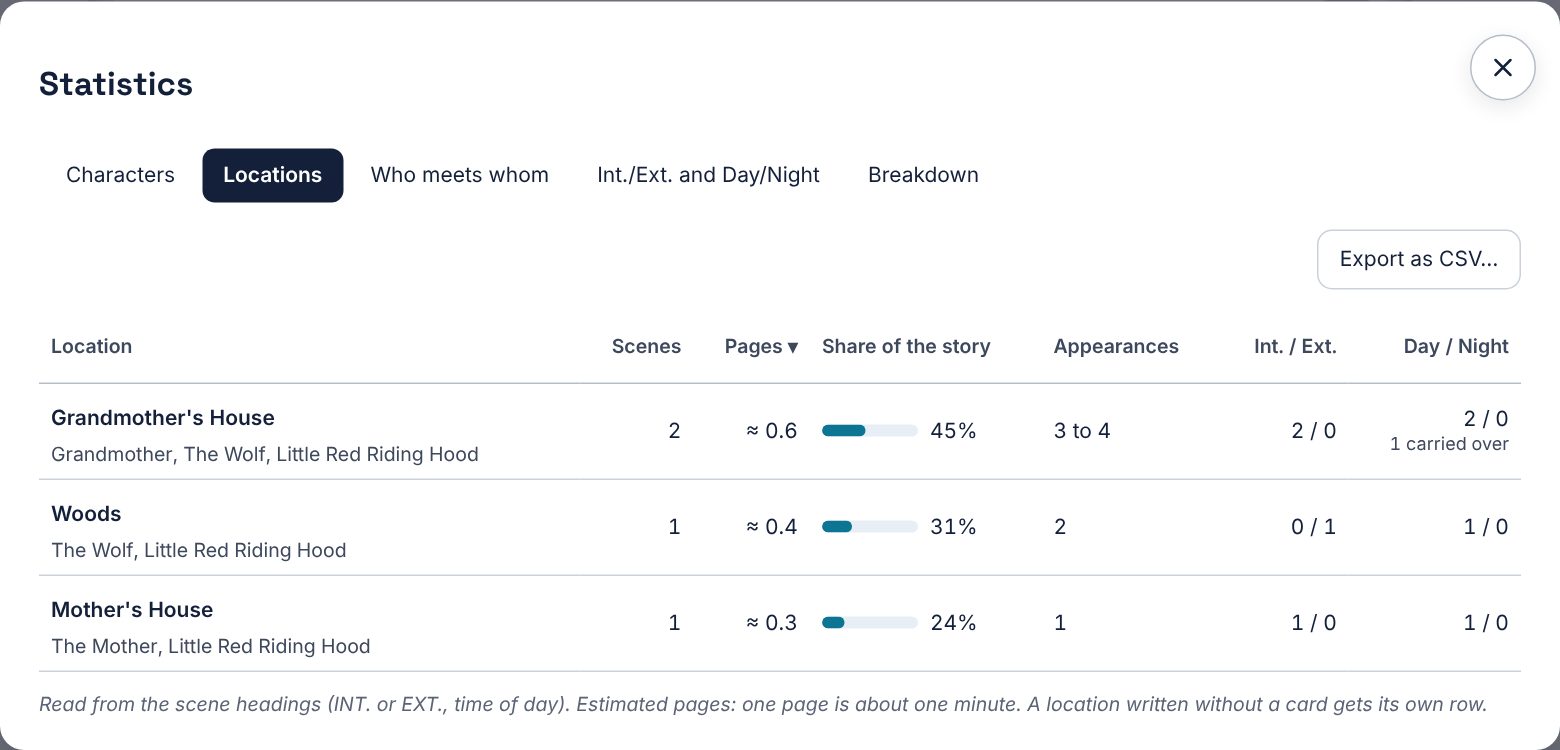
Statistics, in the bar’s ⋯ menu, opens the same window as in a novel (see “Project statistics”), read from the screenplay. The Locations tab is a shooting breakdown: the pages of each location (one page is about one minute), its interior or exterior scenes, day or night, and the characters met there. You see at a glance what will be expensive (exterior nights) or a location used only once. A location written without a card gets its own row. In the Characters tab, the No lines part lists those who never speak: characters who have a card, and names written in capitals in the action, with their scenes and Create the card. The CSV export counts them too, with 0 lines.
In a series, Count, at the top of the window, limits the figures to one season or one episode; Go to (Ctrl G) also offers each season and each episode, with its season’s name, and opens it in the Screenplay view. Check compares the length of each written episode with the cover’s format (for 52-minute episodes, 47 to 60 pages) and points out a main character missing from three or more episodes in a row.
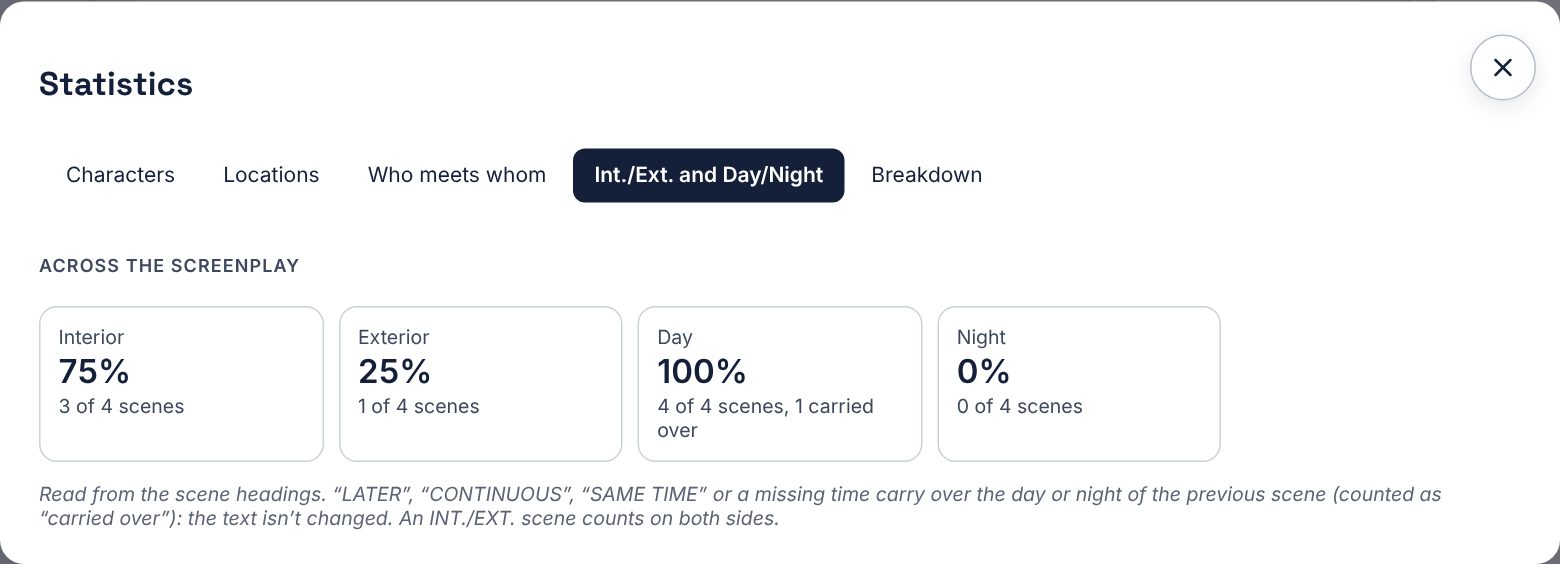
In Who meets whom, a touched cell also offers See these scenes in the screenplay: the filter then keeps only the scenes where both characters meet.
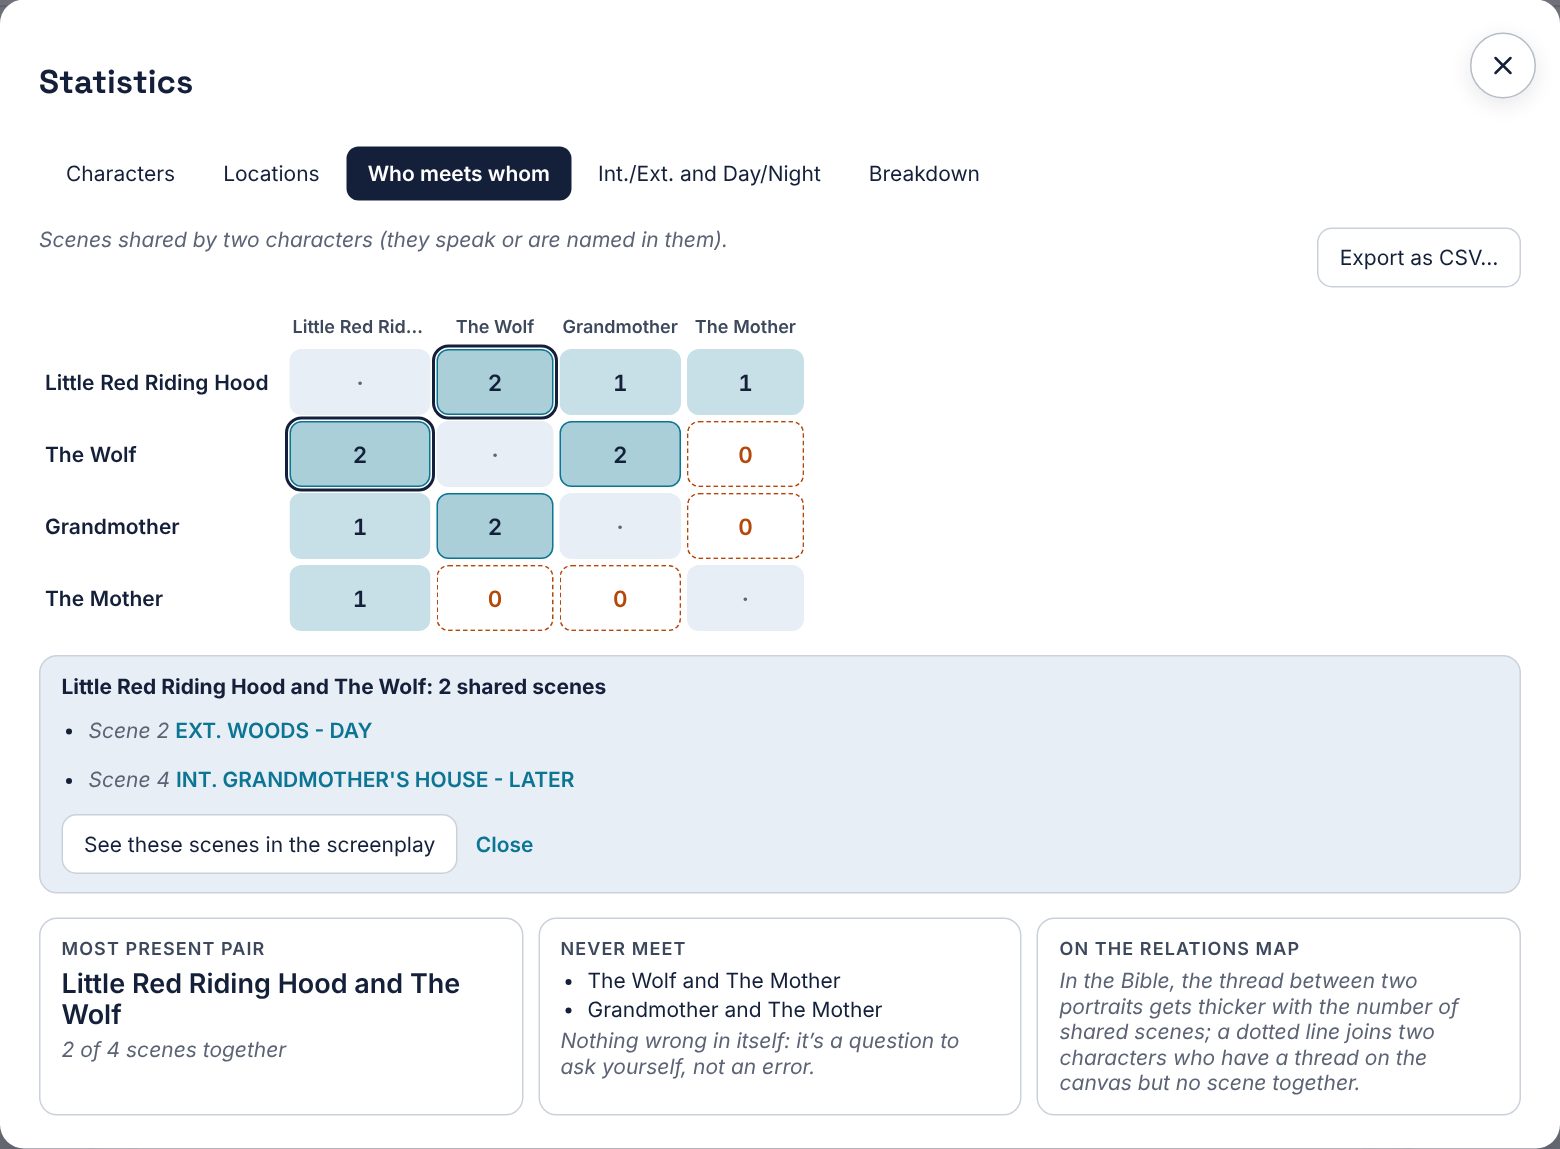
The Int./Ext. and Day/Night tab counts across the whole screenplay. A “LATER”, “CONTINUOUS” or “SAME TIME” scene, or one with no time, carries over the day or night of the previous scene: it is counted as “carried over”, without touching the text. An INT./EXT. scene counts on both sides.
The outline of a screenplay
The outline lists the scenes in screenplay order, with their synopsis, characters, length and status. A scene’s length is counted in eighths of a page, as on a shooting schedule: “3/8 p.”, “1 p.”, “1 2/8 p.”; the scene list of the Screenplay view shows it too, after its page, and a scene’s breakdown sheet shows it at the top. Drag a scene or use its arrows to change the order of the screenplay itself. On each scene, ↗ shows its card on the canvas and ✎ opens it in the Screenplay.
The Template menu offers: none, three acts, Save the Cat, eight sequences (the film in eight sequences of about fifteen minutes), TV episode (teaser, four acts, tag), and the Outline’s structures (hero’s journey, Dan Harmon’s story circle, five-act pyramid, six stages, seven points, kishōtenketsu, romance, mystery), plus your own templates (see the Outline). The template’s beats are sections of the Fountain file, which other software sees as plain sections. In the Screenplay view, the cursor waits under the first beat until a scene follows it, and what you type under a beat starts a scene heading; place scenes with Move to, the arrows or by dragging. Each beat shows its rank (“Beat 3 of 15”), a large title, its hint and its length; your own sections stay smaller, under the beats.
For a series, + New episode (at the top of the outline, in any screenplay that is not a film) creates the first episode under a Season 1: what you have already written becomes its screenplay. The outline then shows the series as a tree, season › episode › scenes. Touch a title to change it in place, + Synopsis under an episode to say in two or three sentences what happens in it, the arrow to fold a season or an episode. Each one shows its pages. Its ⋯ menu offers Write the episode, Move up, Move down (an episode moves from one season to the next) and Remove: only the title goes, the text joins what comes before it. + New season adds one at the end; New episode in this season is in a season’s menu. Move a scene to another episode with Move to or the arrows. In the Screenplay view, the picker at the top of the scene list opens Whole screenplay or a single episode; its arrows go to the previous or next one. On Whole screenplay, the scene list follows seasons and episodes (a title takes you there in one click) and the text names each part: Season, Episode 2, Beat. The beat ribbon only shows with an episode open. A scene written in an episode joins its frame on the canvas right away. Everything stays in scenario.fountain, where seasons and episodes are plain sections for other software. Each episode has its own template: Episode template, under its synopsis, puts its beats in that episode’s text only (TV episode first in the list), your own templates included (My templates: create one, reuse a saved one, edit the episode’s); Move to names them with their episode, and Organize draws them inside the episode’s frame.
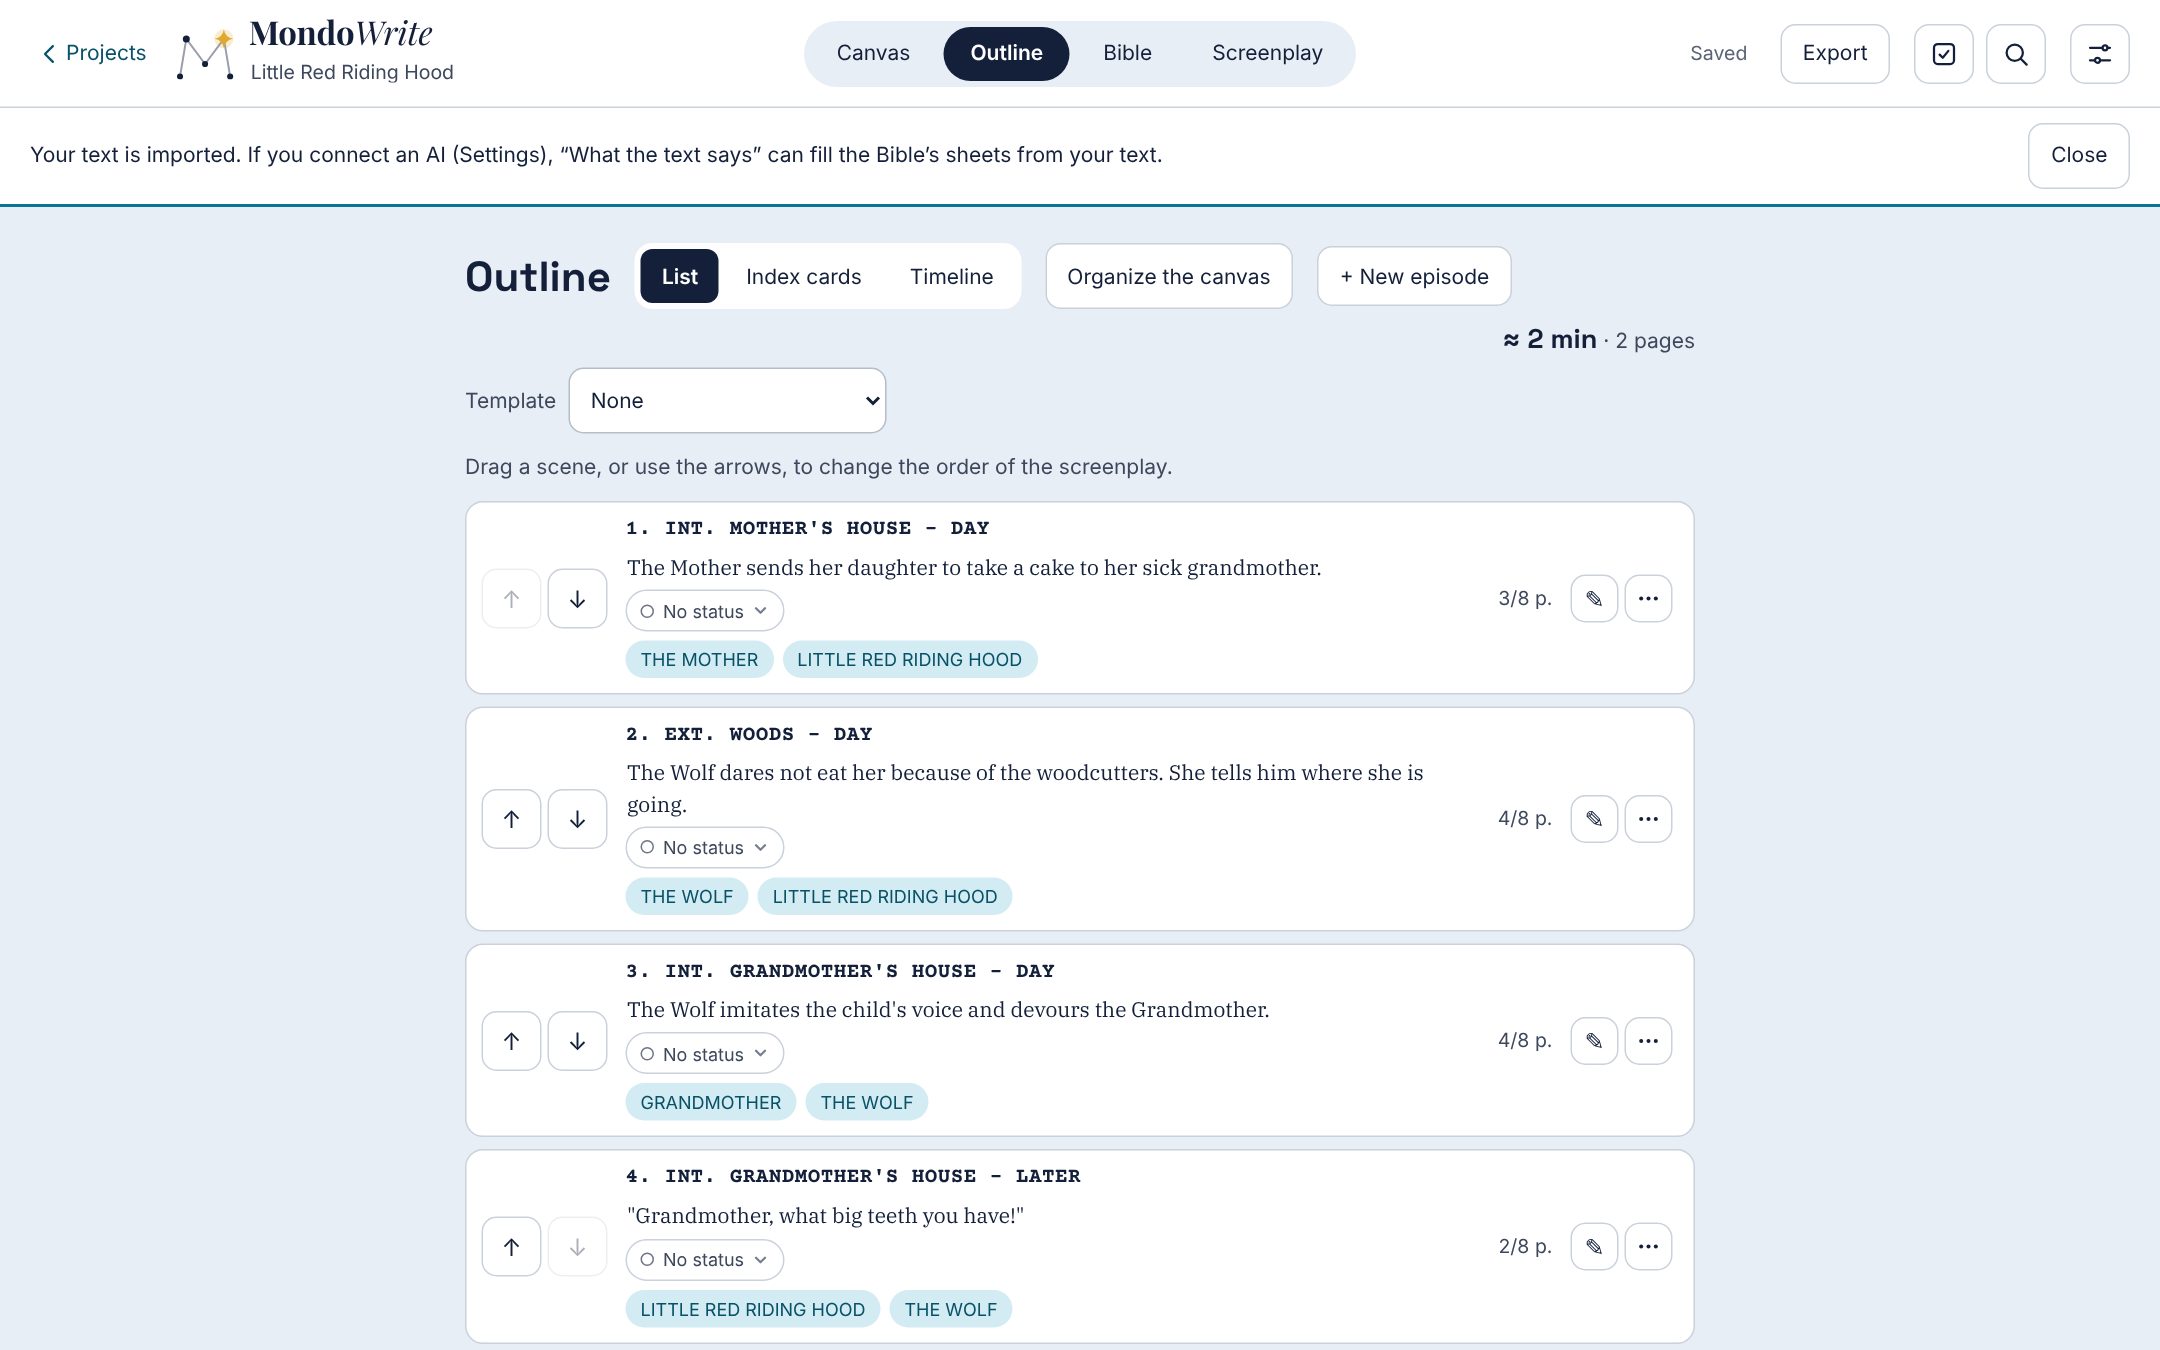
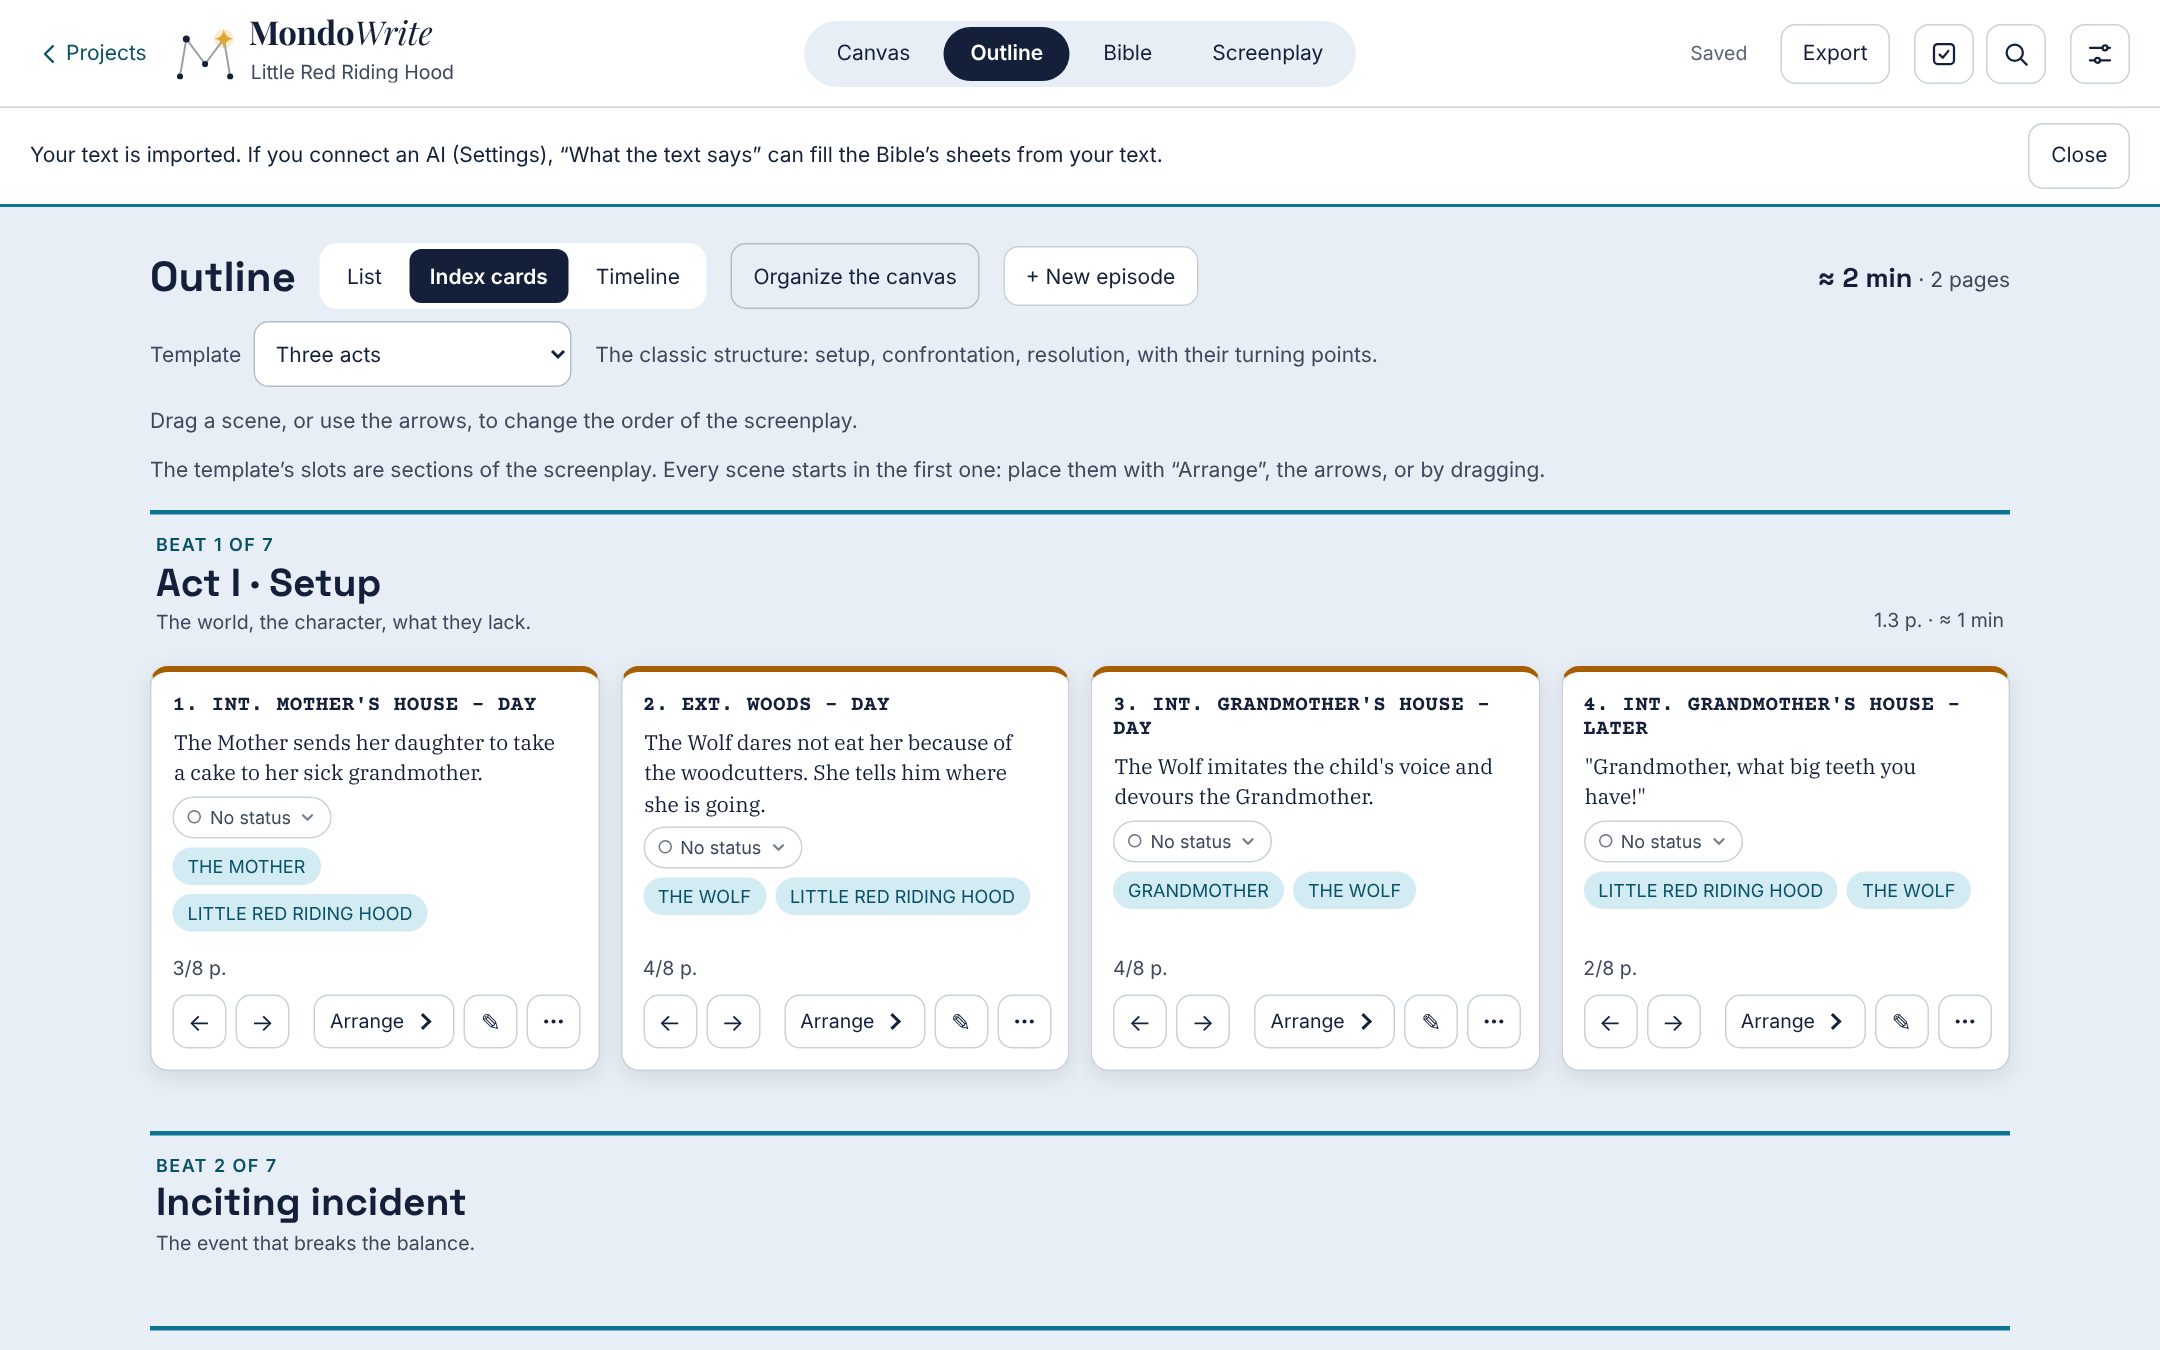
A scene in its card
Expanded, a screenplay Scene card shows its heading, its synopsis and an editor limited to the text of that scene, with the same element bar.
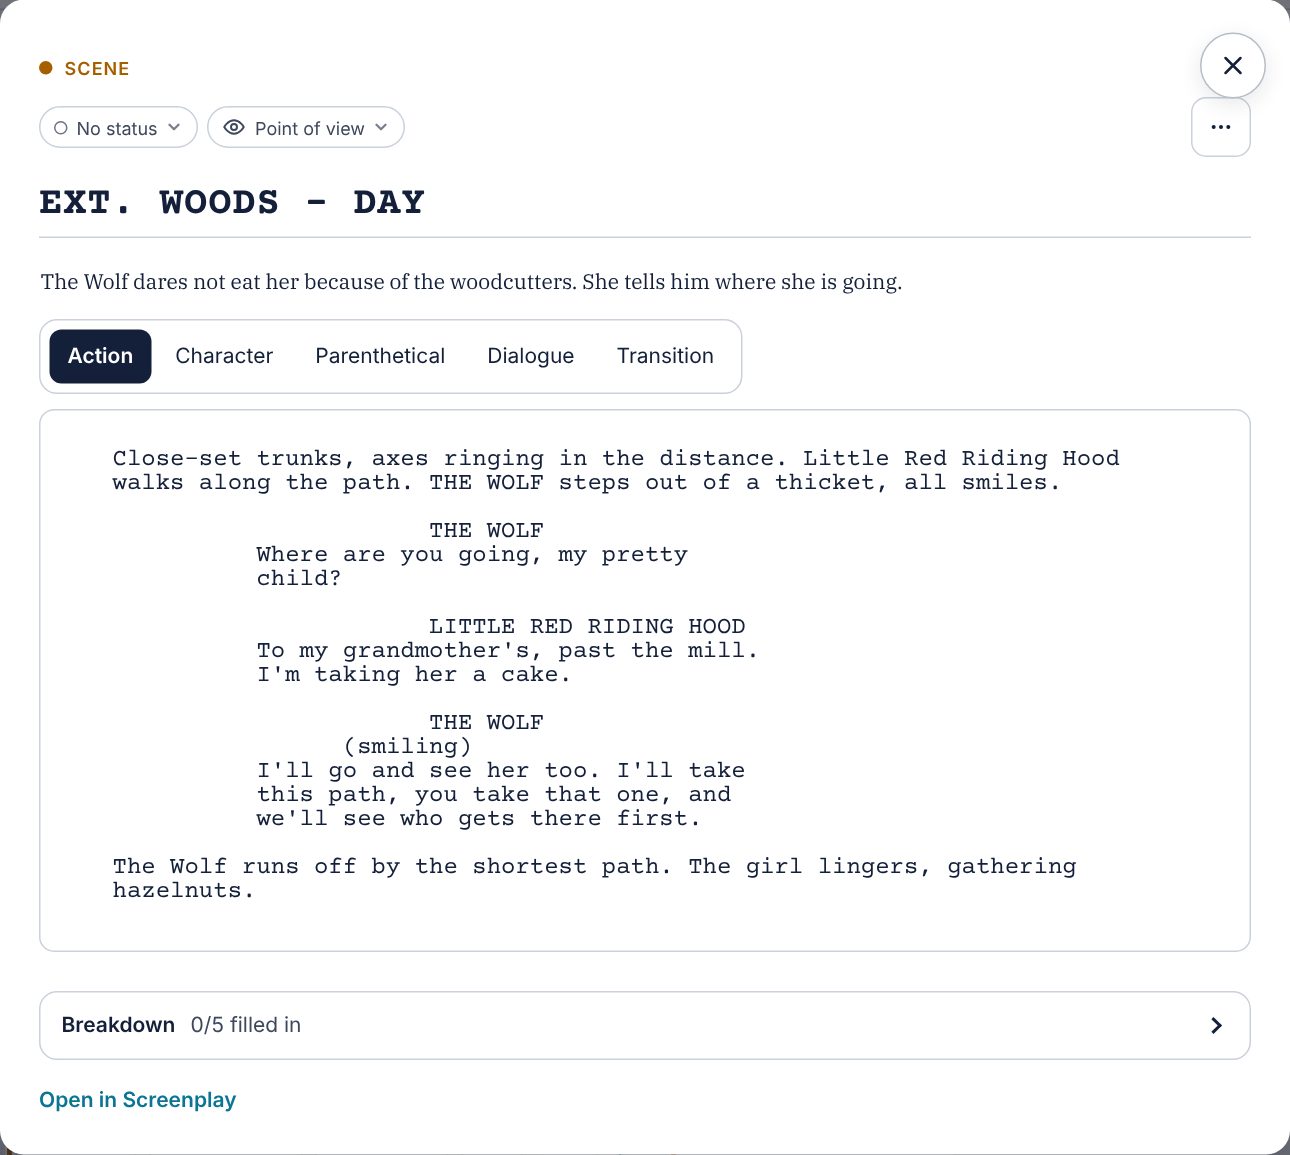
Chapter 10AI, optional
MondoWrite works entirely without AI. If you plug one in, it asks questions and makes suggestions; it never writes your text, and nothing changes without your say.
Plug in a service
In Settings › AI (optional), choose a Service:
- Claude (Anthropic), OpenAI, OpenRouter: online services. Paste your API key; it stays on your device, kept in the system keychain (Keychain on Mac, iPhone and iPad, Credential Manager on Windows, Secret Service on Linux) when there is one, and never in the project. Your cards are only sent to the service when you run an AI action.
- Ollama, LM Studio: models running on your computer. As long as the server address is this computer’s, your texts never leave it; any other address is flagged in Settings. Give the server address (the default one usually works; an address ending in
/v1works too). If LM Studio asks for a token (“Require Authentication” in its server settings), create one in LM Studio and paste it into API token (optional). - Apple Intelligence (on device): on a Mac or iPhone with Apple Intelligence (macOS 26, iOS 26 and later), Apple’s model, free, with no key or setup, and nothing leaves the device. It only shows when it’s available; if Apple Intelligence is turned off, Settings say so, with Check again. This model is small: it suits short actions (Tidy up ideas, assistant questions, Ask the character, Workshop mode); readings of the whole story (continuity, voices, beta reader, what the text says) are greyed out with the reason, and search by meaning and photo descriptions aren’t offered.
Test and list models checks the connection and offers the list of available models. The AI button then appears in the top bar. If the list could not be loaded, a message says so: press the button again to retry.
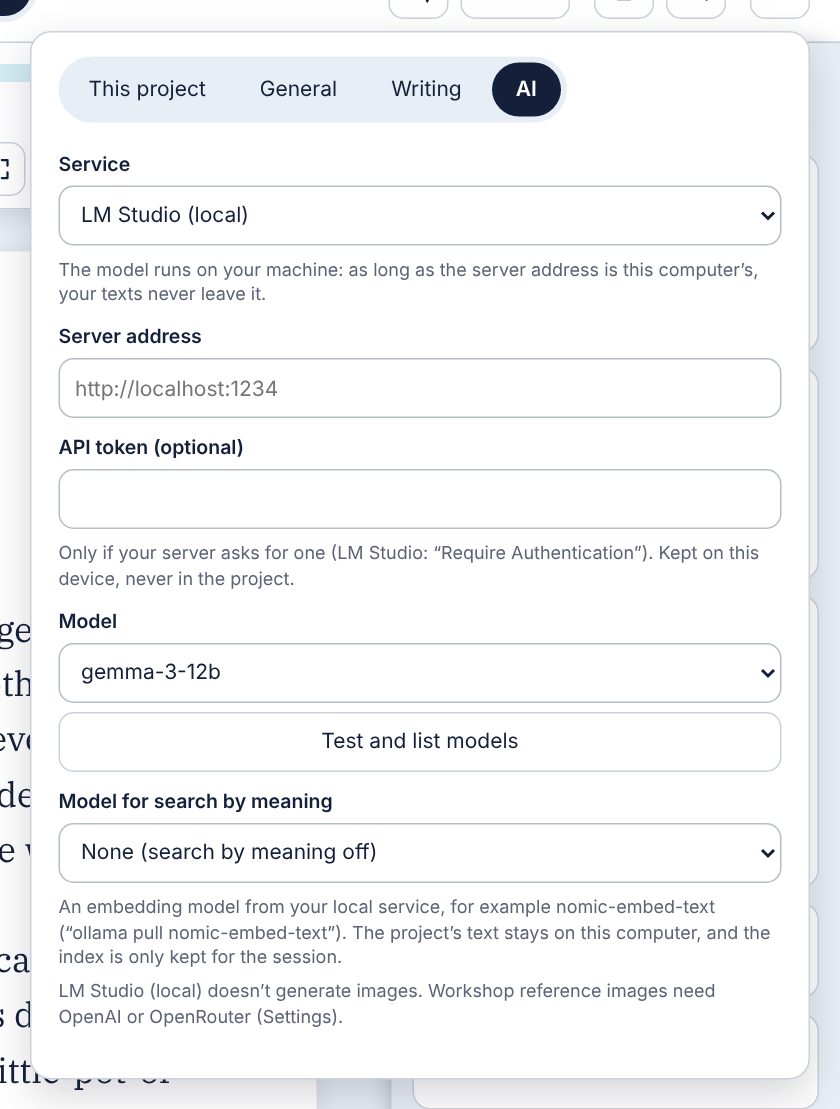
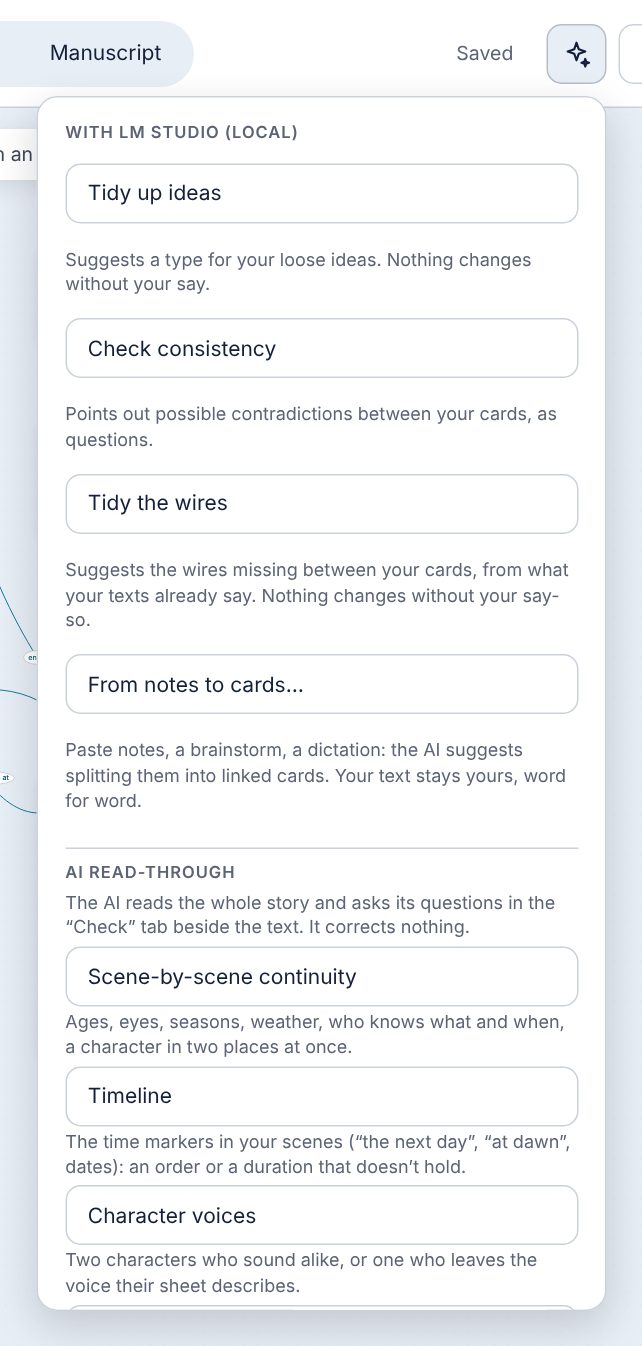
What the AI can do
- Tidy up ideas: suggests a type for each of your loose ideas (“this one is a character”, “this one a place”), with its reason. Apply or ignore each suggestion, or Apply all; everything can be undone on the canvas. Beyond 80 ideas, the AI looks at the first 80 and says so: run it again once those are sorted.
- Check consistency: points out possible contradictions between your cards, as questions. A question can become a Question card.
- Tailored questions: in a character’s assistant, Tailored asks for a question written from their entry. You answer.
- Summary: AI summary puts in order what you wrote about a character (sheet, notes, answers), inventing nothing; it only goes into the entry when you click.
- Ask the character: in a character’s assistant, the Ask them tab turns the interview around. You ask the questions, the character answers in the first person, only from what you wrote (their sheet, answers, wires, the scenes they appear in). On what your texts don’t say, they answer that they don’t know; a name that doesn’t exist in your project is flagged. The conversation isn’t saved: Keep files an answer with the sheet’s answers.
- From notes to cards: AI › From notes to cards…. Paste notes, a brainstorm or a dictation, up to 8,000 characters: the AI suggests cards, each with a type, a title and a passage of your text, and wires between them. Your text is never rewritten: a passage not found as such is left out. Tick what you keep, change a type or a title, then Create the cards; it all undoes in one go.
- Describe a photo: enlarge a photo in the gallery, then Describe with AI. For a place, the AI notes what the photo shows; for a character, it suggests the apparent age and appearance, which you accept field by field. It never tries to identify a person. The model must be able to read images.
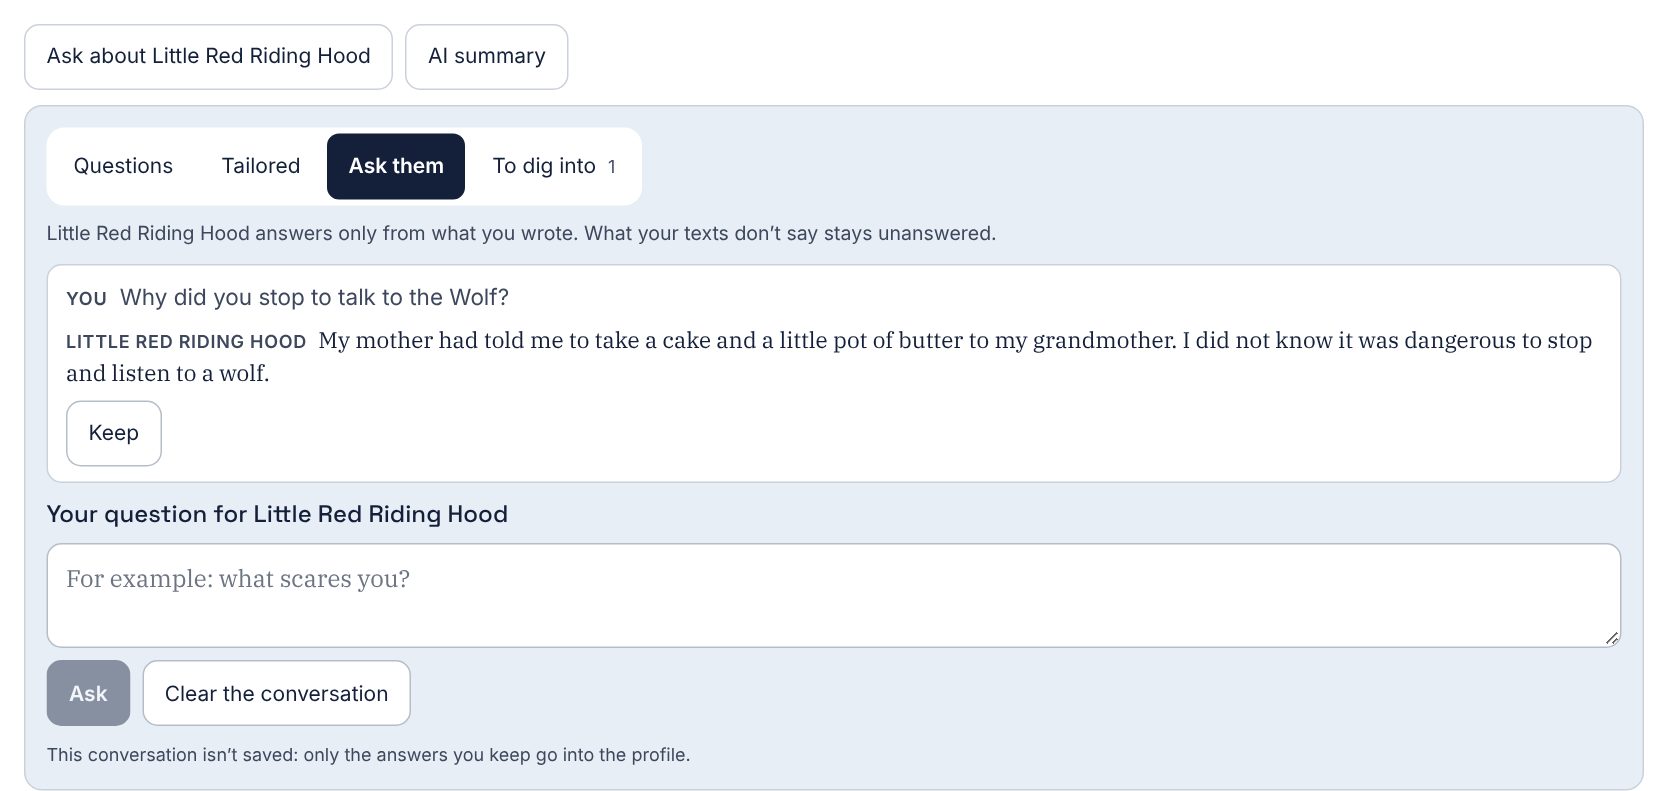
While it works, a Cancel button stops it (AI menu, gallery, character assistant). The AI always names cards by their title. When something goes wrong, a message says what: service unreachable, key rejected, unknown model, limit reached, answer taking too long.
Read through, tidy and search with AI
These tools follow the usual rule: AI asks or suggests, always with the passage of your text it rests on, and nothing goes into the project without your click.
- AI read-through (AI button): Scene-by-scene continuity reads the whole story in order (ages, seasons, who knows what and when), Timeline spots time markers and flags an impossible order, Character voices says when two characters sound alike, Beta reader says where it drifts off and what it was waiting for. Questions land in the Check tab of the Manuscript or Screenplay, under AI questions: each leads to its scene, and Keep as a question turns it into a linked Question card.
- Tidy the wires (AI button): AI suggests the wires missing between your cards, with a label and the passage that says so. Draw this wire or Draw all wires; a suggestion whose passage isn’t in your text is left out.
- A question for an empty beat: in the Outline, a template beat with no scene has an A question button. Keep files it as a Question card.
- What the text says: on a character’s or place’s sheet in the Bible, AI reads your text and suggests filling the empty fields, each with its quote. Add to the sheet, field by field. Handy after importing a finished novel, once the sheets exist.
- Breakdown (screenplay): on a scene’s sheet, Break down this scene; in Statistics, Breakdown tab, Break down the whole screenplay. AI reads the action lines and suggests props, costumes, extras, vehicles and effects to tick; the list by category shows each one’s scenes, with their length in eighths of a page.
- Search by meaning: in search (Ctrl or Cmd + F), By meaning finds a passage even without the word you typed (“where did I mention the letter?”). Only with Ollama or LM Studio and an embedding model picked in Model for search by meaning (nomic-embed-text, for instance): your text never leaves your computer, and the index is only kept for the session.
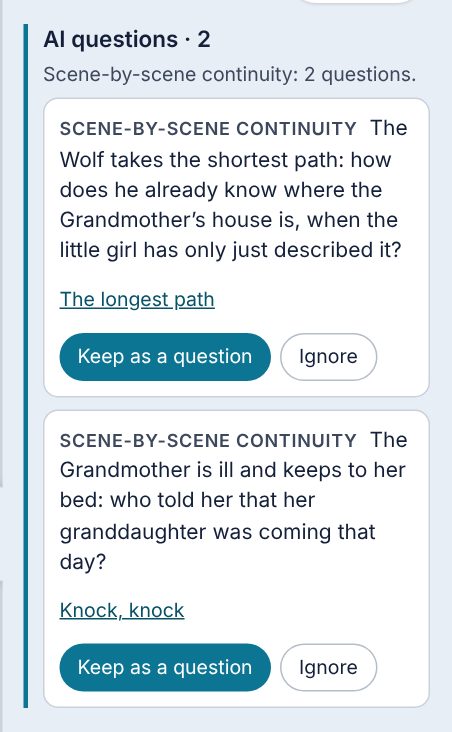
Workshop mode
By default, MondoWrite’s AI asks and suggests; it doesn’t write for you. Workshop mode, turned on project by project in Settings › This project › Workshop mode, lets it suggest text. A Workshop badge in the top bar reminds you.
- Three variants (the ✦ button in the formatting bar, or the Screenplay bar): three rewordings of a selected sentence or line; Take replaces the selection.
- Suggest a synopsis: a one- or two-sentence summary drawn from the scene’s text, in the synopsis field.
- Three directions (Manuscript and Screenplay bars): three one-line leads for what comes next; Make it a card creates an Idea card linked to the scene.
- Suggest a draft on the cover, and Suggest a sheet for a minor character: suggestions field by field, to add, replace or ignore.
- Generate an image (Photos window and a sheet’s gallery, with OpenAI or OpenRouter): a portrait, a setting, a scene or a mood from a description pre-filled from the sheet, which you edit before sending. The title of a place, an object or a scene goes along with the description; a character’s name never does: they are described by their sheet (age, gender, appearance), and the prompt asks for a fictional person, with no text or logo. To illustrate a scene, check the Characters to keep consistent (narrator, speakers, those the text names or a wire links): each one’s portrait goes along as a reference image, so they are recognisable from one illustration to the next; a character without a portrait is only described. With OpenRouter, pick an image model that also reads images. On the project cover, Generate an image draws the cover or poster from the tagline, logline, genre, tone and themes; Write the title on the image (unchecked by default) adds the project title. You keep one image or none; the one you keep is credited “Generated image” with the service and model, and gets a log line. Pick the model in Image model (optional).
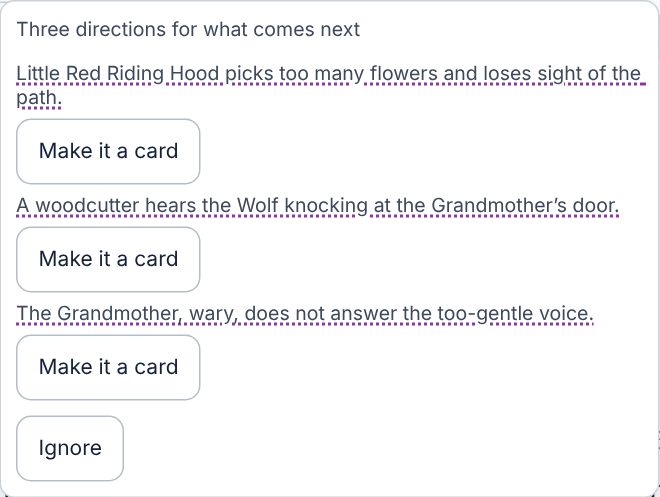
Everything you accept gets a dotted underline, is listed in To do (AI passages) and counted in Statistics (Text touched by AI). Once you’ve reworked a passage, I’ve made it mine removes the mark. Each accepted suggestion also adds a line to the project’s ia-journal.md file (date, action, card or scene, service and model, word count): it helps you answer Amazon KDP, which asks you to declare AI-generated text. A MondoWrite version before 1.8.0 keeps the text but drops the mark if it saves the project again.
An external assistant (MCP)
MondoWrite can open up to an assistant you already use, such as Claude Desktop or any app that supports the MCP protocol. You talk to it in its own window (“read chapter 3 and tell me where attention drops”, “create a sheet for Inès’s sister from the scenes she appears in”) and it works directly on your project. It uses your own subscription or local model: MondoWrite asks for no key and sends nothing on its own. Computer only (macOS, Windows, Linux).
Connecting it
- In Settings › AI, check Let an external assistant read my projects.
- Click Connect to Claude Desktop, then quit and reopen Claude Desktop: MondoWrite shows up among its tools. For another app, Copy the configuration (other apps) and paste it into its MCP settings.
- Project by project, in Settings › This project, choose the External assistant’s access to this project: None (the default), Read only or Read and write. A project left at “None” is invisible to it, and going back to “None” removes its access right away.
What it can read
- With Read only, even with the app closed: the list of your projects open to the assistant, a project overview, the scenes in story order with their text, the Bible sheets, the wires, and search across the whole project. It reads the project as last saved.
- When the project is open in MondoWrite, it also reads what the app works out: To do, comments, statistics, the Check items, a scene’s versions and the AI log.
What it can do, with read and write
Only while the project is open in MondoWrite; with the project closed, it can’t write anything.
- The Bible: create a sheet, change its type (an Idea becomes a Character), fill in its fields and notes, rename it everywhere in the project, keep a “To dig into” question in a character, add a Question card.
- Wires: link two cards, change a wire’s label and its sheet (history, stakes, evolution), unlink. In its notes and texts it cites a card by writing its title in double brackets,
[[Inès Morvan]]: MondoWrite turns it into a real mention and draws the wire. - Scenes: create one (or a book page: dedication, prologue…), write or continue its text, replace a single passage quoted word for word, write its synopsis, fill in its sheet (status, point of view, what the character wants, obstacle, turning point, breakdown…), move it, merge two scenes, split one, put it in the trash or take it out.
- Structure: create, rename, move and delete a chapter; choose a template and put a scene in a slot; create and rename a series’ episodes and seasons.
- The rest: leave a comment on a passage or resolve it, keep a version of a scene, find and replace, write a cover field, change the project title and writing goals, draw, rename or remove a frame, organize the canvas.
It can’t delete a project, empty the trash, export or change settings.
You stay in charge
- Everything it writes is marked as AI (dotted underline, as in Workshop mode, until I’ve made it mine) and logged in
ia-journal.mdwith the app’s name. - When the assistant has read the open project in the last ten minutes, an Assistant badge lights up in the top bar. Its menu says who read it and when, and Cut access to this project takes it away in one gesture.
- Each request is a single undo step. A banner at the top of the screen says “Claude just changed your project” (or how many changes) with Undo, as long as you haven’t done anything since: your own work is never undone.
- Before rewriting a scene or replacing a passage, MondoWrite keeps a version of it (“Before the external assistant”), found under Scene versions….
Ready-made prompts
In Claude Desktop, the “+” button also offers five MondoWrite prompts: Beta read (a reader’s reactions, no rewriting), Consistency check (contradictions between the scenes and the Bible, as questions), Breakdown (props, costumes, extras… scene by scene), Interview a character (who answers only with what you wrote) and Project status (where you stand, what’s left).
Chapter 11Export and publish
The Export button makes your files inside the app, with no external tool. Choose the format: the file is saved wherever you decide.
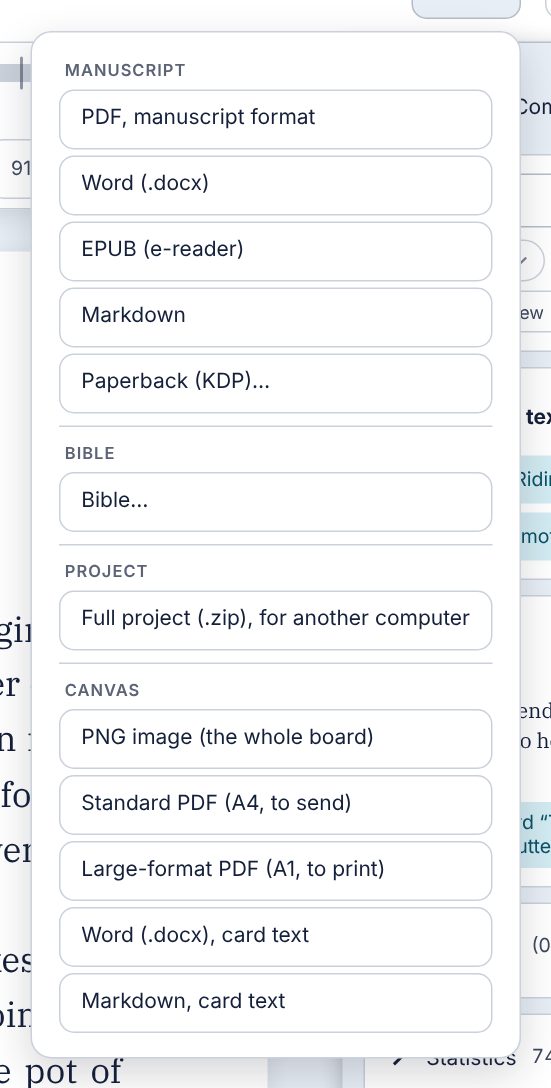
The manuscript
- PDF, manuscript format: the format agents and editors expect (known as “Shunn”): Courier 12, double spacing, indents, your contact details at the top left of the cover page, the rounded word count on the right, the title in the middle and “by” your name. Each page has the header “Name / TITLE / page”, each chapter starts on a new page, and a “#” separates two scenes. The PDF has a bookmark per chapter.
- Word (.docx), to rework or send;
- EPUB (e-reader), with its table of contents;
- Markdown, a single text file;
- Web page (HTML), a single page that opens in any browser, light or dark depending on the reader’s device, with its table of contents and your notes: to read, print or put on a website.
Scenes of the same chapter form one chapter, separated by “* * *”. Book pages (dedication, prologue…) are in their place.
The paperback (KDP)
Paperback (KDP)… prepares your book for print on demand (Amazon KDP): a print-ready interior PDF, and a cover template sized to it.
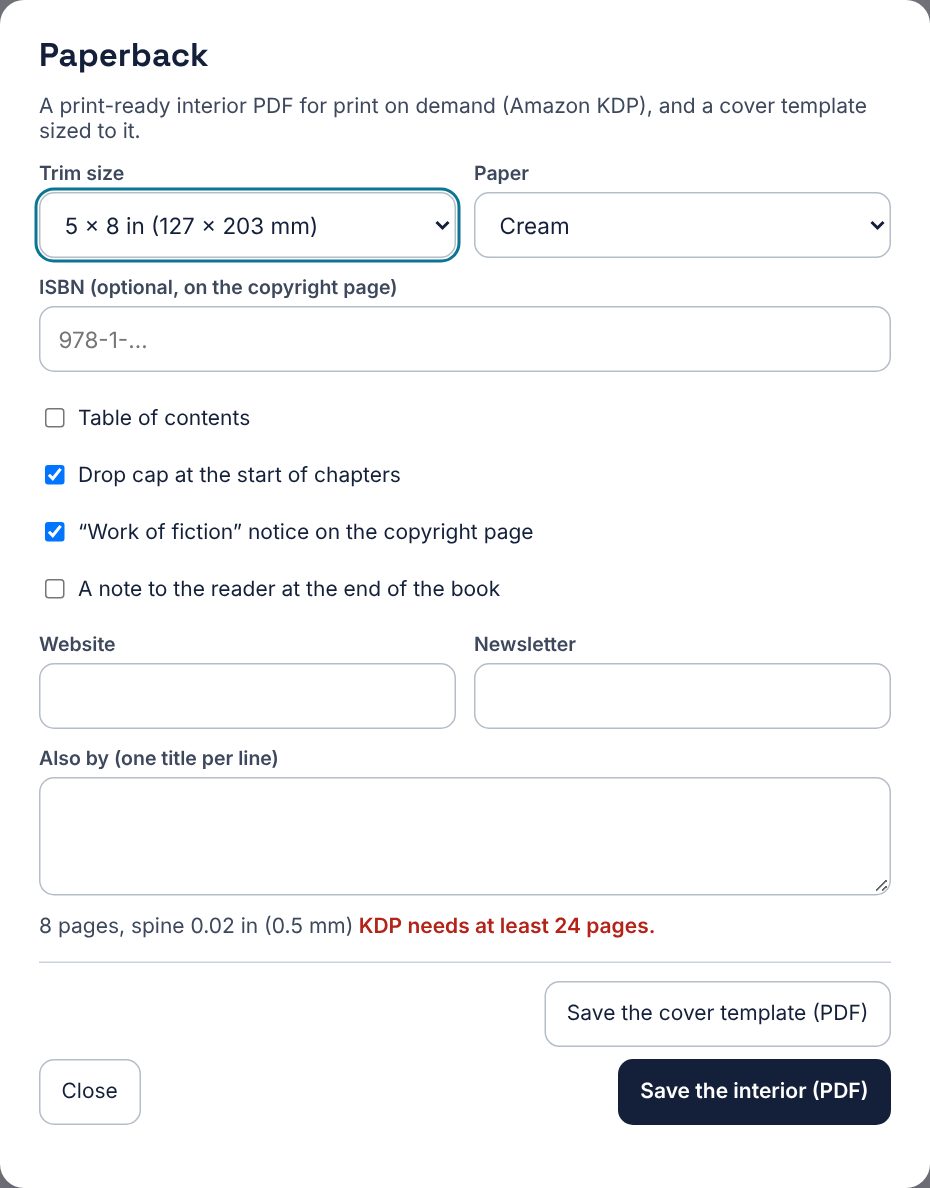
Settings
- Trim size: 5 × 8, 5.25 × 8, 5.5 × 8.5 or 6 × 9 inches. The type size and margins follow the trim.
- Paper: white, cream or groundwood. It sets the spine thickness.
- ISBN (optional), printed on the copyright page.
- Table of contents, Drop cap at the start of chapters, the “Work of fiction” notice, A note to the reader at the end of the book (“Thank You for Reading”, with your Website and Newsletter), and the Also by list.
The settings are kept with the project. As soon as the window opens, and at each change, the book is laid out: the window shows the page count and spine width, and warns if KDP would refuse the book (fewer than 24 pages, or too many pages for this paper).
What the interior contains
- A real book layout: mirror margins, with a gutter (the margin on the binding side) that grows with the page count, as KDP requires;
- the title page, the copyright page on its back (yours if you wrote the “Copyright” page, otherwise a default page: copyright, all rights reserved, fiction notice, ISBN), the dedication and epigraph on right-hand pages, the table of contents with page numbers;
- each chapter on a right-hand page, page 1 at the start of the story, running heads (your name on left-hand pages, the title on right-hand ones) and page numbers at the outside corners;
- justified text, hyphenated according to the language (English or French), with no stray line at the top or bottom of a page, in Crimson Text with its italic;
- the back pages: note to the reader, acknowledgments, about the author, “Also by”; an even page count; a bookmark per chapter.
The cover template
Save the cover template (PDF) gives a page at the exact size of your full cover (back, spine, front), bleed included: the spine computed from the page count and paper, the safe areas to keep text inside, the area for the barcode KDP adds, and the measurements written on it. Use it as a guide layer in your design software, then hide it before exporting your cover. Under 79 pages, KDP doesn’t accept text on the spine.
Fill in the “Title page”, “Copyright”, “Dedication” or “Acknowledgments” pages in the Manuscript so they replace the ones MondoWrite makes. Always check KDP’s previewer before publishing.
The screenplay
- PDF…: the standard format (Courier 12, standard margins, about a page a minute, dialogue split cleanly across pages with “(MORE)” and “(CONT’D)”, dual dialogue side by side), in a settings window described below;
- Fountain, the screenplay’s text file;
- Final Draft (FDX), for productions that use it.
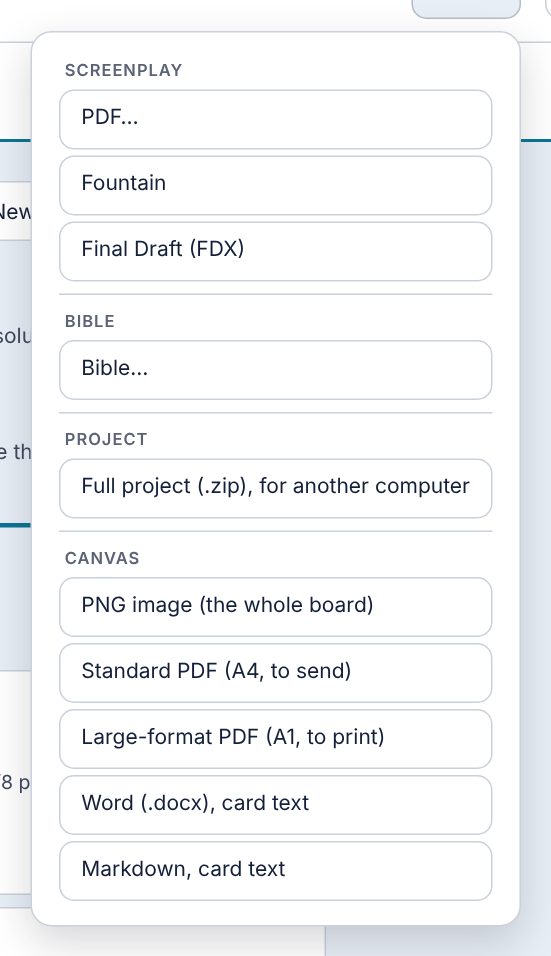
PDF settings
The Export the screenplay as PDF window shows the first page as it will come out, updated with every choice:
In a series, What is exported picks the whole screenplay, a season or an episode (by default, the episode open in the Screenplay view). As is customary, the first page of the script has no number, the following ones do. The PDF gives each episode its own title page (the project title, the season when there are several, then the episode) and pages numbered from 1, also for the whole series or a season. Fountain and Final Draft exports follow the same choice, as a single script.
- Content: The whole screenplay, or One character’s part. For an actor: only their scenes, their lines highlighted, and the scenes keep their number from the whole screenplay (to talk about “scene 12” with the crew).
- Also print: the title page, scene synopses, sections and template beats, your
[[…]]notes, in gray. All unchecked (except the title page), it’s the standard format, the one you send. - (MORE) and (CONT’D): when a speech runs onto the next page (checked by default), and when a character speaks again after action in the same scene (“HUGO (CONT’D)”). Both settings also apply to the on-screen page, and are in Settings › This project too. In the PDF, a long speech breaks at the end of a sentence, with at least two lines on each side and never right after a parenthetical; if no sentence ends in the right place, the whole speech moves to the next page. On screen, a character name is never left alone at the bottom of a page: it moves to the next one with its speech.
- On every page: a Header at the top left, where
{date},{title}and{author}are filled in on export (“Draft 3 · {date}”), and a Watermark across the page (“Confidential”). The page number stays at the top right. - Coloured pages prints each revised page on the paper of its latest pass (blue, pink, yellow…); the others stay white. Only the revised pages of the latest pass: this box appears as soon as a revision has marked lines. The ⋯ menu of the Screenplay view opens Revisions…: open a pass there (one color per version, in the order blue, pink, yellow, green, goldenrod, buff, salmon, cherry), changed lines get an asterisk in the margin and the pass color, and the PDF marks them too, with “Blue revision” at the top of the page. Lock pages is there as well: it freezes the pagination and numbers the scenes, so an added page becomes 12A, a removed page leaves “13-14” on the previous one, and a scene added between 12 and 13 becomes 12A. Unlock… asks for confirmation.
These choices are kept in the project: next time, the window opens as you left it.
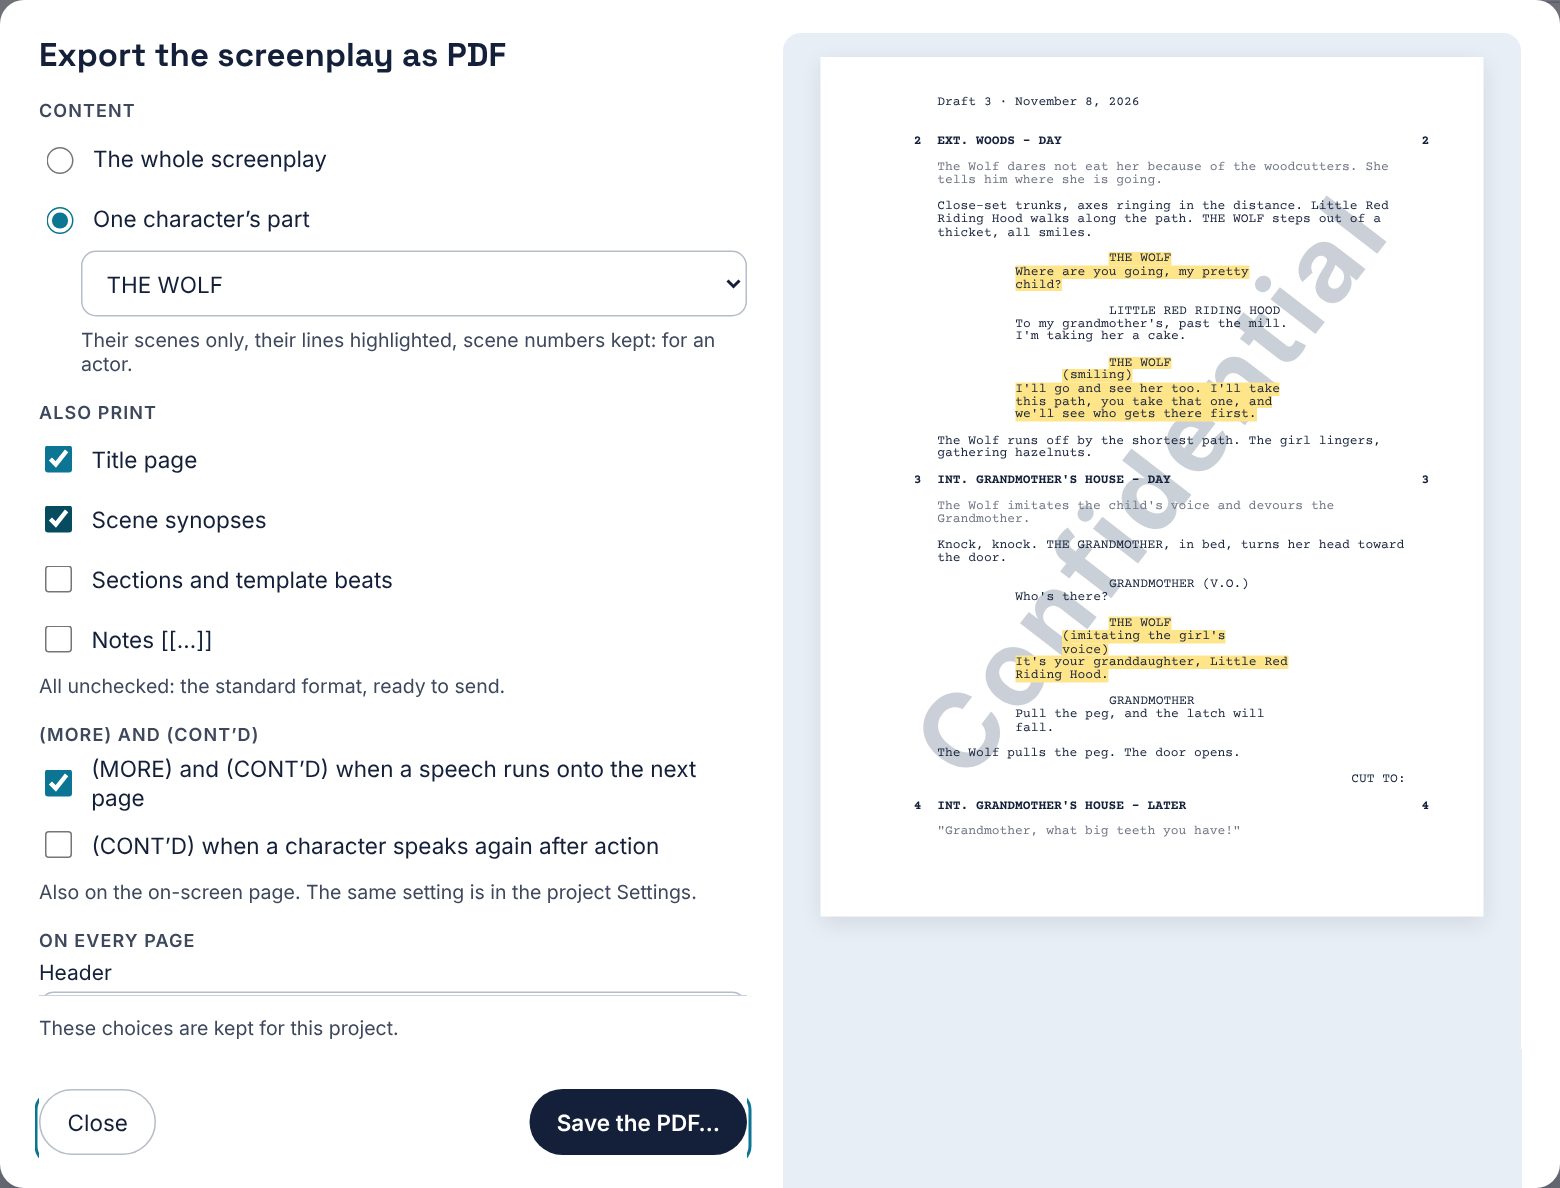
The Bible
Bible… opens the Export the bible window. Three questions are enough, and the preview, on the right, shows the real PDF, page by page, rebuilt at every change.
- Who is it for? Me gives the working bible: everything, including the “For you” part. A publisher (novel) gives a pitch pack, A producer (screenplay) a series bible: without your working notes, with the sheet of each main character (the sheets follow one another, with no blank page between them).
- Parts: tick the parts to print and order them with the arrows. An empty part is not printed; “For you” always comes last.
- Look: Plain, Editorial or Night, one colour out of four, a Cover image (by default The project cover image, if you set one; otherwise an image taken from your project, or None), and the Place photos as thumbnails.
For someone else, the document stays short: above the preview, the page count is followed by a marker, “Most funds and commissions expect 15 to 20 pages”, never by a block. Why this recipient adds a sentence at the end of the note of intent (“Why this network”): save one preset per recipient. Your background and your works (writer profile) make an “About the author” page at the end, preceded by “Why me” for a series. The characters’ voice and writing notes stay in the working bible.
A series bible also gets the arena and what came before the pilot, what holds the characters together, the engine, the season’s question and where it ends, the episodes (a short list: number, title, marker, synopsis, pivot character, grouped by season), the future seasons, the writing rules and, for someone else, the other platforms. Groups, objects, events and rules of the world follow the places in the World part; secrets follow the plots in the Structure. Two options, unchecked for a producer: Thread grid (which storylines in which episodes, or in which parts of the pilot if there are no episodes) and “At a glance” page (the characters’ hooks and the episodes each appears in). Attach the first pages of the pilot adds the first ten pages of the screenplay at the end, in standard format. For a publisher, Attach the first pages of the manuscript does the same with your novel, in manuscript format. The look offered by default is Plain for a producer, Editorial for a publisher.
Your choices are kept with the project. Preset saves them under a name (“For my editor”, “Writers’ room”) to find them again. The file carries today’s date (“Pitch pack - Title - 2026-10-26”): each send keeps its version. Word, Markdown and Web page keep the chosen parts and their order, not the look; the web page carries the images.
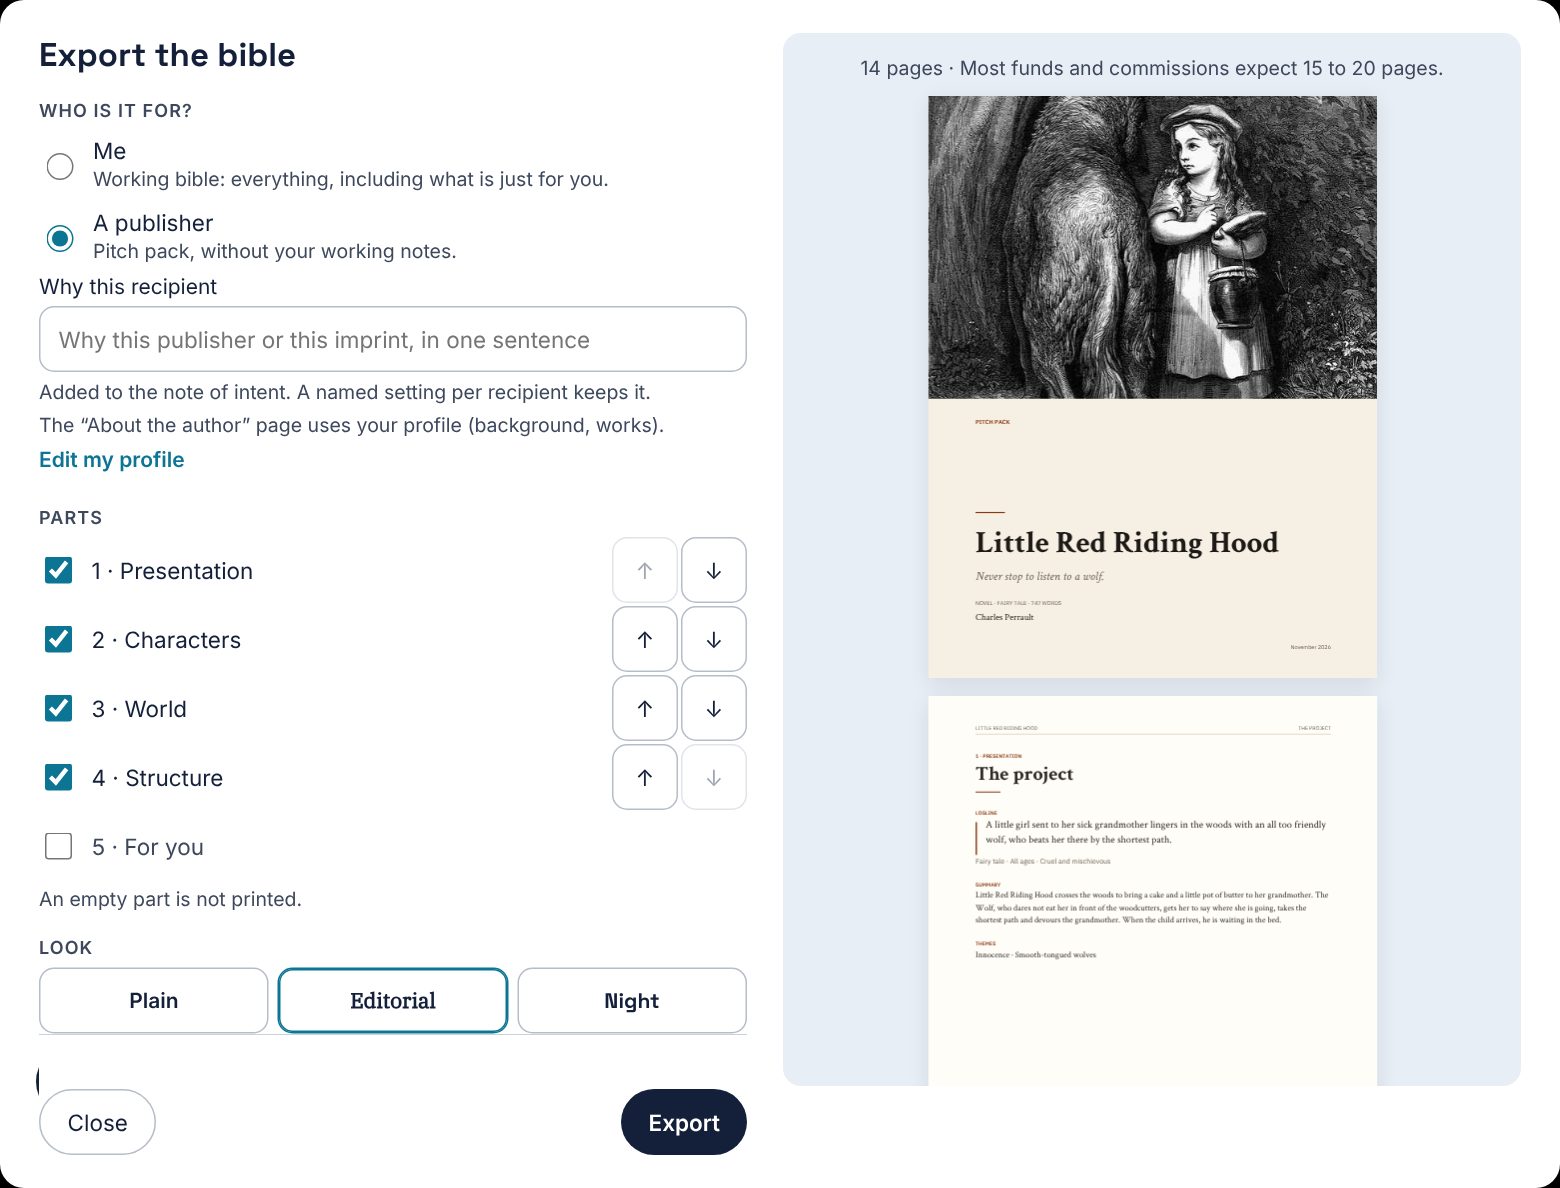
The canvas
The canvas exports to a PNG image of the whole board, a standard PDF (A4, to send) or a large-format one (A1, to print and pin on the wall), or as card text (Word, Markdown), one part per frame.
Chapter 12Your files
A MondoWrite project is an ordinary folder, full of text files you can open, copy, back up or version as you like.
A project’s folder
| File or folder | Contents |
|---|---|
cosmos.json | The title, type, card positions, threads, frames, outline, goals, project cover, paperback settings. |
cartes/ | One card per Markdown file, with a small header (type, title, image, sheet). |
manuscrit/ | The text of each scene of a novel, in Markdown. |
scenario.fountain | The screenplay’s text, in Fountain. |
medias/ | The cards’ images and PDFs. |
corbeille/ | Deleted cards, waiting to be restored or erased. |
markdown/ | Readable copies of the manuscript, bible and canvas, with one version a day. |
A mention of a card is written as an ordinary Markdown link: [@The Wolf](cosmos:…). Everything stays readable in any text editor (the folder names are French, and “cosmos” comes from the app’s former name).
Markdown copies and versions
After each save, the desktop app writes into markdown/ the manuscript, the bible and the canvas in Markdown, with links between entries. A dated copy is kept every day in markdown/versions/: thirty days, then one per month. These copies are never read back: always write in the app. The Markdown copies in the project folder setting (Settings › This project) turns them off.
Syncing between devices
A project stays an ordinary folder: a sync service copies it from one device to another, and MondoWrite reloads the changes. Choose according to your devices:
| Your devices | Recommended method |
|---|---|
| iPhone, iPad and Mac | iCloud Drive, on by default: nothing to set up. |
| With a Windows or Linux PC | A Dropbox folder chosen on each device. |
| One-off hand-over | A .zip file. |
- iCloud Drive (iPhone, iPad, Mac). Projects are kept in the MondoWrite folder of iCloud Drive (
projetssubfolder). The Settings › Sync projects with iCloud Drive box is checked by default on iPhone and iPad, and on the Mac as soon as iCloud Drive holds that folder. Projects created on one device show up by themselves on the projects page of the others, without looking for them. Each device must be signed in to the same iCloud account, with iCloud Drive turned on. Without iCloud Drive, projects stay on the device and Settings says so. If iCloud Drive is turned off later, the projects page warns that iCloud projects no longer show up: they aren’t lost and come back when it is turned on again. On the Mac, if projects are slow to arrive, Find the folder… opens the MondoWrite iCloud folder: chooseprojetsthere. iCloud sometimes creates a duplicate “projets 2” when two devices create that folder at the same time: the projects page says so, and Put them back with the others moves its projects intoprojets. - A cloud folder (iPhone, iPad, PC, Mac). On the projects page, Choose a cloud folder… remembers a synced folder. New projects are created in a subfolder named after their title, and the projects it holds show up in the list. Choose the same folder on each device. On iPhone and iPad the picker is the Files app. Only folders that hold a project show up in the list. Stop syncing (computer) or Back to iCloud projects (iPhone, iPad) leaves that folder: nothing is deleted.
- A .zip file. Export › Full project (.zip) takes everything (text, settings, images and PDFs). Import… puts it in an empty folder and never overwrites a project.
OneDrive doesn’t work for syncing with an iPhone or iPad: iOS doesn’t let an app pick a OneDrive folder (it appears greyed out in the picker). On a computer, a OneDrive folder works as a cloud folder, but only between computers. To connect a PC and an iPhone, use Dropbox.
On iPhone and iPad the app reloads the open project every 20 seconds and when you come back to it. On a computer, it sees changes as soon as they arrive in the folder.
Don’t write on two devices at the same time: syncing sometimes takes a few seconds. If the same file changed on both sides, the app keeps both versions and lets you choose.
To delete a project from all your devices: on iPhone and iPad, Delete project… in the ⋯ menu of the projects page; on a computer, move its folder to the trash (in the Finder: iCloud Drive › MondoWrite › projets).
Editing outside MondoWrite
You can edit a project file with other software, or from another computer through a synced folder. The app notices and picks up the new version. If the same file changed on both sides, neither is overwritten: the version on disk is kept, yours is saved next to it (“… (MondoWrite).md”), and a banner lets you choose: Keep mine or Keep the disk version.
Automatic backups
In the app (computer, iPhone, iPad), MondoWrite keeps a copy of each project apart, in its own folder on the device, never in the project’s folder: if that folder is damaged, deleted or badly synced, the backups remain. A copy is made after a save, at most every 30 minutes while you write; MondoWrite keeps the last 5, then the last one of each day for 30 days. It holds the texts, the trash and the scene versions; images are kept only once, next to them.
Backups…, in the Settings button’s menu, shows the open project’s backups, dated, with Back up now. The projects page also has a Backups… button, which shows those of every project, even one whose folder has gone (on Mac: File › Backups…). Open this backup opens it as a new project, its title followed by the backup’s date: the current project does not change. That is how you get back an earlier canvas, bible or outline; for the text of a single scene, its versions are enough.
If saving fails
A message under the top bar says why (disk full, insufficient rights, folder not found) and offers: Try again; Locate the project folder… if it was moved or renamed; Export a copy… (the whole project in a .zip file, so nothing is lost); or Back to projects without saving.
Automatic backups stay on the device: also keep your projects in a synced folder (iCloud Drive, Dropbox, OneDrive) or copy them elsewhere from time to time. Since they are text files, they take up very little space.
Chapter 13Settings and appearance
The Settings button (the sliders, at the top right) first opens the app menu, the same on computer, iPad and iPhone: Settings…, Trash (n) (project open), Backups… (installed app), Commands… (the palette), then Guided tour, User guide, Keyboard shortcuts and About MondoWrite. Settings… (Ctrl ,) opens four tabs, which hold settings only: This project (when a project is open), General, Writing and AI.
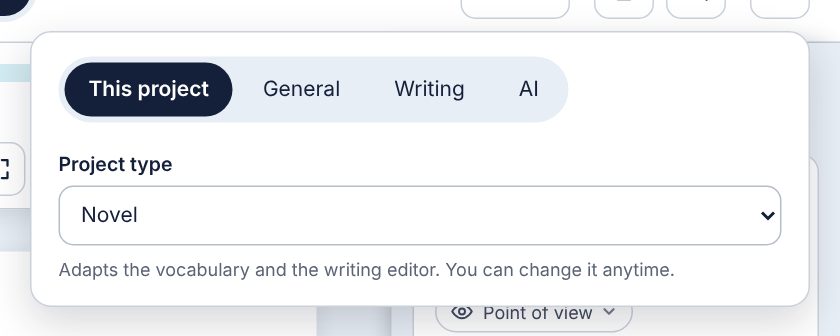
| Setting | Effect |
|---|---|
| This project | Project type (novel or screenplay); for a screenplay, the page size and numbering options; Markdown copies; Workshop mode. |
| Language | English, French, and the languages translated by the community. The first time, the system’s language. Translate MondoWrite into your language opens the translators’ guide. |
| Appearance | Match system, light or dark. |
| Typography as you type | Follow the interface language, a language of your choice, or none. |
| Spell checker | Except manuscript and screenplay (on demand), everywhere or nowhere. |
| Keyboard suggestions and autocorrect | Words suggested and corrected by the system keyboard, or none. |
| Author name | Read from your profile; Edit my profile… opens the You, the writer window. |
| Free photos | The Pixabay and Unsplash keys (Openverse needs none). |
| AI | The service, the key or address, the model. |
| Updates | The check at launch and the check button (desktop app). |
User guide opens this guide in your browser; Guided tour runs the tour again and brings back the help that had faded (the canvas hint, the screenplay keys). The guide also opens anywhere with F1, right at the chapter for the view you are in, and, on a Mac, from the Help menu in the menu bar, which follows the app’s language. On Windows and Linux, F11 switches the window to full screen and back. On a Mac, every command of the interface also has its place there: Format (bold, italic, strikethrough, “to revisit”), View (panels, focus mode, highlight) and Canvas (new card, new frame, organize, wires). Windows, Linux, iPad and iPhone have no menu bar: the Settings button’s menu stands in for it, and Commands… (Ctrl K) brings every command together. Language, appearance, keys and profile are device settings; the project type and the paperback settings are kept in the project.
Dark mode
The whole app exists in dark, down to the manuscript page. Choose Dark, or Match system to follow your computer.
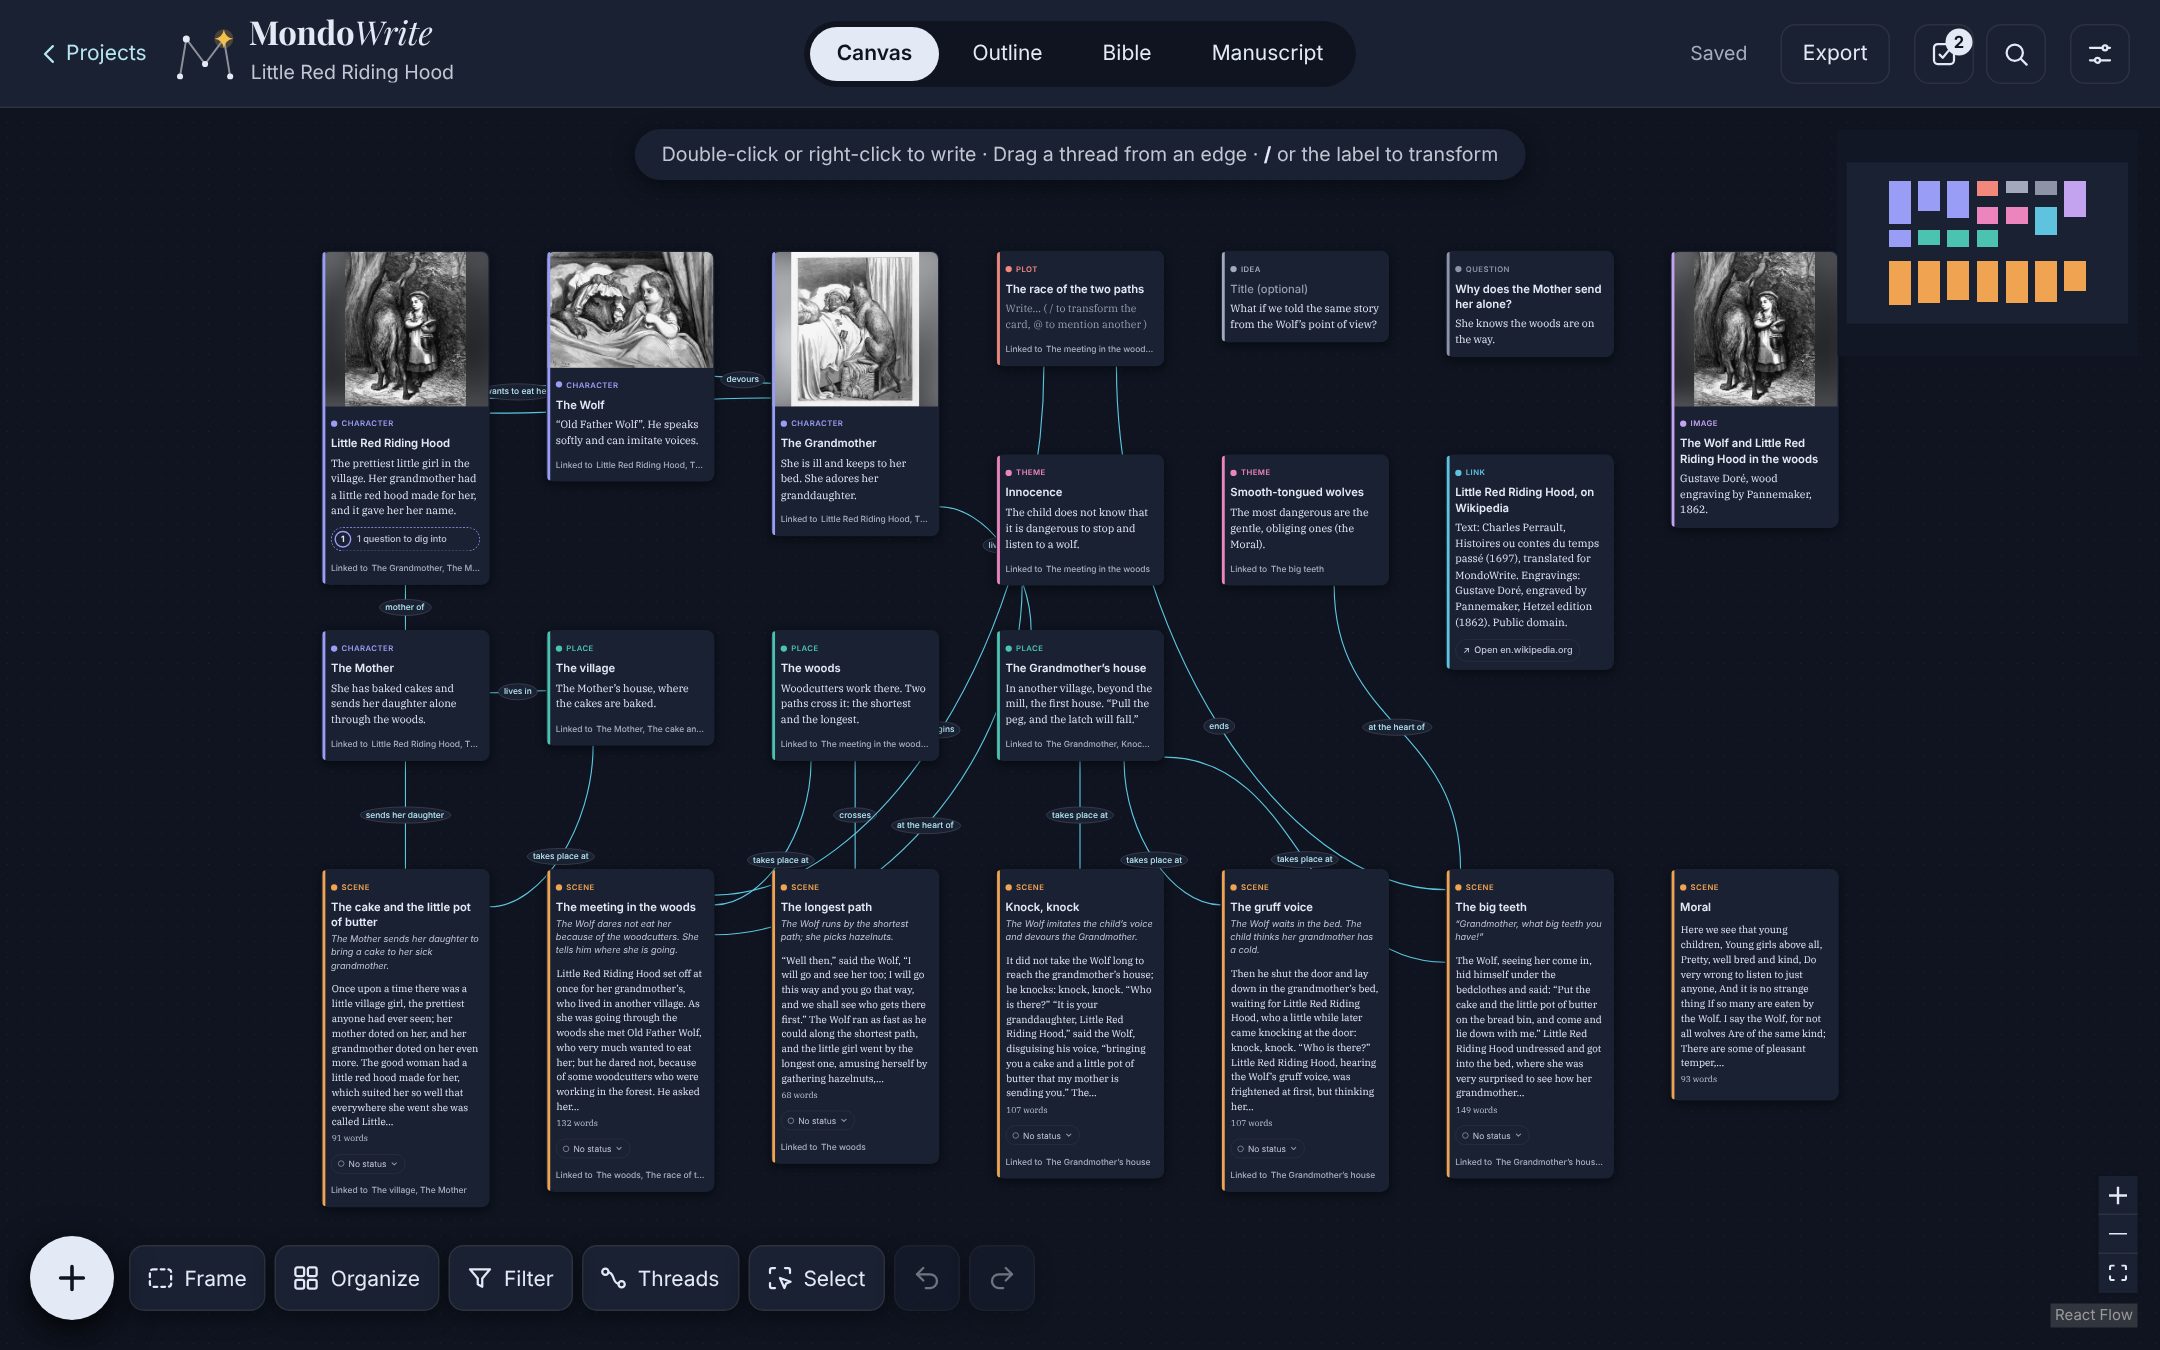
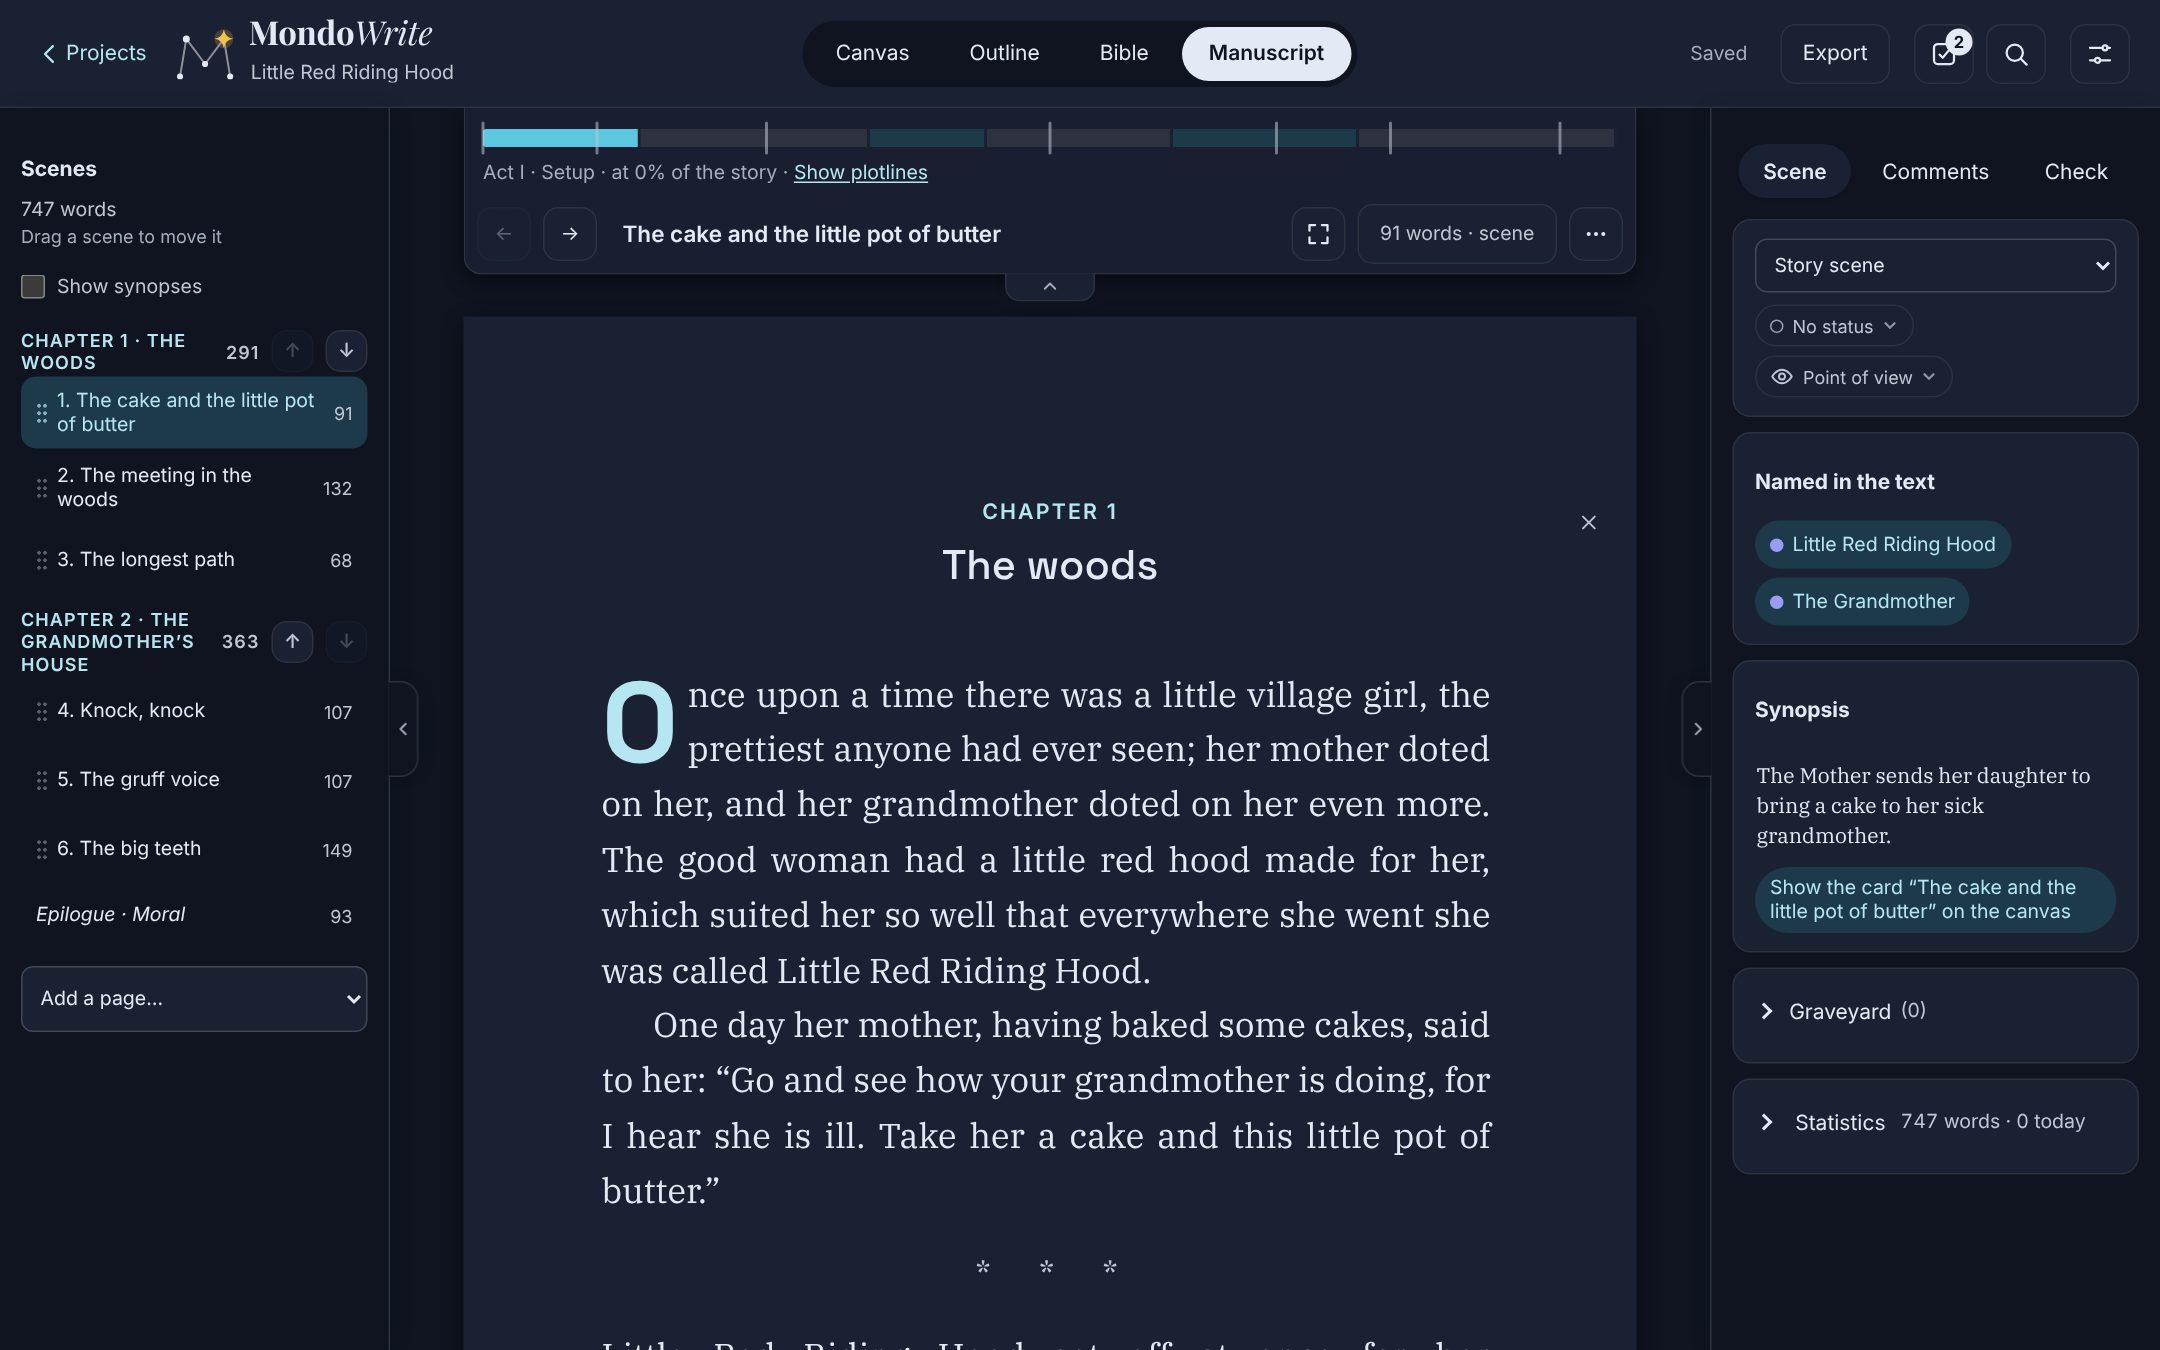
With a finger
On a touch screen, everything works with a finger: a long press on a card lifts it (it is selected, with a drop shadow) so you can move it, a long press inside an unlocked frame lifts the frame with its cards, tapping a card’s label changes its type, the Select button lets you draw around cards, and every drag-and-drop action also has a button.
On iPhone
On a phone, the four views are tabs at the bottom of the screen, within thumb’s reach: Canvas, Plan, Bible and Manuscript (Outline and Screenplay for a screenplay), in the same order as on the computer. Ordering the Bible’s sections stays on the iPad and the computer, where it has room. Export is in the ⋯ menu at the top right, with the direct exports only: the manuscript (PDF, Word, EPUB, Markdown, web page) or the screenplay (standard PDF, Fountain, Final Draft), the whole Bible (Word, Markdown, web page) and the complete project; the Files app opens so you can choose where to save it. The exports that have a settings window (screenplay PDF with its options, paperback, Bible as PDF) and the canvas exports stay on the iPad and the computer. The screen width decides: an unfolded foldable iPhone, or a wider window, gets the iPad layout back.
On the canvas, two fingers move and zoom. The + opens the list of types: pick one, and the new card opens right away full screen, its title ready for what you type; the keyboard’s return key moves to the text. Close it with the cross: the card is in place on the canvas, in the Bible, and on your other devices. A card already there opens full screen with its Expand card button.
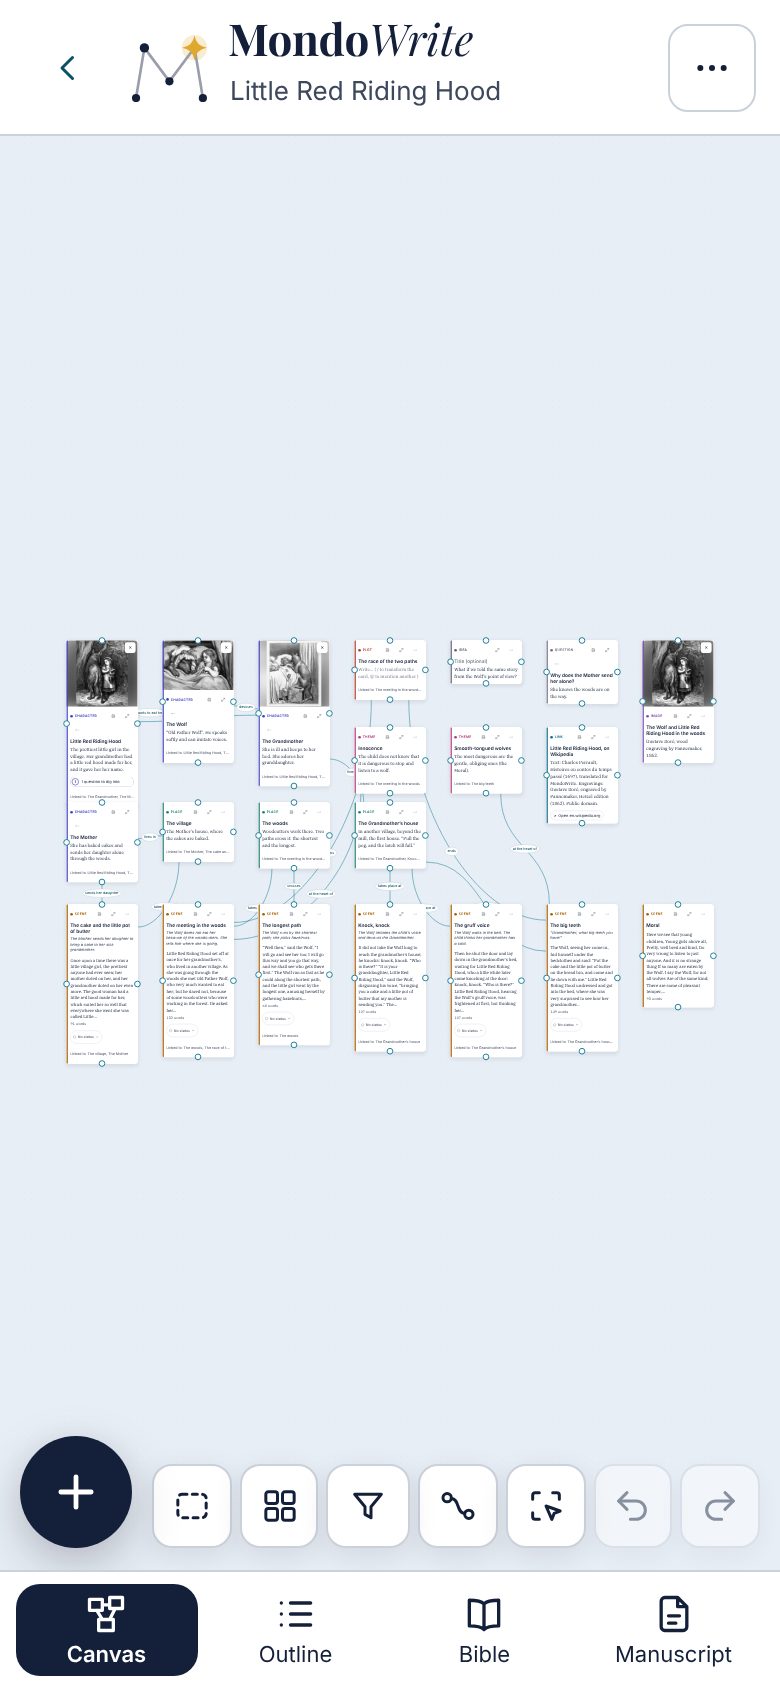
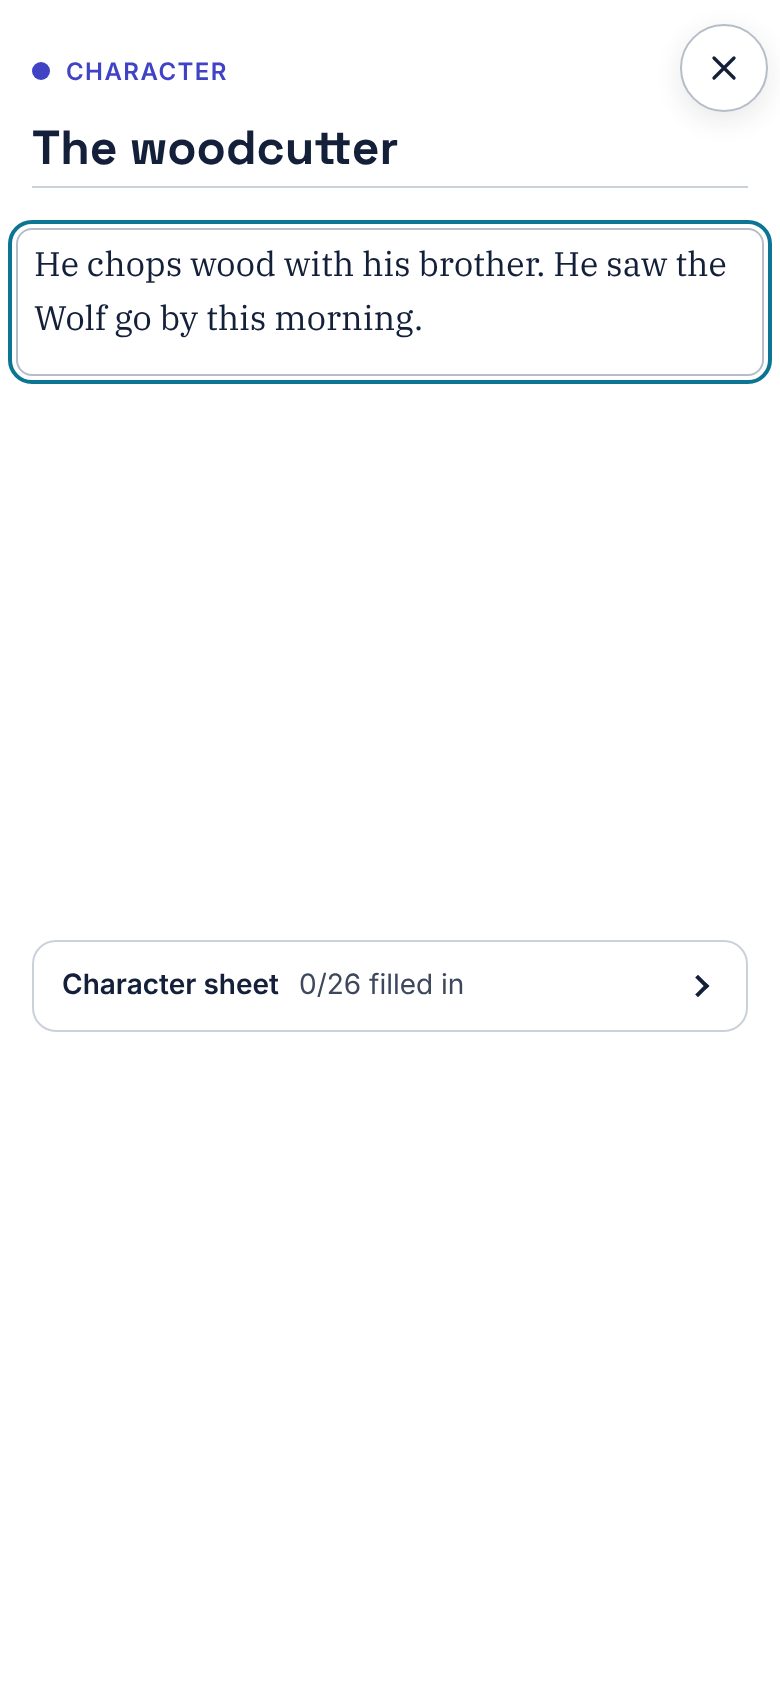
In the Manuscript and the Screenplay, spread two fingers on the page, as if zooming in: you enter Focus mode; pinch them to leave it. A quick one-finger swipe to the right opens the scenes panel, to the left the right-hand panel; the same gesture the other way closes the open panel. In the Bible, it opens and closes the contents. These gestures also work on iPad, even while you are typing; the handles at the edge of the screen stay there if you prefer to tap. On a computer’s trackpad (Mac, PC, Linux), the same pinch opens and closes Focus mode.
Notes taken with the Notebook of an earlier version remain cards “to sort”: To sort · N, on the canvas, lists them, with a dotted outline around each; as soon as you move one or link it to another card, it leaves the list.
Chapter 14Keyboard shortcuts
The full list opens at any time with Ctrl /. On a Mac, Ctrl becomes ⌘ and Alt becomes ⌥.
Everywhere
| Ctrl / | The list of shortcuts |
| Ctrl 1 … 4 | Canvas, Outline, Bible, Manuscript |
| Ctrl F | Search for a card or a passage |
| Ctrl + − 0 | Page zoom (Manuscript, Screenplay): in, out, normal size |
| Ctrl Shift H | Find and replace in the text |
| Ctrl G | Go to a page, a scene, a chapter |
| Ctrl K | Command palette: run an action by its name |
| Ctrl Shift L | To do |
| Ctrl S | Save |
| Ctrl Z · Ctrl Shift Z | Undo · Redo |
Canvas
| N | New card |
| C | New frame (around the selection) |
| / | Change type (at the start of a line, or in an empty title) |
| @ or [[ | Mention another card |
| Ctrl Enter | Expand the selected card |
| Alt ← → | Widen or narrow the card |
| Shift + drag | Draw around several cards |
| Ctrl + click | Add a card to the selection |
| Ctrl A · Esc | Select all · Deselect all |
| Delete | Move the selection to the trash |
| Ctrl C · Ctrl V | Copy the selected cards · Paste cards, a link, an image or text (into the focused card) |
| Ctrl D | Duplicate the selected cards |
Text (cards, Bible, manuscript)
| Ctrl B · Ctrl I | Bold · Italic |
| Ctrl Shift D | Strikethrough |
| Ctrl Alt 1 … 3 | Title, heading |
| Ctrl Shift 8 · 7 | Bulleted list · Numbered list |
| Ctrl Shift 9 | Checkbox |
| Ctrl Shift B | Quote |
| Ctrl Shift X | Mark “to revisit” |
| ** * # - [ ] | Markdown as you type and paste |
Manuscript
| Enter Enter | Split the scene (on an empty line) |
| Enter Enter Enter | New chapter |
| / + name | Create a character or place card (or select a name, then /) |
| Ctrl Shift K | Send the selected passage to the Graveyard |
| Ctrl Shift F · Esc | Focus mode · Leave it |
| Ctrl Shift E | Focus mode: change the highlight |
| Alt ↑ ↓ | Move the scene (scenes column) |
Screenplay
| Tab · Shift Tab | Change element |
| Enter | Next element |
| Esc | Element bar (or leave focus mode) |
| Ctrl Shift K | Send the selected passage to the Graveyard |
| Alt ↑ ↓ | Move the scene (scenes column) |
Chapter 15Frequently asked questions
Where are my texts saved?
In the folder you chose when creating the project. The path isn’t shown in the app: find it with Open folder…, or search your computer for the cosmos.json file.
How do I work on two computers?
Choose the same cloud folder (Dropbox, iCloud Drive or OneDrive) on both computers with Choose a cloud folder…: their projects show up on both sides. Between two Macs, iCloud does it by itself. See “Syncing between devices”. Avoid writing on both at the same time: if a file changes on both sides, the app keeps both versions and lets you choose.
I deleted a card by mistake.
Ctrl Z, or the message’s Undo button, or Settings › Trash › Restore. A scene’s text is never erased with its card.
How do I turn a novel into a screenplay?
Settings › This project › Project type. Cards, the Bible and files don’t change. The first time, scenes become screenplay headings and their synopsis comes along; the prose text stays in the manuscript, available if you switch back to the novel.
My paperback PDF has too few pages.
KDP requires at least 24 pages. A smaller trim (5 × 8) or a table of contents and back pages add a few pages; otherwise the text is simply too short for a paperback.
The AI doesn’t answer.
For Ollama or LM Studio, check that the software is running and a model is loaded, then Test and list models. For an online service, check the API key and your credit. The error message says what is blocking. In LM Studio, load the model with a “Context Length” of at least 16,384 for read-throughs and consistency checks: with 4,096 or 8,192, MondoWrite sends smaller packs, and a request that does not fit is refused with a message that says so. With a reasoning model (GPT-5, o3…), MondoWrite asks it to reason briefly; if it still returns nothing, pick a lighter one (a “mini” version).
My photo can’t be described.
The chosen model must be able to read images (for example gemma3, qwen2.5vl or llava with Ollama).
I found a bug.
Settings button menu › About MondoWrite › Report a bug (on a Mac, also in the Help menu). A GitHub page opens with a prefilled message: your version, system, language, project type and the last errors the app noticed. Describe what happened and how to make it happen again, then send it (a free GitHub account is needed). Nothing is sent without you, and neither your text nor your keys are in the message.
Is MondoWrite free?
Yes. MondoWrite is free software (GNU AGPL 3.0 or later licence): you can use, study, modify and share it. The source code is at github.com/sebastienpiconnier/MondoWrite. It is inspired, among others, by NEO, Hugh Howey’s writing software.